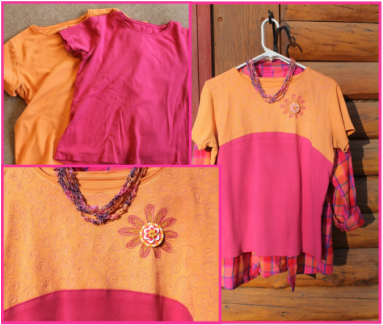
 Yesterday, I got to combine two of my favorite things, upcycling clothes, and free motion stitching. It all started with two t-shirts that were both a bit too short. I decided to combine them and get one that fit. Since I have a tendency to spill on my shirts...I also decided to decorate the top section with some free motion stitching. (better photo below) This type of free motion isn't really for the faint of heart, (one layer of stretchy fabric...) but with a few tips it's not impossible either. I'd like to do a more advanced free motion page sometime, in addition to the beginner one. I'll have to put this on it! Here's how I did this project.: I placed the two shirts on top of each other, lining them up as well as possible. It helped that they were the same brand, so really the exact same shirt. Then, I slid the pink one down a bit, because I wanted the section I cut off of that to be longer than the section I cut off the orange one. I neglected to photograph this step... I then cut a curved line through all the layers, I just eyeballed it. This could be a straight line also. The next step was to decorate the orange top part. The only secrets here are to use a hoop and water soluble stabilizer, I used OESD Aqua Film, but there are other brands. (Free tip: after you open a roll of anything like that, roll up the label and stick it inside the tube, that way you will always know what it is...) It's definitely tricky to get the hoop in places like the shoulders. A smaller hoop is nice for getting it in there, but then you have to move it even more often...Once you start stitching, you have to move the hoop while it is still under the machine, to avoid cutting the thread over and over. I pinned the stabilizer on to the shirt first, but it's still tricky. Of course, this would be much easier if you did it on fabric before making something from scratch, since the fabric would lay flat. Then just stitch whatever design you want, moving the hoop when you run out of room. Sometimes you can get closer to the edges of it by turning it around, the back of the foot will hit it first. After that, I decided it wasn't done, so I added a flower. When that was done, I washed out the stabilizer using LOTS of warm water. Then, I just had to attach the pink bottom to the orange top. A walking foot is tremendously helpful for sewing knits, and I always use a slight zig zag to add a bit of give. I then topstitched the seam, and that's it! My daughter found these buttons in her stash, are you kidding!!? They were made for this project! I also have a matching flannel shirt and a fiber necklace to complete the look :-) 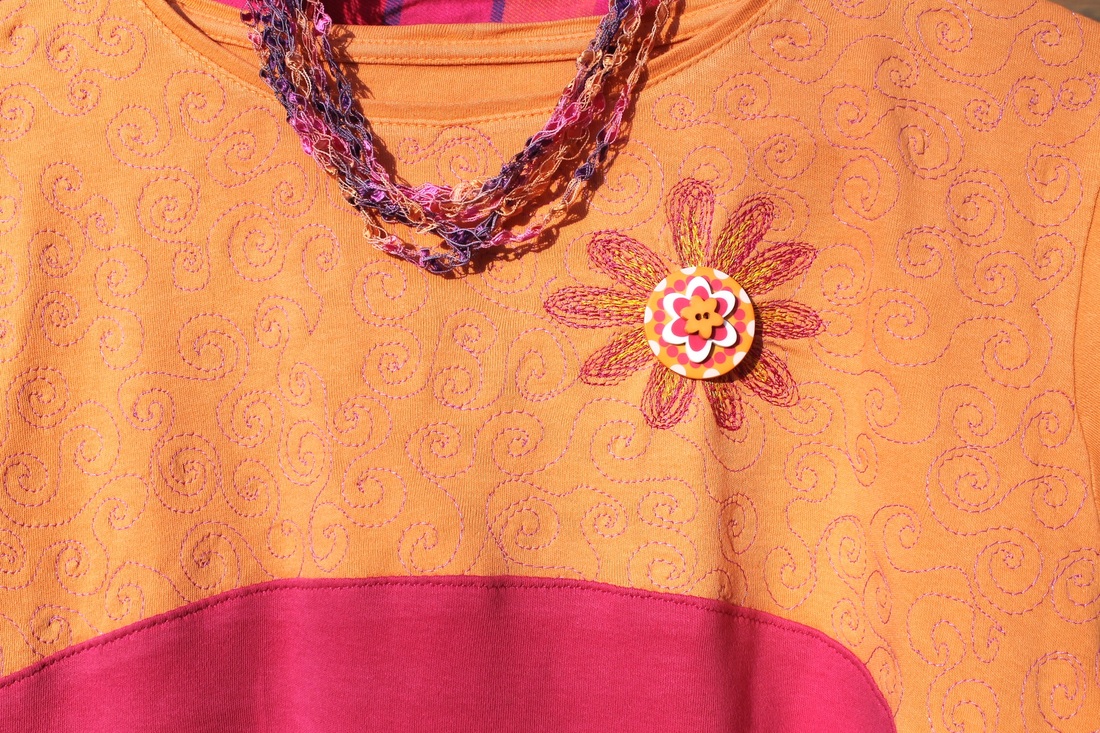 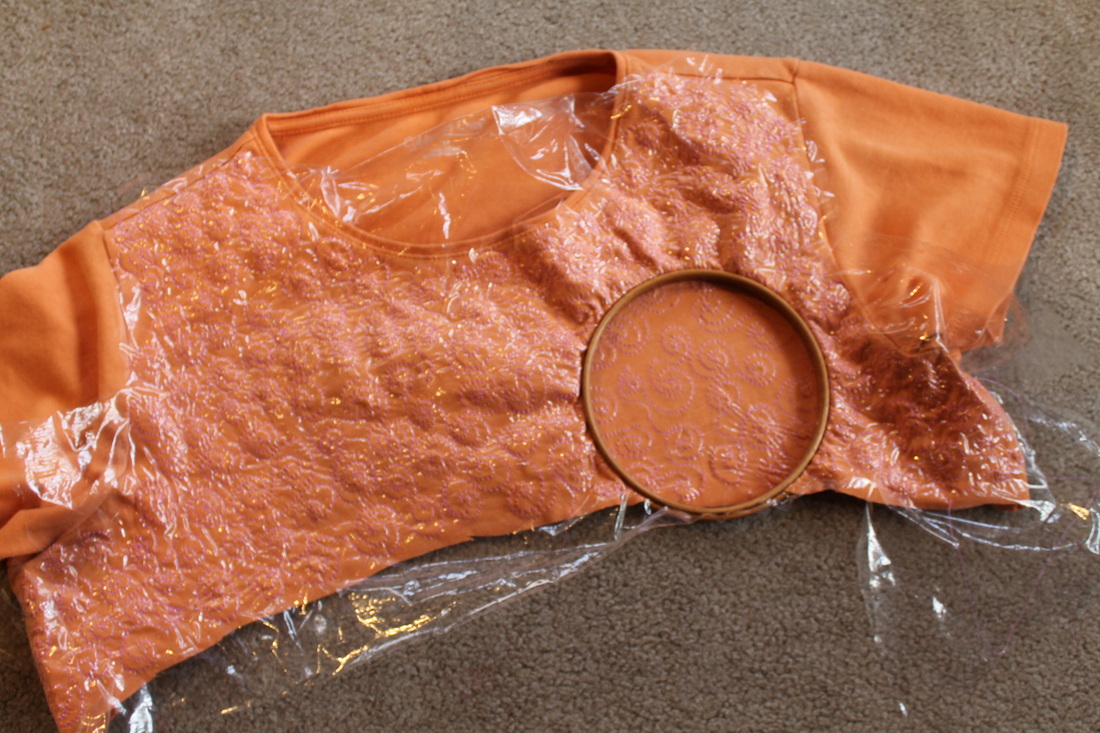 Stabilizer and hoop, after most of the stitching is done.
0 Comments
Leave a Reply. |
Beret Nelson's On The Trail Creations Blog Page
Beret NelsonI am a homeschooling mom of three fun kids, who are now old enough that I have a little time to pursue my passion for sewing! After several years of making quilted cards and art quilts, I'm now designing kits and patterns. Some of my designs have been in Keepsake Quilting and Art Quilting Studios magazine! I teach classes online, and am starting to do more traveling and teaching. I also have many tutorials, including some on YouTube. I am blessed to live in Alaska where I am surrounded by the inspiration provided by the beauty of God's creation! Free mini art quilt workshop for new subscribers!
"Like" my facebook page!I am also an independent distributor for Plexus supplements, since I credit them with enabling me to be healthy enough to do all these fun things! They target blood sugar and gut health, which are at the root of so many modern health issues. E-mail me for more info, or check out my website! I am as passionate about getting people healthy as I am about getting people creating :-)
[email protected] or https://plexusworldwide.com/beretnelson  Archives
June 2024
|
 RSS Feed