On The Trail Creations
  • Home
  • Shop Online
    • Art For Sale
    • Collage Art Quilt Kits
    • Store - Wall Hangings/Table Runners Kit & Patterns >
      • Sandhill Sunset Wall Hanging
      • Moonshadows Wall Hanging
      • Moonlight Moose Table Runner
      • Serenity Wall Hanging
      • Summer Dragonfly Wall Hanging
      • Summer Dragonfly Table Runner
      • Moonlight Moose Wall Hanging
      • Autumn Leaves Wall Hanging
      • Autumn Leaves Table Runner
      • Night Owl Wall Hanging Quilt
    • Store - Quilted Greeting Card Kits/Patterns >
      • Acrylic Card Template
      • Trish Stuart Collection
      • Out On a Limb Card Kit
      • Wonder Lake Card Kit
      • Moonshadows Card
      • Raven Moon Card
      • Chickadee With Berries Card
      • Whale Tale Card
      • Moose and Willows Card Kit
      • Raven Card Kit
      • Wild Iris Card
      • Northwoods Nisse Card
      • Boreal Botanicals Card
      • Winter Trees Card
      • For the Birds Card Pattern
      • Wild Flower I Card Pattern
      • Wild Flower II Card Pattern
      • Wild Flower III Card Pattern
      • Wonky Heart Card Pattern
      • Whimsical Heart Card Pattern
      • Black-Capped Chickadee Card
      • Three Leaves Card Pattern
      • Let it Snow Card Pattern
      • Happy Birthday Card Pattern
      • Tundra Swan Card Pattern
      • Milepost Card Pattern
    • Store - Coffee Kuspuks/Quilt Panels >
      • Season of Hope Velvet Panel
      • Screen Prints
      • Coffee Kuspuk
      • Moonlight Moose Potholder Kit
      • Chickadee Menu Planner
      • Spring Flowers Coaster Pattern
      • Teresa Ascone Panels
      • Scrappy Baby Bib
    • Molly Molecule Book
  • Online Classes
    • Simple Secrets for Art Quilting
    • Framed Collage Quilt Class
  • Tutorials
    • Grace quilt tutorial
    • Sewing Machine Needle Organizer Pincushion
    • Organza silk screen tutorial
    • Polymer Clay button tutorial
    • Birch Tree card tutorial
    • Coffee Shop greeting card
    • Free Motion Stitching Tutorials >
      • Free Motion Tutorial
      • 10 minute project tutorial
      • Valentine Coasters
      • Grape hyacinth postcard
      • Advanced free motion projects >
        • Sparkly 3D dragonfly wings
        • Inktense Frog quilt
        • Dream Big flower panel
    • Journal Cover - Book Tutorials >
      • Quilted Book Cover Tutorial
      • 1000 Gifts Journal Cover Tutorial
      • Quiet Book Tutorial
    • Tutorials for Our Kits >
      • Moonshadows Video Tutorials
      • Summer Dragonfly Video Tutorials
      • Serenity Video Tutorials
    • Video Tutorials - Screenprinting, Inktense, Quilted Card Binding
    • Pocket Prayer Quilt
  • Beret's Blog
  • Art Quilt Gallery
  • Quilted Cards Gallery
  • Our Story
  • Our Mission
  • Quilt Shops
  • Contact Us
  • Sked Verks
    • Sked Verks Gallery
    • Sked Verks Online Store
  • Return Policy - FAQs

Valentine Coasters Tutorial

Picture
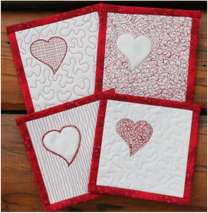
These are 4 variations of one simple design, each using free motion stitching a little differently. If you made them rectangular instead, you could make them into cards.
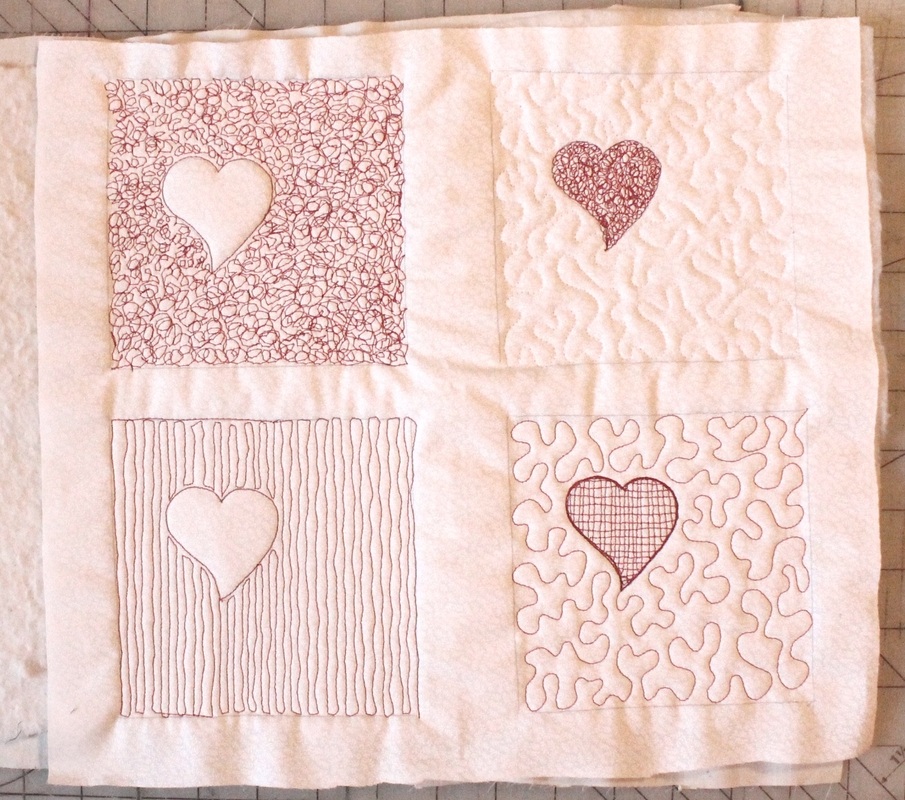
To start, I traced four 5 inch squares on a piece of fabric, about 13 inches square so there is room for some space between the squares. Leaving the four coasters attached for now can be easier than working with smaller pieces, but that works too. Just make sure you add at least an extra 1/2 inch around the edges for something to hold on to, and to accommodate any shrinking or drawing up of the fabric caused by the stitching. I then drew a little heart on each one, stacked that with batting and backing, (I used muslin) and stitched them while they were still attached. Keep scrolling down for individual stitching directions. (A little tip...a heart is much easier to draw if you don't plan on making it symmetrical :-) You can use any simple shape you want, get them from your computer or a coloring book if you don't want to draw one.)
Picture
Picture
Picture
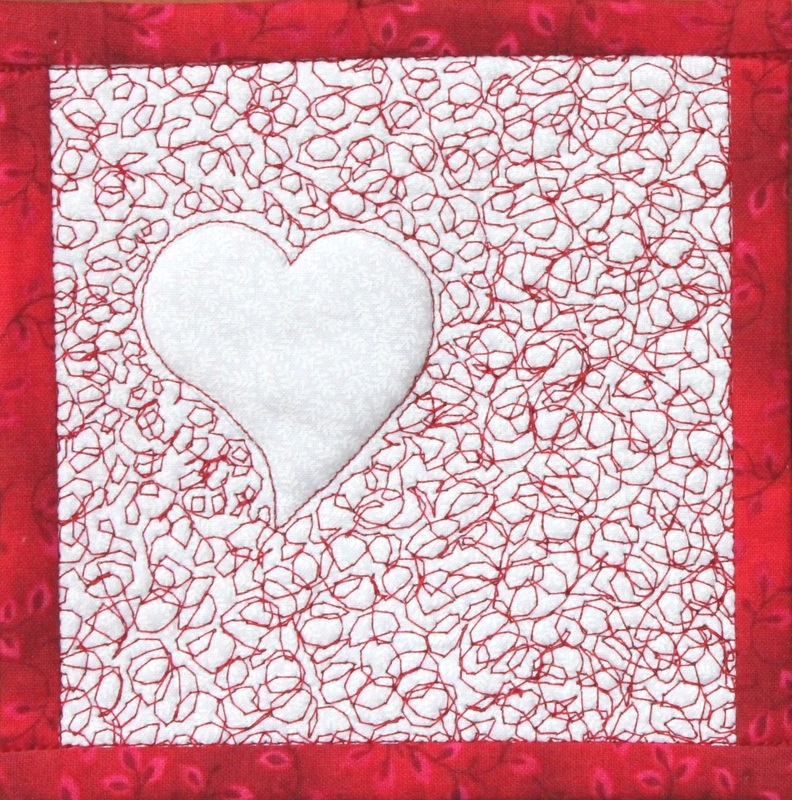
For the first one, I stitched around the outline of the heart first. I then just scribbled all over the rest of the background with my free motion stitching. It is pretty much little messy circles, purposely overlapping. Much easier than trying to make sure your stitches don't overlap! I kind of wish I had skipped tracing the heart. If you do that, you would want to use something removable to draw the line, and make sure your scribbling goes right up to the line so your heart still has definition. Another option is to trace it with thread that matches your background.

Picture
Picture
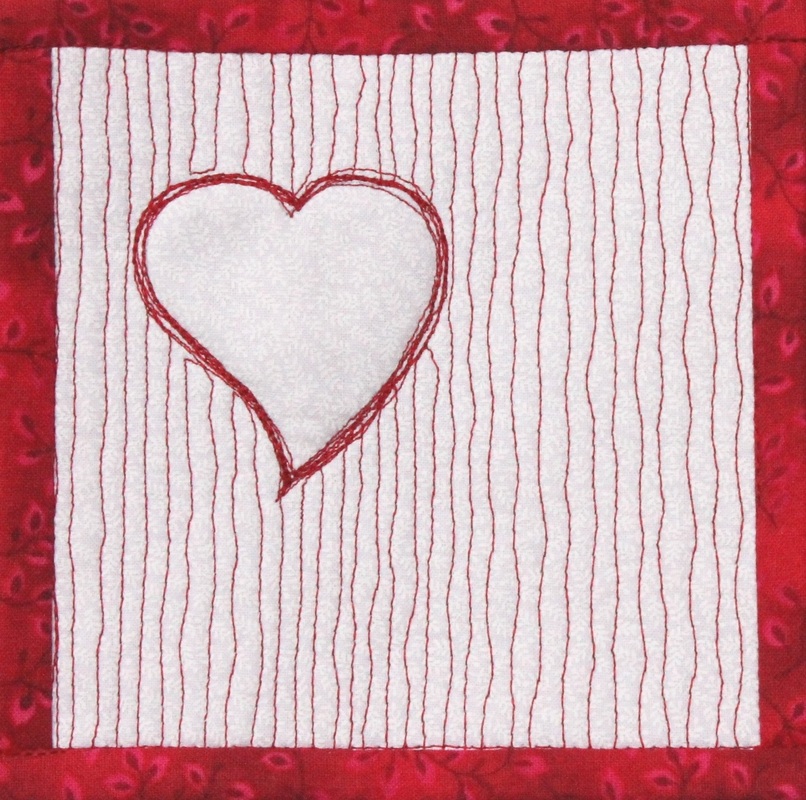
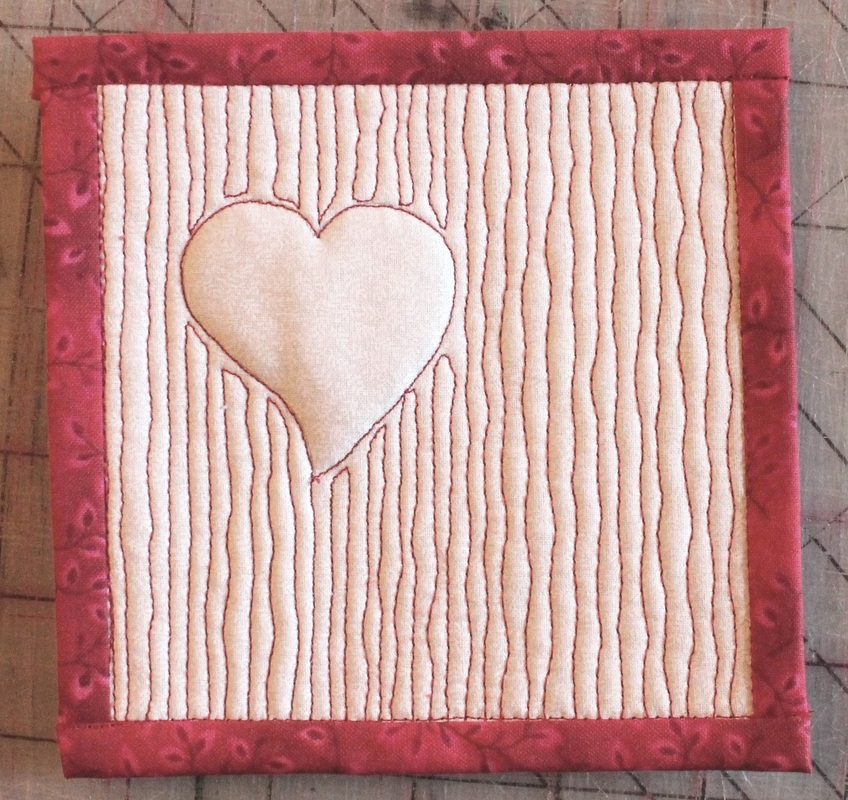
For this one, I again traced the heart, then made slightly squiggly vertical lines. I decided I didn't like the lines around the edge of the heart, so I went around the heart several more times. Now it looks like I meant to do it that way :-) There's always a way to fix things!

Picture
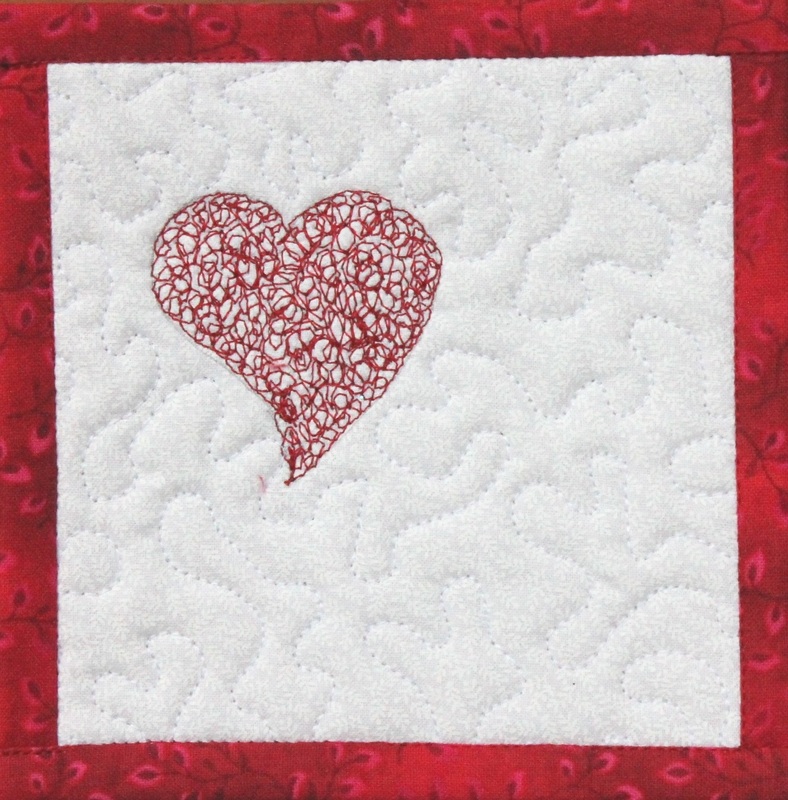
For this coaster, I just did the scribbling inside the heart instead of outside, then added stippling with thread that matches the background. The background is white on white, but close enough to solid that the stitching does show, but not nearly as much as contrasting thread would.
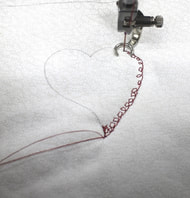
The second photo shows how I started the heart. I went around the edge with little circles first, so I would still have a defined edge.
Notice the thread tails...it is always good to take one stitch and pull your bobbin thread to the top before you start. After a few more stitches you can clip them off.

Picture
Picture
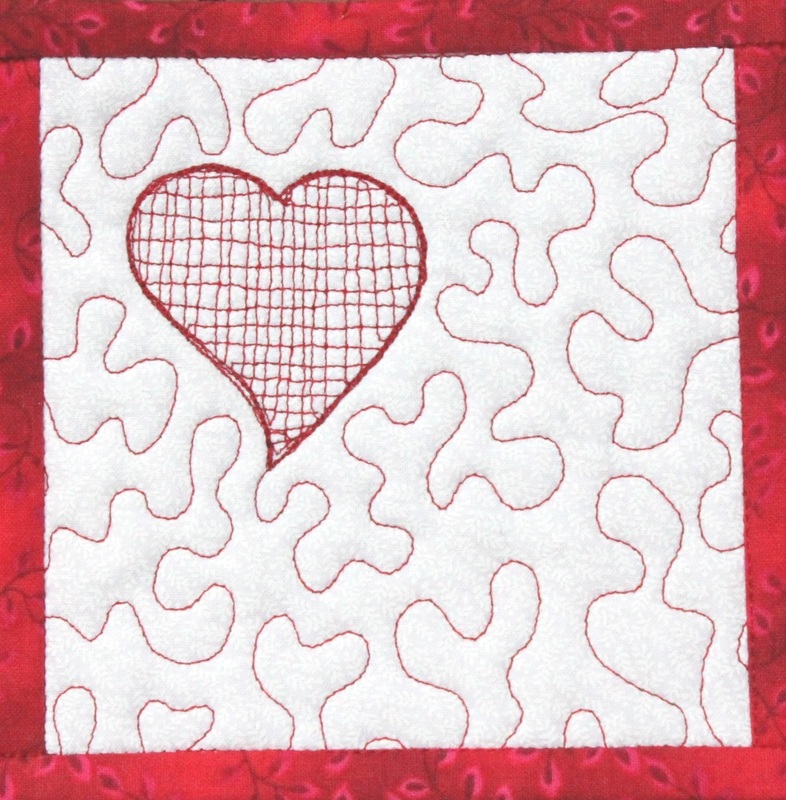
Last one! Again, I traced the heart, then made squiggly horizontal and vertical lines going across it. The outline looked messy when I got done with that, since you have to keep traveling on it to get to a new spot. So I did the trick of going around the outline several times again. Then added stippling like the previous one, only with contrasting thread.

To finish your coasters, cut them out at 5 inches, which may now be slightly outside your original lines due to the stitching causing your fabric to draw up. I used straight binding, using the edge of my straight stitch foot as a seam allowance guide. To make narrower binding, just move the needle to the right and you can still use the edge of your foot. The binding should generally be cut 4 times as wide as your seam allowance. Mine was about 3/8 inch seam allowance, so 1 1/2 inch binding strips. There is a nifty binding method with better directions in any of my card patterns, available for download for only $4.75. I am willing to give away lots of secrets, but I can't give them all away, right? :-) You could also add another backing to cover your stitches before doing the binding if you want.
Click here to see all our kits and patterns
Picture
Picture
  • Home
  • Shop Online
    • Art For Sale
    • Collage Art Quilt Kits
    • Store - Wall Hangings/Table Runners Kit & Patterns >
      • Sandhill Sunset Wall Hanging
      • Moonshadows Wall Hanging
      • Moonlight Moose Table Runner
      • Serenity Wall Hanging
      • Summer Dragonfly Wall Hanging
      • Summer Dragonfly Table Runner
      • Moonlight Moose Wall Hanging
      • Autumn Leaves Wall Hanging
      • Autumn Leaves Table Runner
      • Night Owl Wall Hanging Quilt
    • Store - Quilted Greeting Card Kits/Patterns >
      • Acrylic Card Template
      • Trish Stuart Collection
      • Out On a Limb Card Kit
      • Wonder Lake Card Kit
      • Moonshadows Card
      • Raven Moon Card
      • Chickadee With Berries Card
      • Whale Tale Card
      • Moose and Willows Card Kit
      • Raven Card Kit
      • Wild Iris Card
      • Northwoods Nisse Card
      • Boreal Botanicals Card
      • Winter Trees Card
      • For the Birds Card Pattern
      • Wild Flower I Card Pattern
      • Wild Flower II Card Pattern
      • Wild Flower III Card Pattern
      • Wonky Heart Card Pattern
      • Whimsical Heart Card Pattern
      • Black-Capped Chickadee Card
      • Three Leaves Card Pattern
      • Let it Snow Card Pattern
      • Happy Birthday Card Pattern
      • Tundra Swan Card Pattern
      • Milepost Card Pattern
    • Store - Coffee Kuspuks/Quilt Panels >
      • Season of Hope Velvet Panel
      • Screen Prints
      • Coffee Kuspuk
      • Moonlight Moose Potholder Kit
      • Chickadee Menu Planner
      • Spring Flowers Coaster Pattern
      • Teresa Ascone Panels
      • Scrappy Baby Bib
    • Molly Molecule Book
  • Online Classes
    • Simple Secrets for Art Quilting
    • Framed Collage Quilt Class
  • Tutorials
    • Grace quilt tutorial
    • Sewing Machine Needle Organizer Pincushion
    • Organza silk screen tutorial
    • Polymer Clay button tutorial
    • Birch Tree card tutorial
    • Coffee Shop greeting card
    • Free Motion Stitching Tutorials >
      • Free Motion Tutorial
      • 10 minute project tutorial
      • Valentine Coasters
      • Grape hyacinth postcard
      • Advanced free motion projects >
        • Sparkly 3D dragonfly wings
        • Inktense Frog quilt
        • Dream Big flower panel
    • Journal Cover - Book Tutorials >
      • Quilted Book Cover Tutorial
      • 1000 Gifts Journal Cover Tutorial
      • Quiet Book Tutorial
    • Tutorials for Our Kits >
      • Moonshadows Video Tutorials
      • Summer Dragonfly Video Tutorials
      • Serenity Video Tutorials
    • Video Tutorials - Screenprinting, Inktense, Quilted Card Binding
    • Pocket Prayer Quilt
  • Beret's Blog
  • Art Quilt Gallery
  • Quilted Cards Gallery
  • Our Story
  • Our Mission
  • Quilt Shops
  • Contact Us
  • Sked Verks
    • Sked Verks Gallery
    • Sked Verks Online Store
  • Return Policy - FAQs