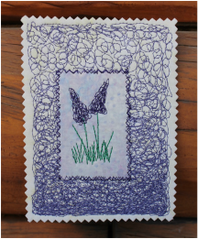
Grape Hyacinth Postcard Tutorial |
|
This is a quick project, and much simpler than it looks! Because it has so much stitching, I used Timtex heavy interfacing instead of batting.
Step One: Fuse a piece of light colored fabric to your heavy interfacing. You don't need a backing with this interfacing. If you use regular batting, you do need backing fabric, and I would recommend using an embroidery hoop. It will be much less frustrating and get less warped from all the stitching. Interfacing would also help, or fuse your fabric to your batting, both the top and the backing, but I would still use a hoop.
Mine was about 5 x 6 inches to start with.
Step Two: I traced a rectangle about 4 x 5 inches to give myself a guide, so that I didn't have to cut the stitches when I cut it out. The sizes are entirely up to you.
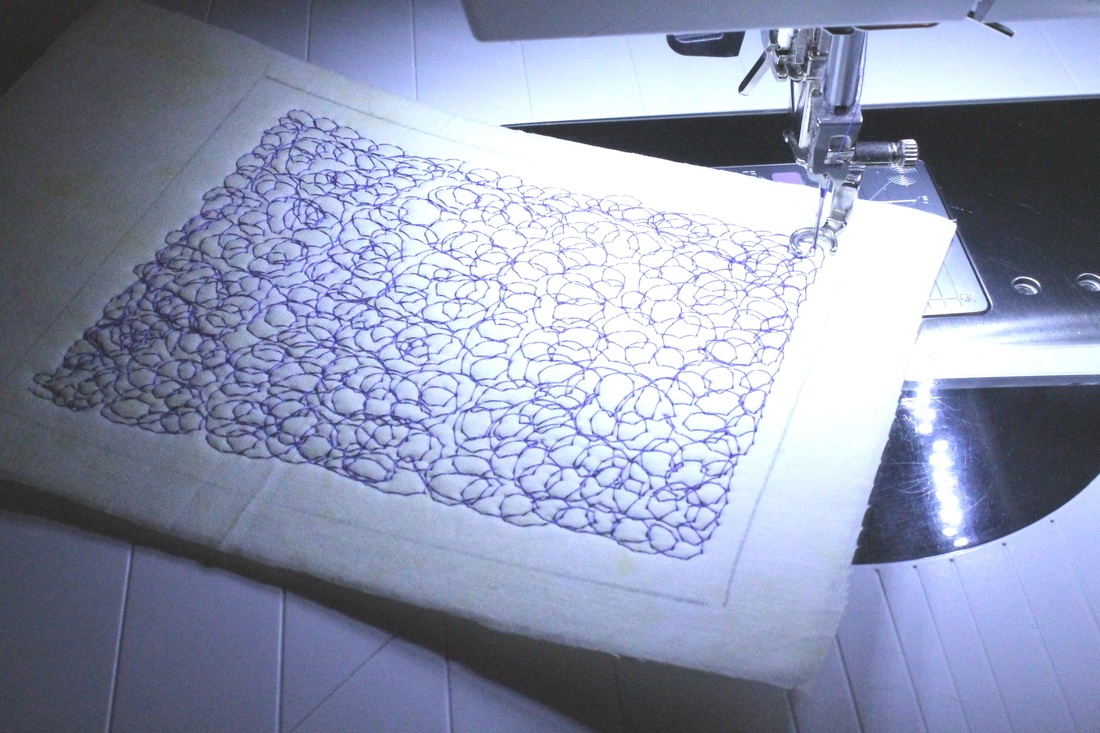
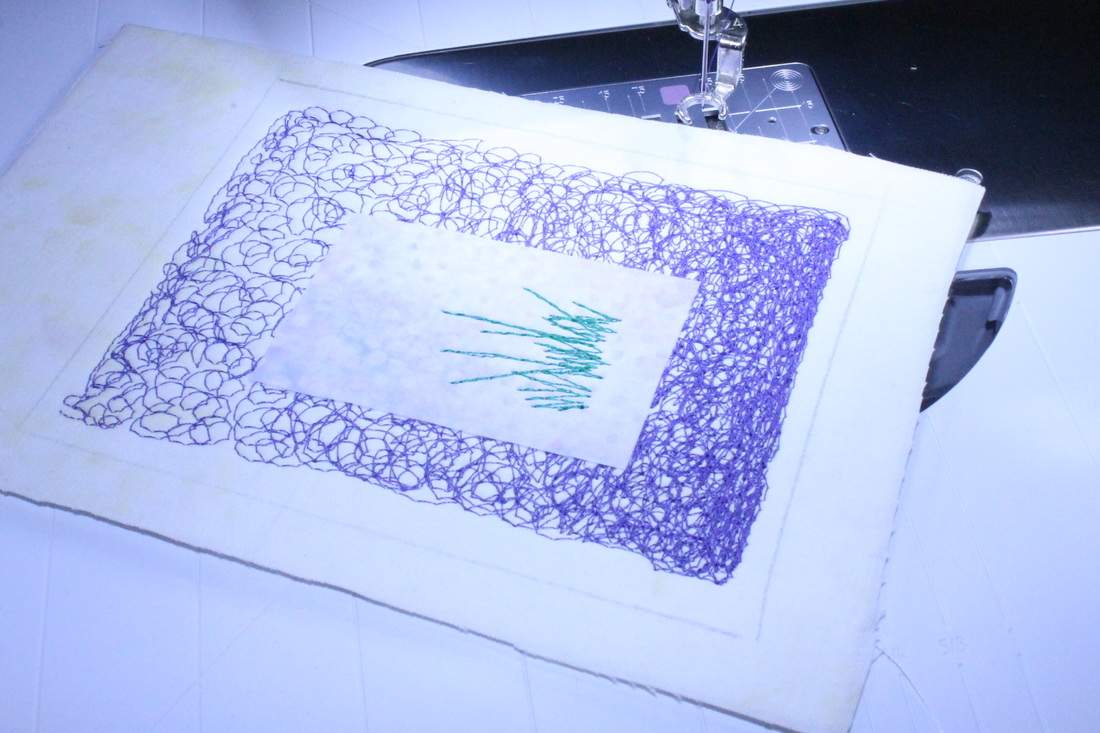
Step Three: Using a medium dark purple thread, start scribbling all over the background. This is pretty much little circles that overlap each other. For now, try to keep it fairly evenly distributed across the whole background. If you want, you can leave it like this and go to Step Five.
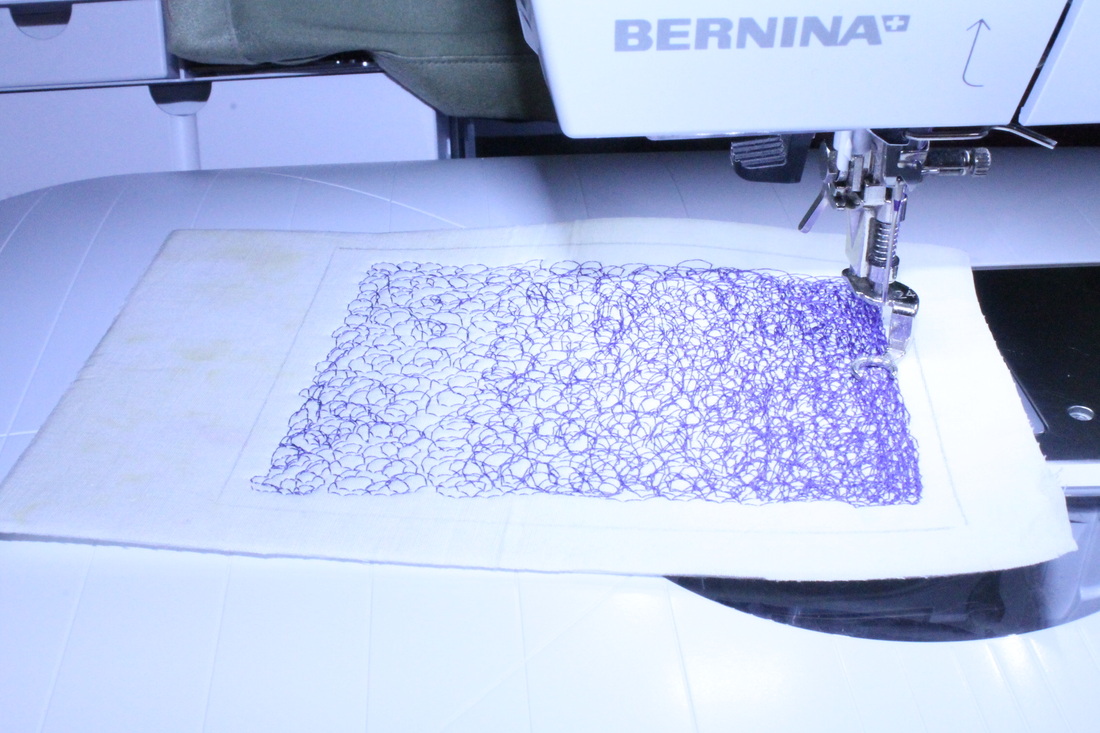
Step Four: If you'd like, you can go over most of it again, starting a little down from the top, and making it increasingly dense as you go. Think of it as 3-5 different sections, each more dense than the last. Pretty cool, right? :-)
|
Step Five: Fuse a piece of light colored fabric to the background. I used light lavender, about 1 1/2 x 2 1/2 inches.
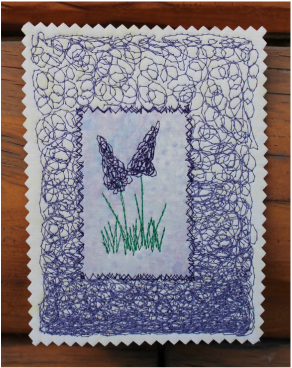
Step Six: Using green thread, stitch some stems and grass. This is just up and down lines of varying length. Try to make some of them at an angle too. Don't overthink it :-) Step Seven: If you want, you can lightly draw a triangle for the shape of the flower, or you can just wing it. I stitch the outline first, but still with little circles, to define the edges a bit, then fill it in. I used a darker purple thread than I used on the background, but this is up to you. Step Eight: If you want to clean up the back, you can fuse another piece of fabric to the back. I then cut mine out with a pinking shears. |
|
That's pretty much it! I also stitched around the edge of the little rectangle using a zig zag stitch with the free motion foot, going back and forth so it ended up looking more sketchy. You can skip this step, or just do a traditional zig zag or satin stitch with a regular foot.
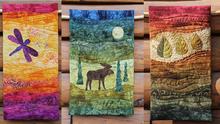
Variations: Use more than one green for the grass, or make the flowers different colors for another look too! |