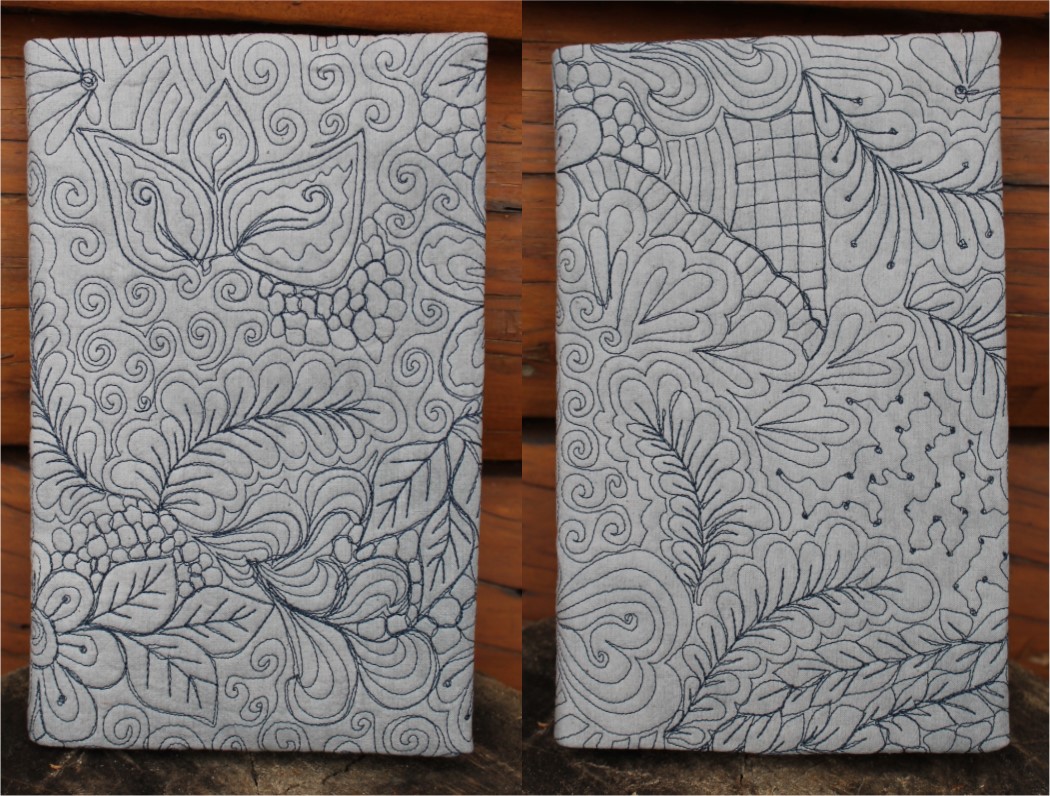
 I got my copy of Machine Quilting Unlimited magazine in the mail yesterday, boy is that a fun one. I didn't think I would ever like a magazine as much as Quilting Arts, but this one is just as good! I was especially excited to see an article by Karlee Porter, her work is really amazing. And even more amazing, the tips in the article enabled me to do a better sketch than I usually can, which then turned into trying it on a journal cover. So much fun! This is the front and back of the cover, it is reversible as long as it can be turned upside down. This reminded me that I haven't put out a request recently for book cover pics. If you make a book cover using my tutorial, and are willing to have a photo of it on my tutorial page, please send it to me at [email protected]! I will even link it to your website/blog if you have one. Karlee also has a new book out, Graffiti Quilting, which I think I will have to get! Go check her out, karleeporter.com! 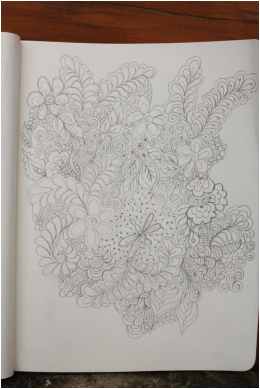
0 Comments
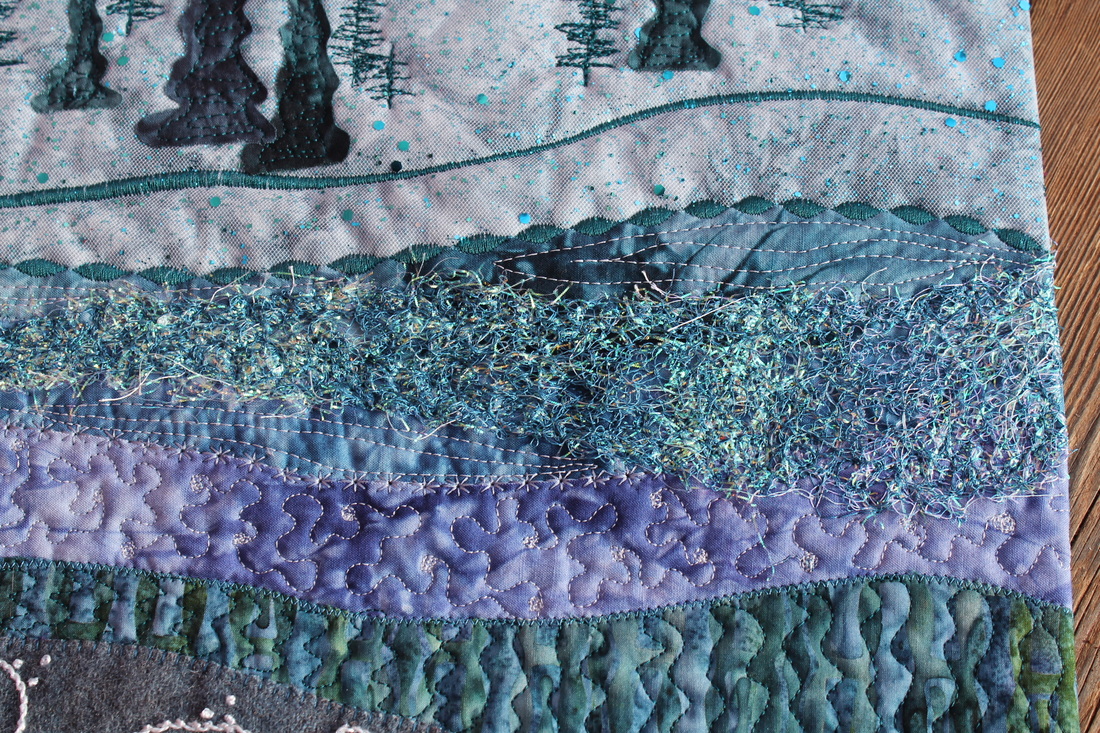
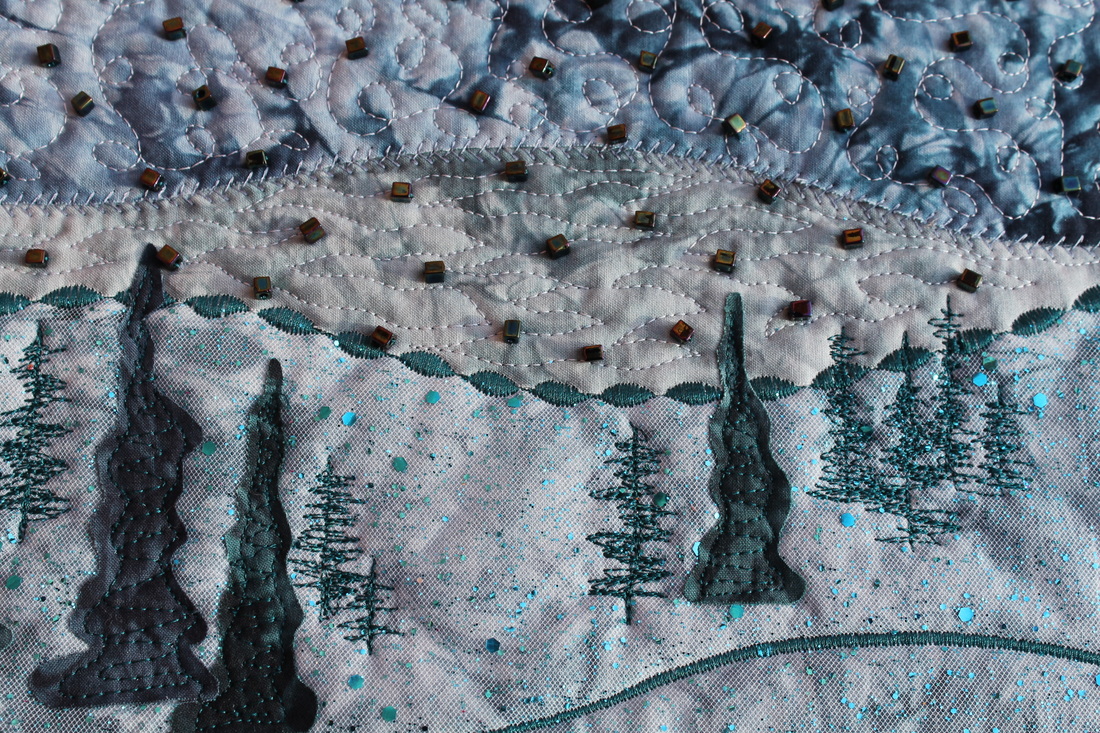
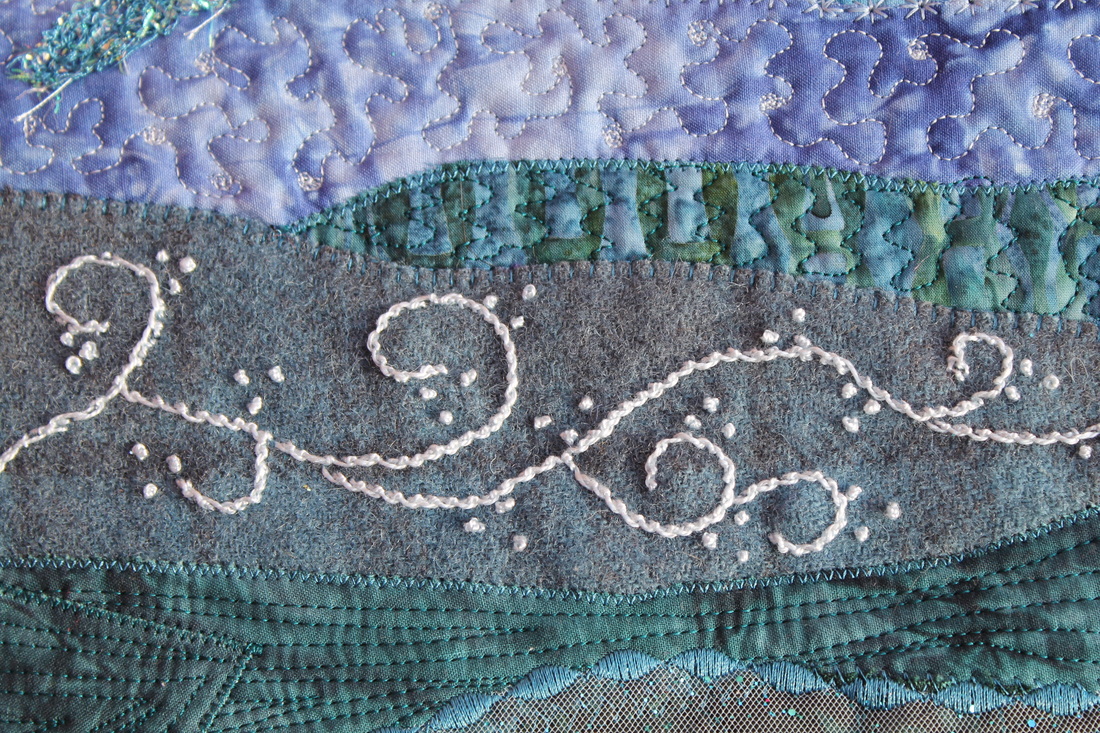
This little quilt has been in the works for weeks, I finally got it done. It is going to be in an online fundraiser auction for Camp LiWa, which my kids have been involved with this year. There is a sparkly section in the middle that I made using Angelina fibers sandwiched between two layers of water soluble stabilizer and stitched all over. I also did a little beadwork and hand embroidery on this one. Little quilts like this are a fun way to practice some new techniques without spending a lot of time. 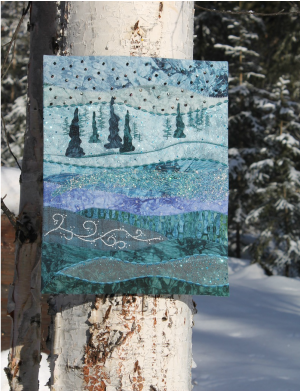
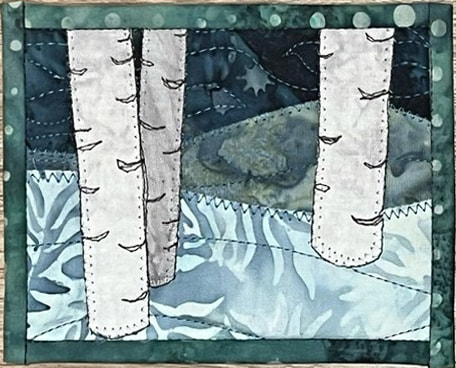
 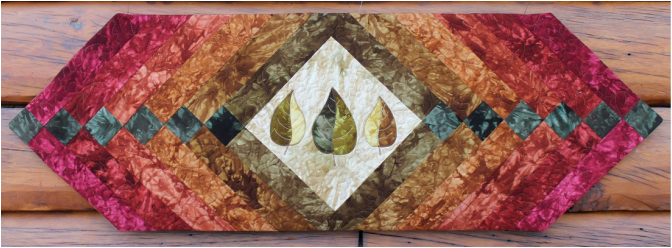 Today I made a sample for the Autumn Leaves table runner kit. I'll have to think about the colors for a bit, then it will still be a couple of weeks at least before it is ready for purchase. The Autumn Leaves wall hanging has the colors arranged a little differently than the other two, so it doesn't translate quite as easily...any comments? Remember, the Moonlight Moose and Summer Dragonfly kits are ready though! Click the photos for more info or to order.
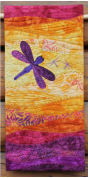
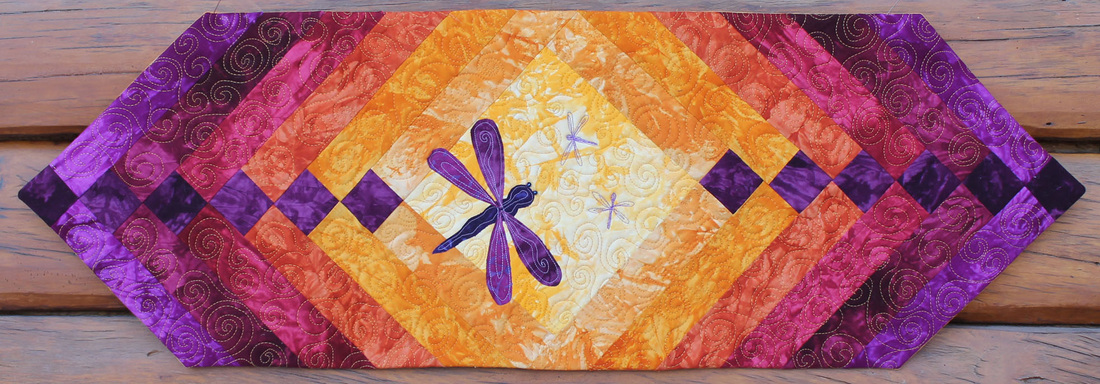
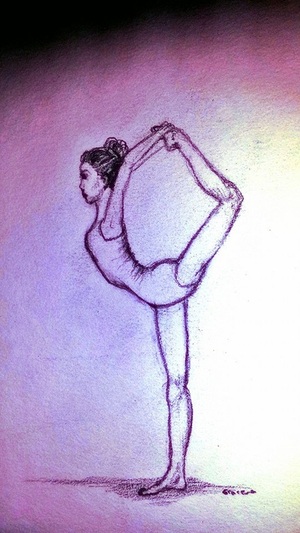
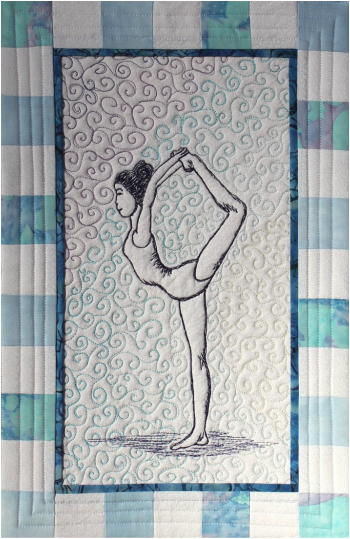
The Summer Dragonfly table runner is now ready for purchase! I'm putting the photo sideways for now, so it doesn't disappear on Pinterest...:-) click the photo for more info or to order. The table runner kits come with everything you need except batting and thread. They are a quick project, and with the beautiful hand dyed Starr Design fabrics, you can't go wrong! 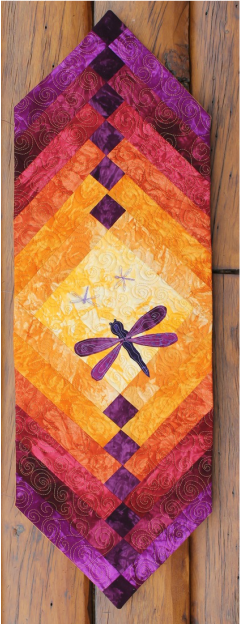 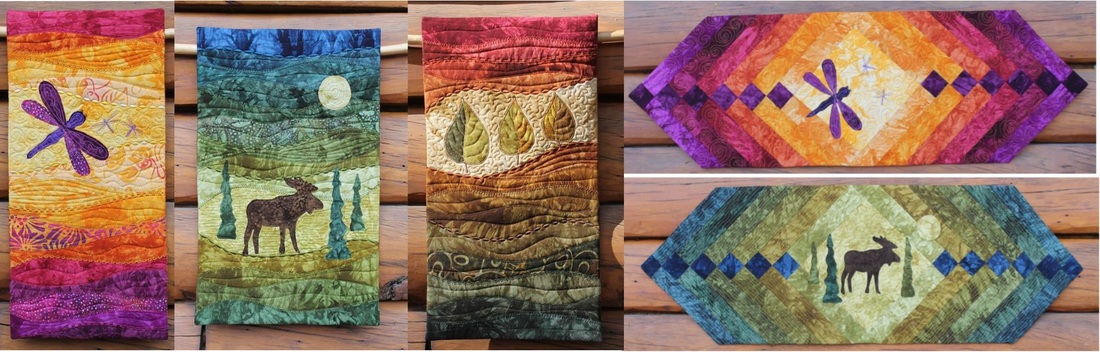 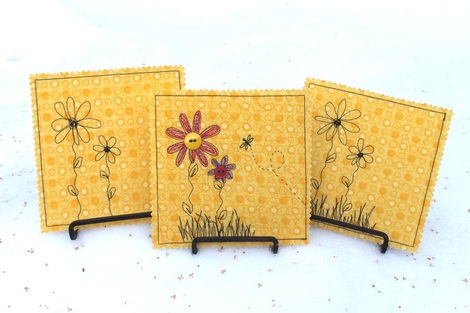 Another quick free motion project for the Free Motion Fun page, with some options if you have more time. If you really want to practice but don't have a lot of time, I'd recommend getting some heavy interfacing such as Timtex or Peltex. If you get the fusible kind, it is so quick to just iron a piece of fabric to it and you are ready to go, you don't even need backing. But these can also be done with regular batting and backing as well. Click here for the tutorial. I'm not actually sure what these are, they can be coasters, except for the one with buttons..., or postcards, or just wall art! 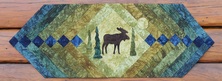 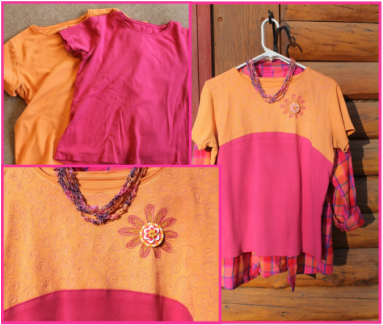 Yesterday, I got to combine two of my favorite things, upcycling clothes, and free motion stitching. It all started with two t-shirts that were both a bit too short. I decided to combine them and get one that fit. Since I have a tendency to spill on my shirts...I also decided to decorate the top section with some free motion stitching. (better photo below) This type of free motion isn't really for the faint of heart, (one layer of stretchy fabric...) but with a few tips it's not impossible either. I'd like to do a more advanced free motion page sometime, in addition to the beginner one. I'll have to put this on it! Here's how I did this project.: I placed the two shirts on top of each other, lining them up as well as possible. It helped that they were the same brand, so really the exact same shirt. Then, I slid the pink one down a bit, because I wanted the section I cut off of that to be longer than the section I cut off the orange one. I neglected to photograph this step... I then cut a curved line through all the layers, I just eyeballed it. This could be a straight line also. The next step was to decorate the orange top part. The only secrets here are to use a hoop and water soluble stabilizer, I used OESD Aqua Film, but there are other brands. (Free tip: after you open a roll of anything like that, roll up the label and stick it inside the tube, that way you will always know what it is...) It's definitely tricky to get the hoop in places like the shoulders. A smaller hoop is nice for getting it in there, but then you have to move it even more often...Once you start stitching, you have to move the hoop while it is still under the machine, to avoid cutting the thread over and over. I pinned the stabilizer on to the shirt first, but it's still tricky. Of course, this would be much easier if you did it on fabric before making something from scratch, since the fabric would lay flat. Then just stitch whatever design you want, moving the hoop when you run out of room. Sometimes you can get closer to the edges of it by turning it around, the back of the foot will hit it first. After that, I decided it wasn't done, so I added a flower. When that was done, I washed out the stabilizer using LOTS of warm water. Then, I just had to attach the pink bottom to the orange top. A walking foot is tremendously helpful for sewing knits, and I always use a slight zig zag to add a bit of give. I then topstitched the seam, and that's it! My daughter found these buttons in her stash, are you kidding!!? They were made for this project! I also have a matching flannel shirt and a fiber necklace to complete the look :-) 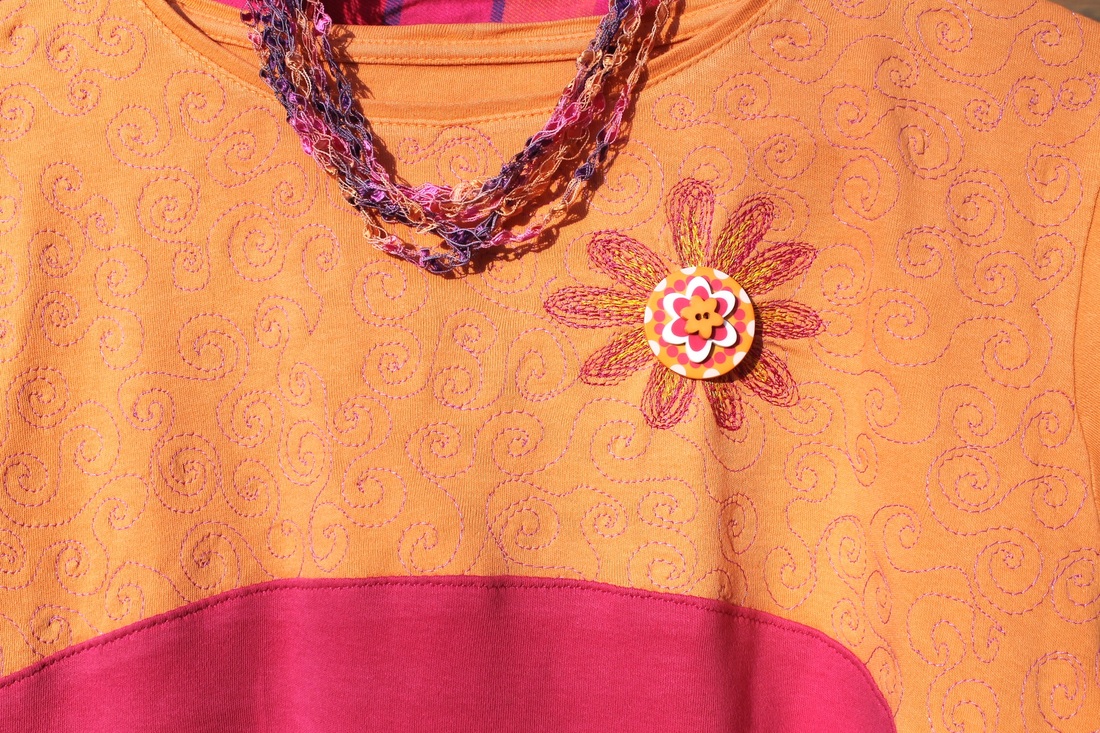 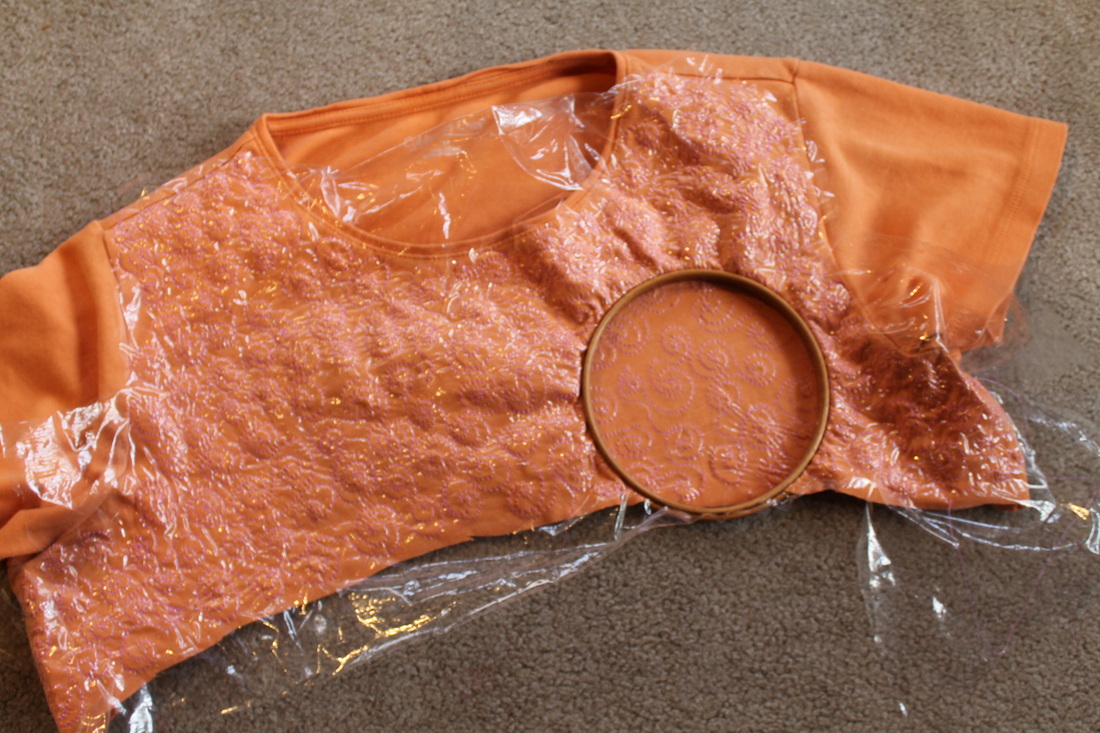 Stabilizer and hoop, after most of the stitching is done. A friend of ours, Grace Bennett, recently posted this drawing she did of a ballerina, called A Sketching of Stretching. I thought it was begging to be done with free motion, so I made a little wall hanging out of it for her! A very fun project for me :-) Also, I am currently hosting a drawing/giveaway on my facebook page, the drawing will be when it hits 1000 likes! Click here to go there and see how to enter!
I'm getting close to 1000 likes on my facebook page, so I am having a giveaway to hopefully put me over! To enter, go to my page (click here), comment on the post about the giveaway and say which of these three wall hanging kits you would like to win. Also, if you share that post on facebook, you will be entered TWO more times, since that helps me the most. If you share, write that in the post too, sometimes privacy settings keep me from seeing who shared. I will do the drawing when I get to 1000 likes. Good luck! 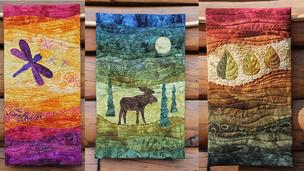 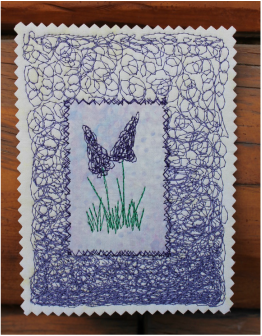 This is the next project on my new Free Motion Fun page. Trust me, it's easier than it looks! My theory is to start with scribbling, which is pretty much all this is. Because it has such dense stitching, I used heavy interfacing like Timtex or Pelltex. Click the photo to get to the new page and the tutorial for how to make this postcard, and 'like' my facebook page to see when new projects are added! (button on the sidebar on the right) 
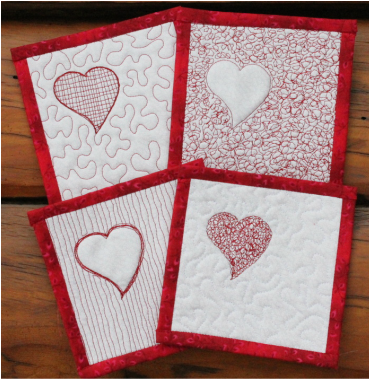 I am excited about a new page I have finally gotten started today on my website. I am fairly passionate about helping people overcome their fear of trying new things when it comes to sewing, and especially free motion stitching. So I am making a page with some very quick, small projects that are great for practicing. Of course, my card patterns can be also, but these will be even simpler, I think. Since it is Valentine's week, I started with some heart coasters, several variations of the same design. Click on the photo to go to the new page. If you want to know when new designs are added, like my On The Trail Creations facebook page, button on the sidebar on the right.  |
Beret Nelson's On The Trail Creations Blog Page
Beret NelsonI am a homeschooling mom of three fun kids, who are now old enough that I have a little time to pursue my passion for sewing! After several years of making quilted cards and art quilts, I'm now designing kits and patterns. Some of my designs have been in Keepsake Quilting and Art Quilting Studios magazine! I teach classes online, and am starting to do more traveling and teaching. I also have many tutorials, including some on YouTube. I am blessed to live in Alaska where I am surrounded by the inspiration provided by the beauty of God's creation! Free mini art quilt workshop for new subscribers!
"Like" my facebook page!I am also an independent distributor for Plexus supplements, since I credit them with enabling me to be healthy enough to do all these fun things! They target blood sugar and gut health, which are at the root of so many modern health issues. E-mail me for more info, or check out my website! I am as passionate about getting people healthy as I am about getting people creating :-)
[email protected] or https://plexusworldwide.com/beretnelson  Archives
June 2024
|

 RSS Feed