|
This past year, I’ve been doing lots of training in several areas, but mostly business related. The people I’ve been learning from start with the success of customers as the top priority, so it’s been a lot of marketing stuff from a very ethical and value based perspective, which I love! (I realized years ago that I don’t make anything without ‘talking’ to you guys in my head, 🤣 must be the teacher in me. 😄 So I already have had you in mind all along!) It’s been like drinking from a fire hose, but so good, and I’m excited to start sharing some of it with anyone who will listen! (more on that below) Quilt making decisions Because of that, I’ve been doing more long term planning, and getting out of the ‘daily scramble’ of just reacting to what comes in my business every day. I have a much better idea of the ‘bigger picture’. But planning comes with lots of DECISIONS… That has made me realize that much of what I want to do for YOU is help you make some of the many decisions involved in art quilting. Making a quilt, and even more so an art quilt, involves a lot of decisions, and it can be overwhelming to the point where it stops people before they start. You have to decide the subject, the colors, the actual fabrics, the size, the techniques, the quilting, the embellishments, and more. My goal with my kits is to do that for you, but my goal with my classes is to teach you some actual steps and tricks for doing it for yourself. Hopefully even the kits are a boost toward making those decisions for yourself on future projects! I always hope to save you from some of the overwhelm and decision paralysis that can come with trying something new like art quilting. Even if you have been doing it for awhile, having a structure for planning a project can be helpful! So, I’m adding a free downloadable form that you can use to help plan your next project to the freebies that come with signing up for my newsletter. It will give you a framework to start with to take away some of the overwhelm, and help you see the bigger picture before you start a project. (I’ve been on a roll with the new free stuff lately, it might not happen every week, 😂!) And of course, there is a lot more information on each of these steps in my Simple Secrets for Starting Art Quilting class!  And for the business minded… I’m working on a plan for those of you who either would like to start a business, or have one already and would like to grow it! (Maybe it’s time for your hobby to start carrying some of its own weight, ha!) I’ve spent a ton of time, and literally thousands of dollars, to gain some great knowledge that is definitely helping my business, (and my sanity😅) and I’d like to save you some of that time and money by passing on what I’ve learned in a more economical way. I think it will be in the form of a membership, with monthly topics and a live Zoom call to ask questions. And how about a road map for you to follow to either start or grow a business? I wish I had had one! Stay tuned for more information as I get that sorted out! I’m definitely excited to see where this is all going to go. My head is bursting with new ideas and ways to help YOU, whether it is with quilting or business. And that is ultimately what helps my business, helping YOU in whatever way I can. Sign up for my newsletter in the sidebar on the right to get the checklist, plus two more things! Happy sewing! Beret 
0 Comments
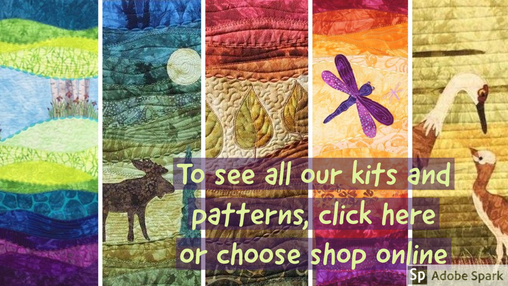
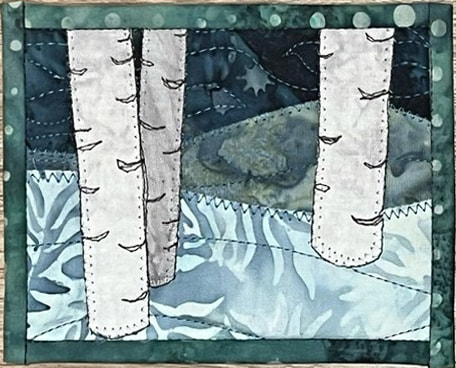
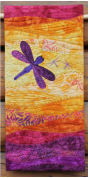
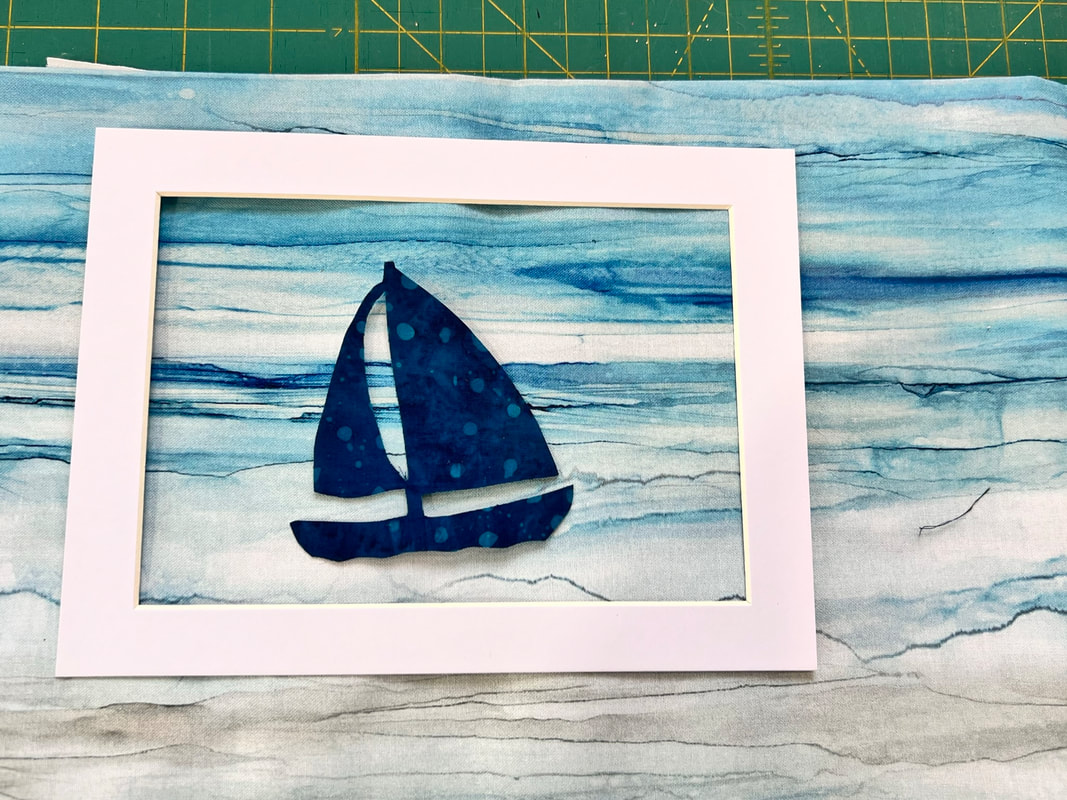
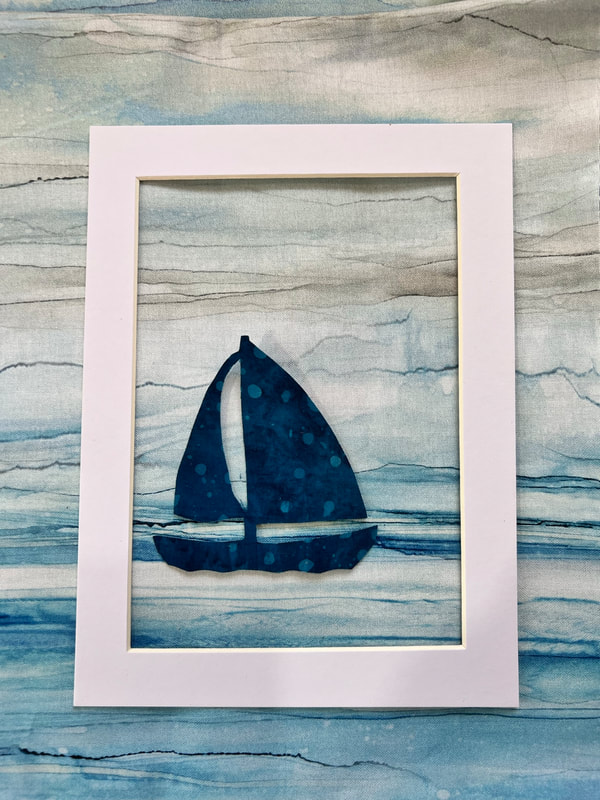
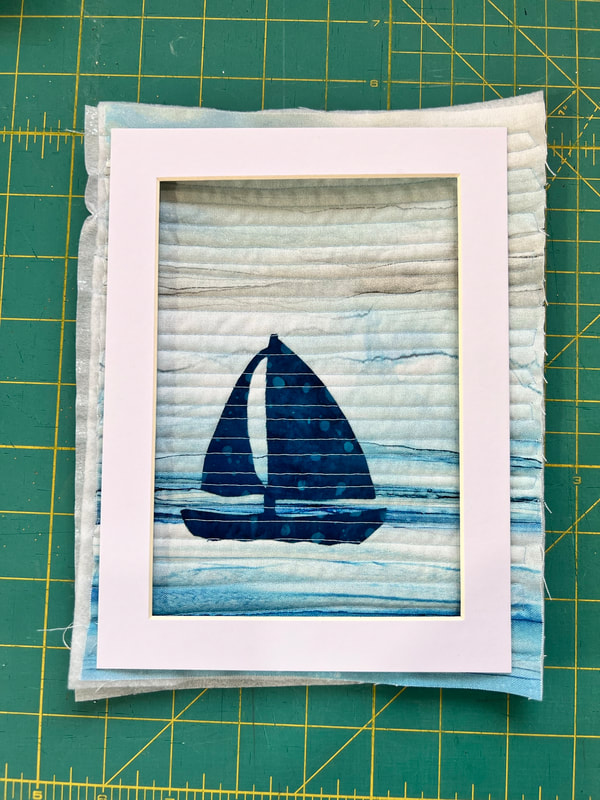
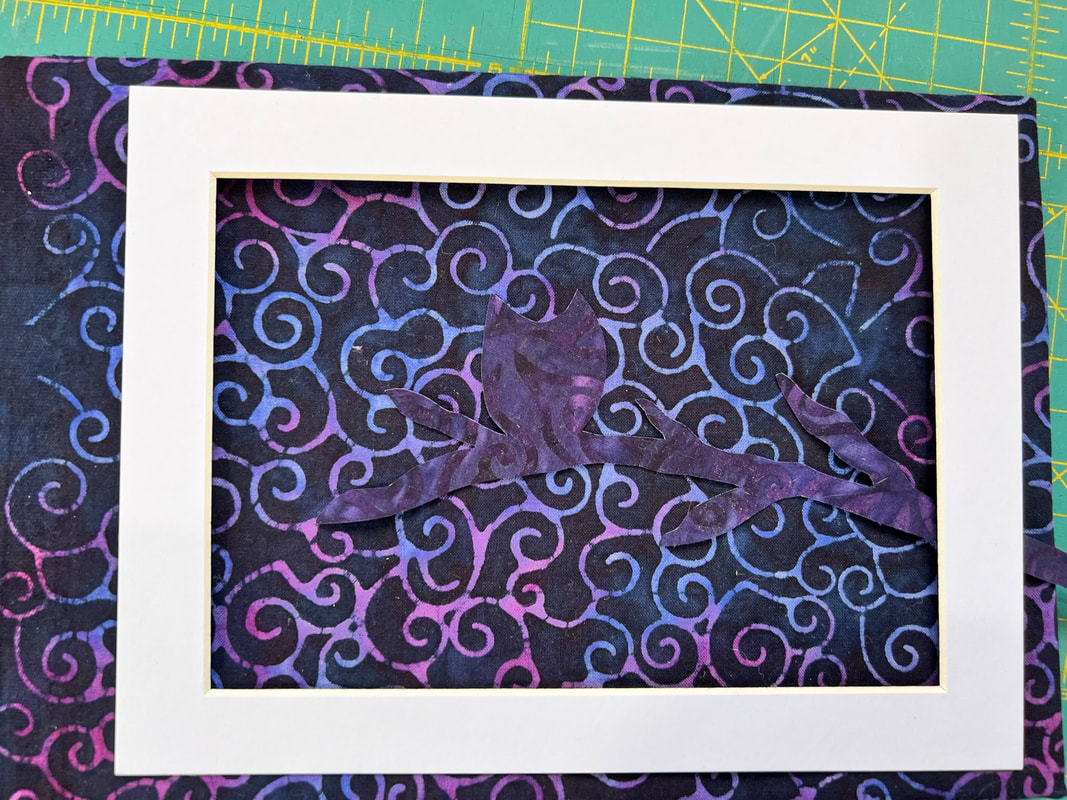
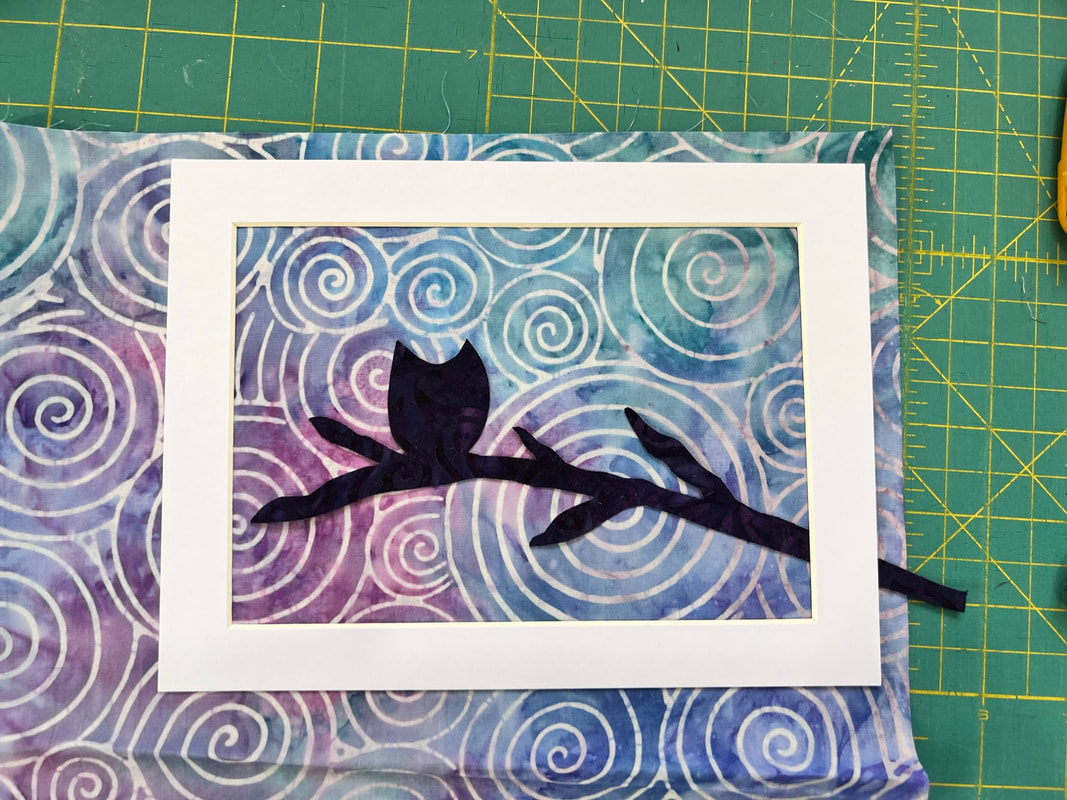
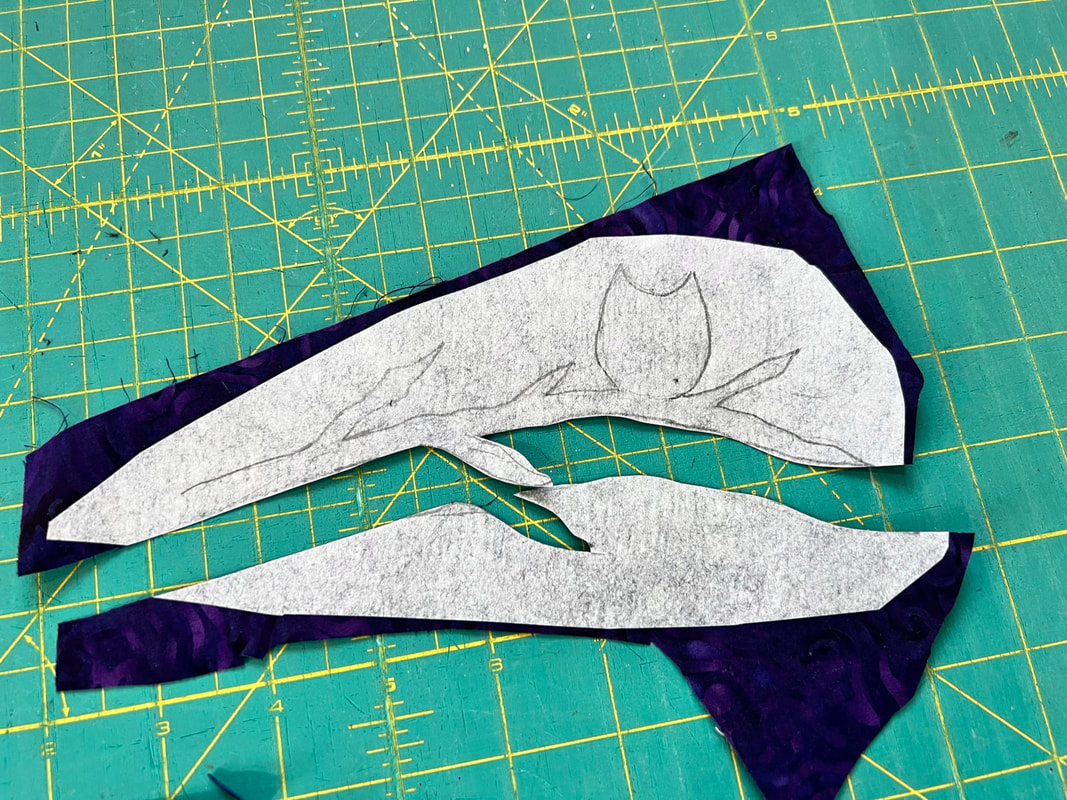
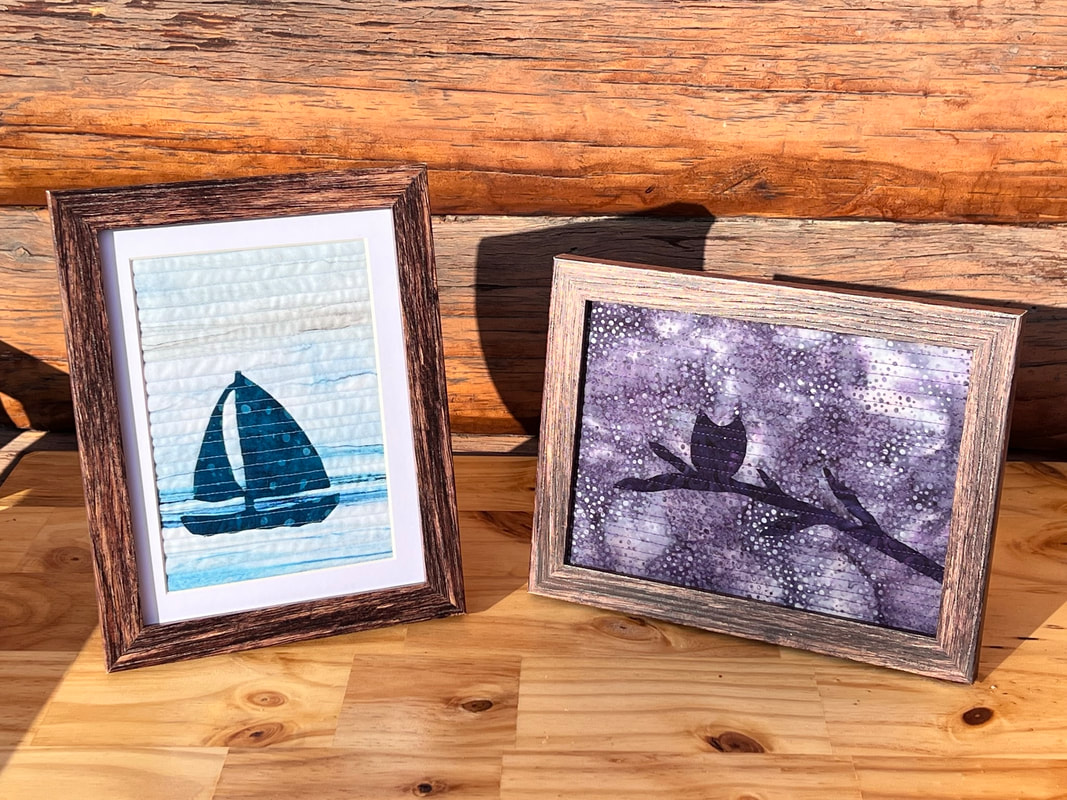 Almost every day in art quilt groups online I see people saying they want to try art quilting but aren't sure where to start. And I can't tell them I'd love to help, because that would be considered advertising, which I understand. But it's still torture 😂 It makes me want to work harder at helping YOU, the people who have already found me 😀 The success of my business depends on the success of the people who learn from me! So, here's another quick weekend project for beginners, but of course this project is fun for more experienced people too! It involves no measuring at all, and should easily be under an hour once you choose your design and fabric. (And don’t spend too much time on that; if you don’t like it, make another one!) I do always assume some basic sewing knowledge. Here is the project: Possibly the quickest/simplest art quilt design ever is a silhouette and well chosen background fabric. The silhouette doesn’t have to be black, and the background fabric doesn’t have to be ‘landscapy’. The fabrics that look like they are hand painted are always awesome, but there are lots of other options. I put in a couple that I auditioned and decided not to use. I also put them in a frame, which does several things. One, you don’t have to finish the edges if you don’t want to. Two, the mat can help you choose the right location on your fabric. And three, the mat also becomes the template for cutting out your project when it’s done. I used a 5x7 frame, but you can use whatever. (And you can skip the frame, but it’s easier with!) Step One: find or draw a silhouette. A branch is pretty easy, or you can trace a photo (that you have permission to use.) Trace it onto the paper side of fusible web. Iron that to the back of your silhouette fabric and cut it out. Now you can lay that on background fabrics to try them. Step Two: when you find a background fabric you like, use the mat to cut it out, but leave about 1/2” extra all around. No need for measuring or even cutting straight at this point! Step Three: peel the paper off of your applique and iron it to your background. You can use the mat again for placement. Just don’t put anything right in the center usually! Step Four: cut batting or fusible fleece the same size (ish) as your background fabric, and also something for backing. I often use interfacing, but fabric works too. Stack them with backing on the bottom, then fleece/batting, then your design. Step Five: using straight lines no more than 1/4” apart, quilt the whole piece, through all layers, even the silhouette. I purposely chose a lighter thread for the sailboat so you can see it’s fine if it shows on the appliqués, don’t stress over thread color! Step Six: use your mat again to cut it, this time exactly the size of the mat. That’s it, pop it in the frame! No need to even finish the edges. Of course there are endless ways to vary these and/or add more details, I just wanted to start with the very simplest! I could have added a moon to my owl, or birds with the sailboat. The best way to learn is to just try things, so I hope this gives you a starting place. What will you do? A cat, horse, bird, person, fence, cityscape, endless possibilities. If you do it, please share it with me! Either by email, or in my On the Trail Creations VIP Group page, or tag me on IG (onthetrailcreations) And of course, I'd love to have you join one of my online classes if you haven't yet! Framed Collage, or Simple Secrets for Starting Art Quilting 😊 Happy Sewing! Beret
|
Beret Nelson's On The Trail Creations Blog Page
Beret NelsonI am a homeschooling mom of three fun kids, who are now old enough that I have a little time to pursue my passion for sewing! After several years of making quilted cards and art quilts, I'm now designing kits and patterns. Some of my designs have been in Keepsake Quilting and Art Quilting Studios magazine! I teach classes online, and am starting to do more traveling and teaching. I also have many tutorials, including some on YouTube. I am blessed to live in Alaska where I am surrounded by the inspiration provided by the beauty of God's creation! Free mini art quilt workshop for new subscribers!
"Like" my facebook page!I am also an independent distributor for Plexus supplements, since I credit them with enabling me to be healthy enough to do all these fun things! They target blood sugar and gut health, which are at the root of so many modern health issues. E-mail me for more info, or check out my website! I am as passionate about getting people healthy as I am about getting people creating :-)
[email protected] or https://plexusworldwide.com/beretnelson  Archives
June 2024
|
 RSS Feed