On The Trail Creations
  • Home
  • Shop Online
    • Art For Sale
    • Collage Art Quilt Kits
    • Store - Wall Hangings/Table Runners Kit & Patterns >
      • Sandhill Sunset Wall Hanging
      • Moonshadows Wall Hanging
      • Moonlight Moose Table Runner
      • Serenity Wall Hanging
      • Summer Dragonfly Wall Hanging
      • Summer Dragonfly Table Runner
      • Moonlight Moose Wall Hanging
      • Autumn Leaves Wall Hanging
      • Autumn Leaves Table Runner
      • Night Owl Wall Hanging Quilt
    • Store - Quilted Greeting Card Kits/Patterns >
      • Acrylic Card Template
      • Trish Stuart Collection
      • Out On a Limb Card Kit
      • Wonder Lake Card Kit
      • Moonshadows Card
      • Raven Moon Card
      • Chickadee With Berries Card
      • Whale Tale Card
      • Moose and Willows Card Kit
      • Raven Card Kit
      • Wild Iris Card
      • Northwoods Nisse Card
      • Boreal Botanicals Card
      • Winter Trees Card
      • For the Birds Card Pattern
      • Wild Flower I Card Pattern
      • Wild Flower II Card Pattern
      • Wild Flower III Card Pattern
      • Wonky Heart Card Pattern
      • Whimsical Heart Card Pattern
      • Black-Capped Chickadee Card
      • Three Leaves Card Pattern
      • Let it Snow Card Pattern
      • Happy Birthday Card Pattern
      • Tundra Swan Card Pattern
      • Milepost Card Pattern
    • Store - Coffee Kuspuks/Quilt Panels >
      • Season of Hope Velvet Panel
      • Screen Prints
      • Coffee Kuspuk
      • Moonlight Moose Potholder Kit
      • Chickadee Menu Planner
      • Spring Flowers Coaster Pattern
      • Teresa Ascone Panels
      • Scrappy Baby Bib
    • Molly Molecule Book
  • Online Classes
    • Simple Secrets for Art Quilting
    • Framed Collage Quilt Class
  • Beret's Blog
  • 40 Ways
  • About Us
  • Tutorials
    • Grace quilt tutorial
    • Sewing Machine Needle Organizer Pincushion
    • Organza silk screen tutorial
    • Polymer Clay button tutorial
    • Birch Tree card tutorial
    • Coffee Shop greeting card
    • Free Motion Stitching Tutorials >
      • Free Motion Tutorial
      • 10 minute project tutorial
      • Valentine Coasters
      • Grape hyacinth postcard
      • Advanced free motion projects >
        • Sparkly 3D dragonfly wings
        • Inktense Frog quilt
        • Dream Big flower panel
    • Journal Cover - Book Tutorials >
      • Quilted Book Cover Tutorial
      • 1000 Gifts Journal Cover Tutorial
      • Quiet Book Tutorial
    • Tutorials for Our Kits >
      • Moonshadows Video Tutorials
      • Summer Dragonfly Video Tutorials
      • Serenity Video Tutorials
    • Video Tutorials - Screenprinting, Inktense, Quilted Card Binding
    • Pocket Prayer Quilt
  • Art Quilt Gallery
  • Quilted Cards Gallery
  • Quilt Shops
  • Contact Us
  • Sked Verks
    • Sked Verks Gallery
    • Sked Verks Online Store
  • Return Policy - FAQs

Tote/laptop bag tutorial

6/11/2019

0 Comments

 
Picture
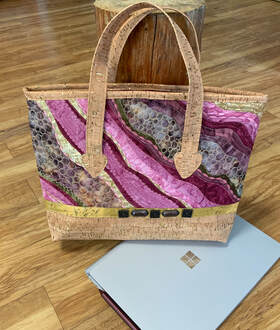
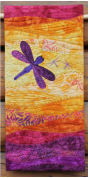
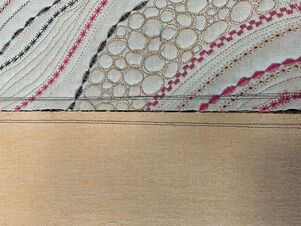
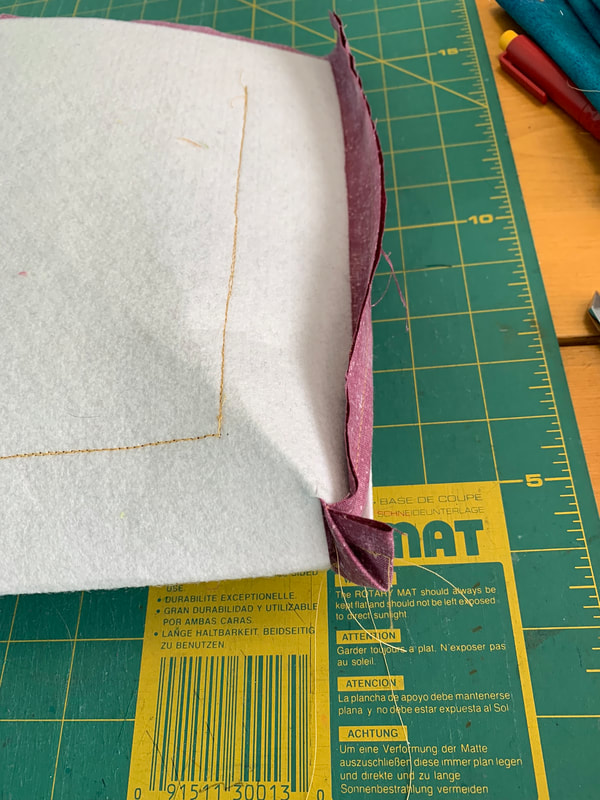
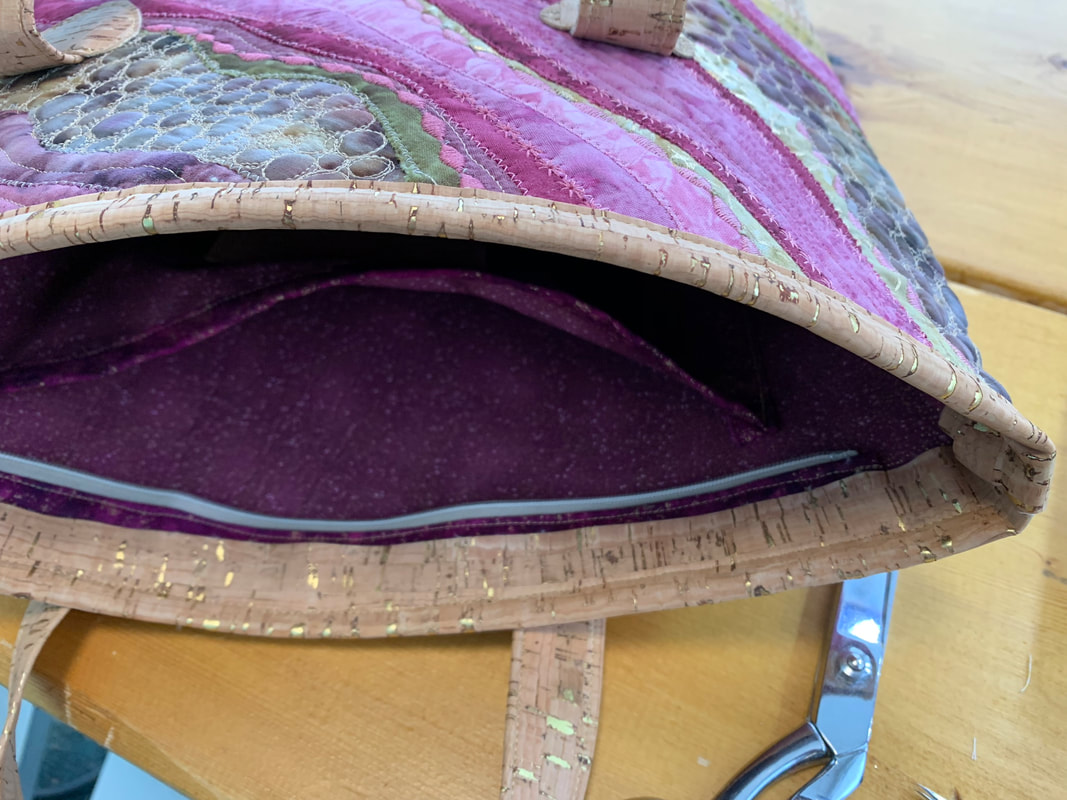
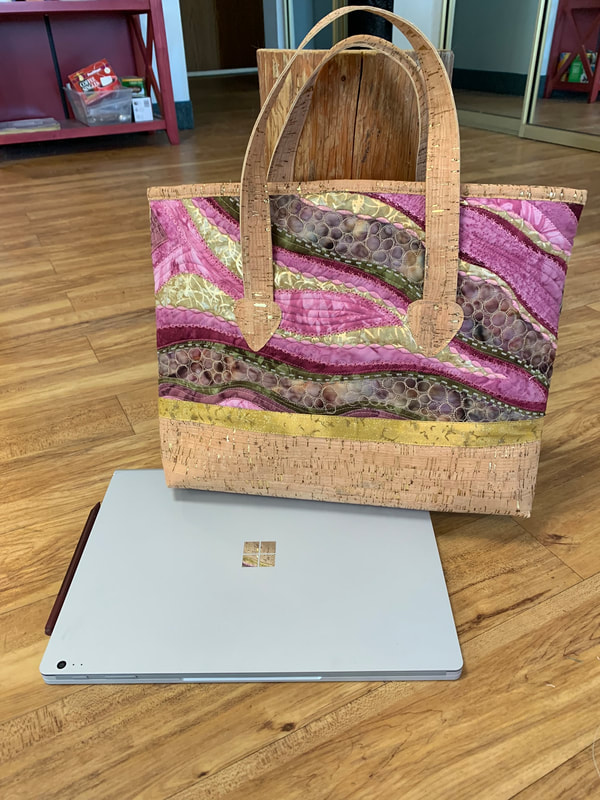
I'm really trying to put more of my tutorials here instead of other forms of social media... I think they will be more accessible! I recently made a really fun bag for my Microsoft Surface Book, but it would be a great bag for many uses, and easily customized. I also was able to incorporate both cork fabric and a UFO art quilt that had been sitting around for awhile! I may do it as a class, or even two classes since the quilted part is optional. Let me know if that sounds interesting, local people! 

This won't be a complete tutorial, but I will include a few things that can be applied to many different bag projects, like my favorite tote bag zipper method! 
First of all, the gold strip under the buttons wasn't strictly decorative. The quilted part and the cork fabric are both fairly substantial, so to avoid a bulky seam there, I added the strip between them. If the strip is cut 4 times the seam allowance, the two thick layers will butt up together on the inside, which was my goal. Mine was 3/8" seam allowance, 1 1/2" strip, final size 3/4". Here is a photo (second photo below) of the inside at that spot. No overlap of the thick layers, but also no gap.
Picture
Original UFO quilt... I was aiming for an agate, but guesses included bacon, dragon, river, snakeskin, lava, rocks, geode... :-) It's better as a bag!
Picture
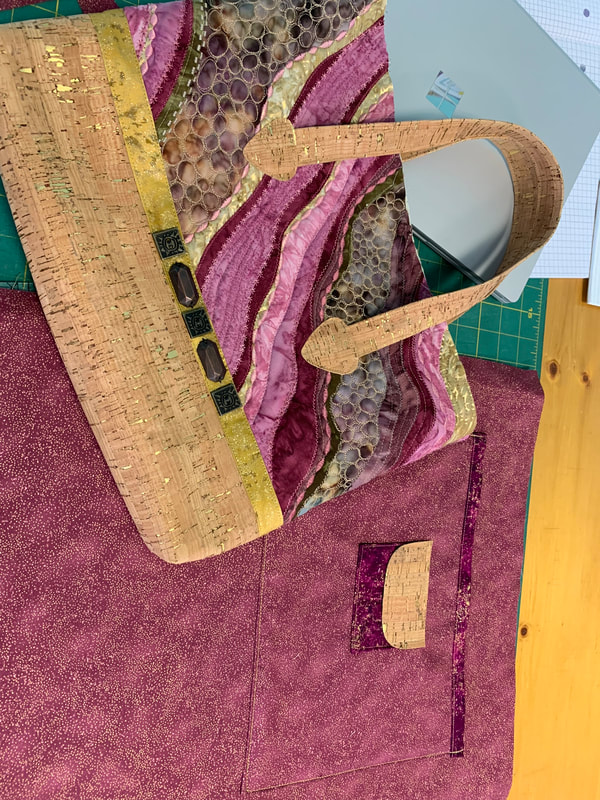
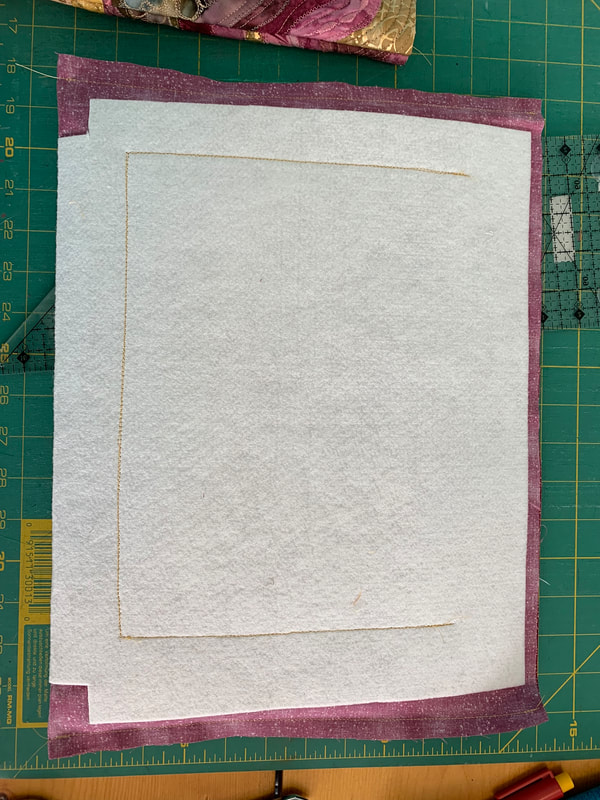
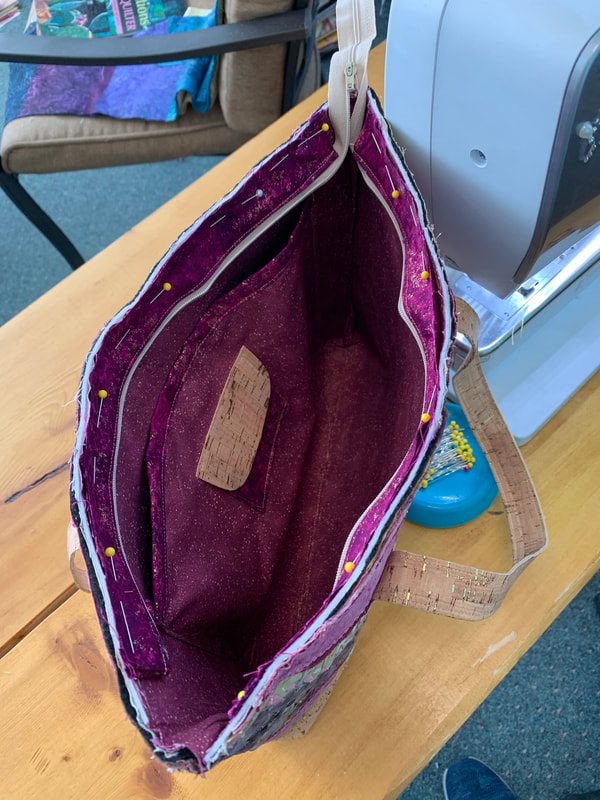
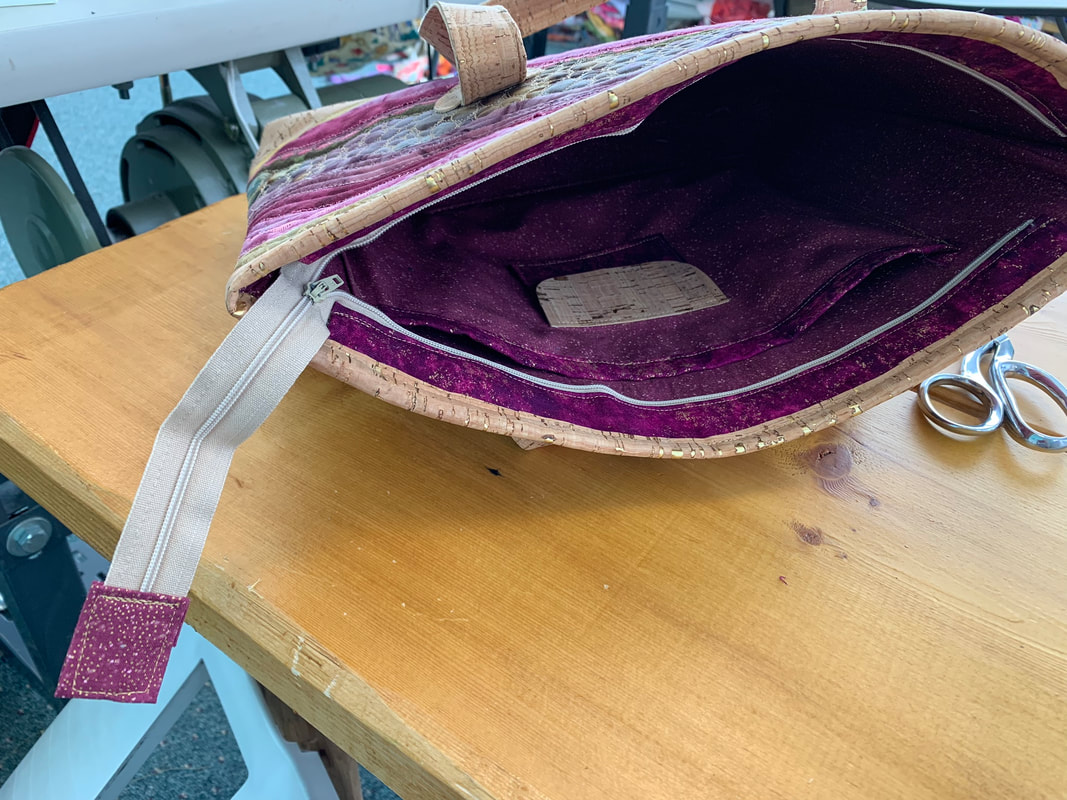
I made the outside with a section of quilt, then cork, then quilt, attached with the gold strips for both seams. I didn't photograph that, but here is a diagram. Mine was 16" wide and 24" long, but that can be varied to any size you want. I also made 3/4" box corners, which makes the "bottom" 1 1/2" wide. I also added the handles at this point, which I made by folding a strip of cork in half and topstitching both edges. I attached them, then covered the ends with a rounded triangle cut out of cork. Then this gets folded in half right sides together, and sides and box corners stitched. (see lining for at least partial photos of those steps.) Also any decorations such as buttons get added now. 
Picture
I made the lining the same size, then I cut out a piece of Peltex stiff interfacing the same size, minus the seam allowances and the corners, and fused that to the wrong side of the lining. Then I added a larger pocket for the cord and mouse, and a smaller one on that pocket for thumb drives. Then stitched the side seams and box corners. It would have been easier to do the seams and corners first, but then adding the Peltex would have been harder, so I went with this option! Since I used binding to attach the inside and outside, the lining just tucks right in, no wrestling it through a hole, or turning it right side out, it stays just like this. 
Picture
Picture
Picture
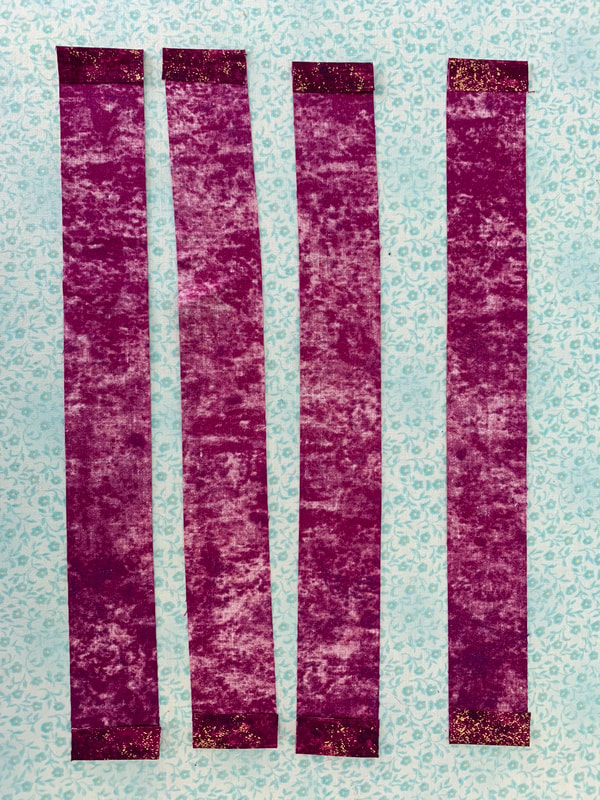
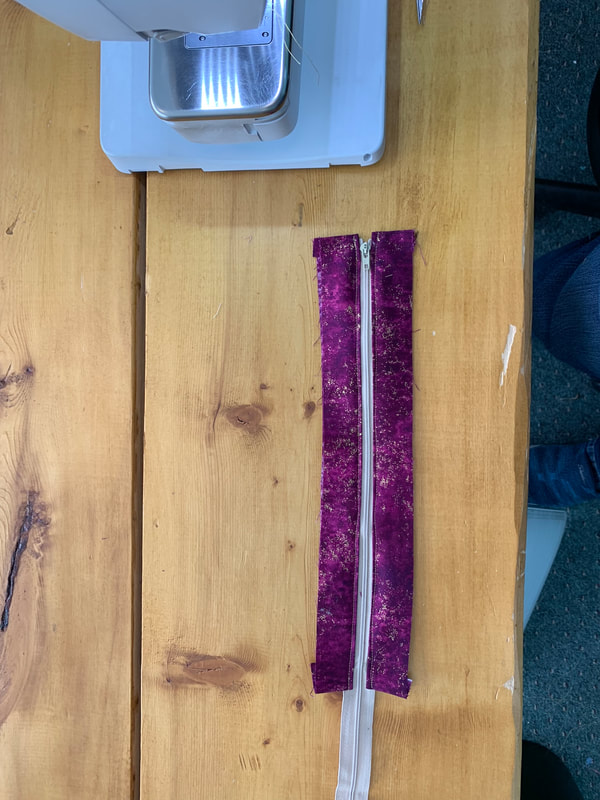
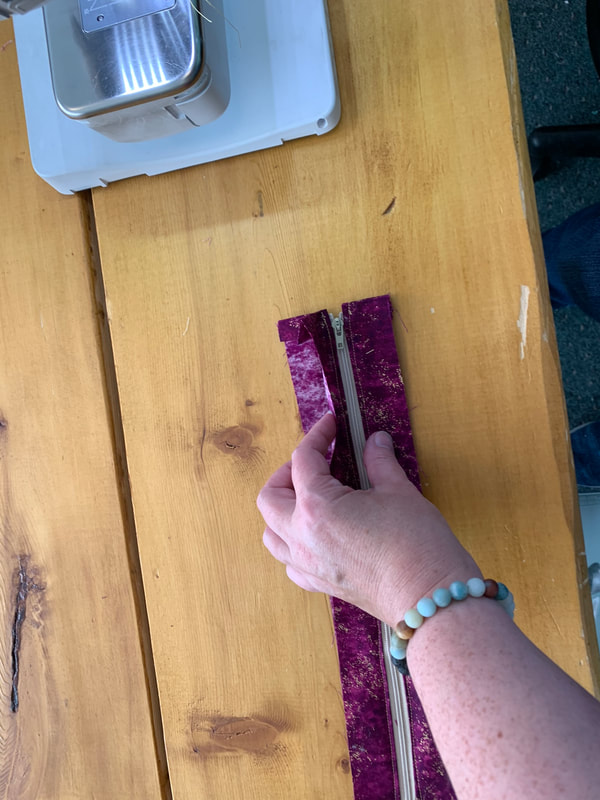
After I tucked the lining into the bag, the thickness of it caused the lining to stick up a bit, so I just trimmed it off :-) 
Picture
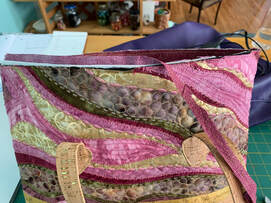
And now for the dreaded zipper! But with this method, it really isn't bad at all. The secret is adding the zipper to strips of fabric, and then attaching those with the binding. You never have to deal with the zipper and the bag at the same time! Use a zipper that is longer than you need also, so you can open it up all the way when attaching the strips to the bag. 
First, cut four strips that are one inch narrower than your bag, and about 1 1/2 inches wide, bigger if the bag is wider. Then press under 1/2" at both ends of each strip as shown. Now you are going to sandwich your zipper between these strips, two on each side, but it's easier to do one at a time. In the last photo below, the zipper is face down on the right side of the fabric. The open end is at the end of the strip, with the excess zipper tape folded over. Stitch it down fairly close to the teeth using a zipper foot. The zipper will be extra long at the other end, that's what you want. 
Picture
Picture
Picture
Now add another strip directly on top of the one you just did, right sides together, with the zipper in between. Do the same to the other side of the zipper. Then, topstitch on either side of the zipper to flatten it out...hard to press with a zipper! There, that wasn't too bad, right? Much easier than putting a zipper in a bag! At this point, it's easy to add to the bag, I promise! 
Picture
Picture
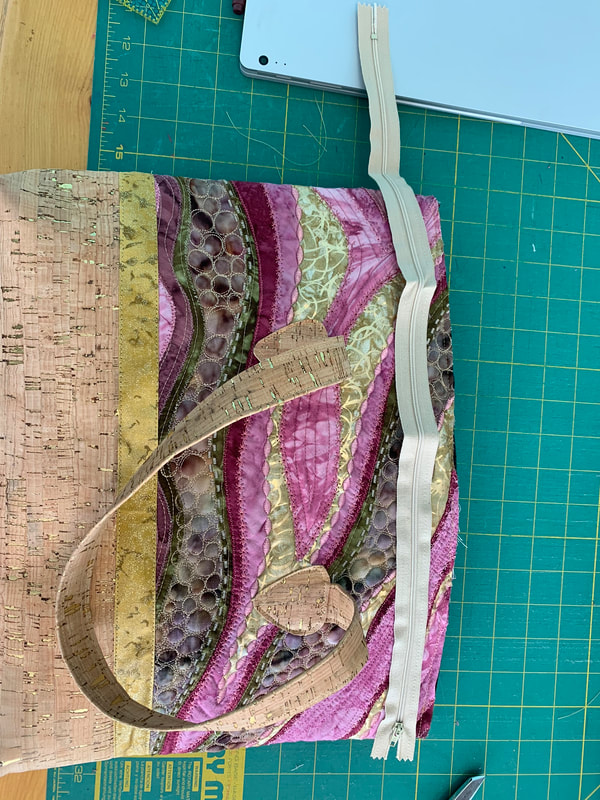
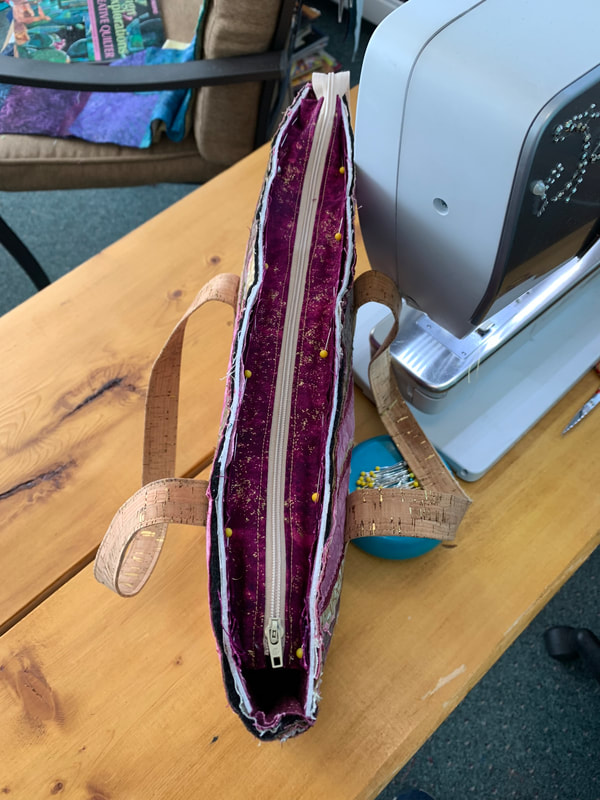
 Center the zipper on the inside edge of the bag. Both ends should be an inch away from the corners, which keeps them from getting in the way of the binding. See how it helps to unzip the zipper past the opening? Tuck the extra zipper in the bag through the hole in the corner, mine is sticking out so you can see it... Stitch the strips to the bag, through the outside and the lining, using a narrow seam allowance that will be covered by the binding. You could even use a zig zag to reduce bulk, but I didn't think of that until now, ha! It's a good idea to zip before stitching to make sure the sides are lined up. Then unzip all the way before binding, and you won't even know it's there!
Picture
Picture
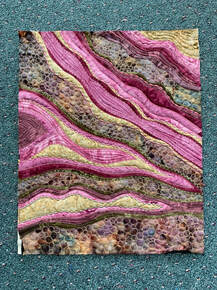
You can use your favorite binding method to finish at this point, but I thought it would be cool to try cork fabric. I knew the normal method would be too bulky, but then I thought it would be hard to catch the back side if I just used a strip folded over the edge. I ended up cutting it extra wide, and trimming it after it was stitched. I put the extra on the inside, and stitched from the outside. I cut it about 1 1/2" wide. There's a bit of waste, but I think well worth it! I had to use two pieces as my cork fabric was too narrow to use just one. I overlapped the ends just a bit. The first photo shows after stitching but before trimming the extra on the inside. I just trimmed close to the stitching, maybe 1/8". The second photo shows how you can shorten the zipper if it is WAY too long. There you have it, send me a photo if you try it, or any part of it! Send to beret@onthetrailcreations.com or post in our On the Trail Creations VIP facebook group. Happy Sewing! I'll put one more of the final bag at the end also. Ok, two... front and back. I've been using this bag and I love it! 
Picture
Picture
Picture
Front
Picture
Back
Click here to see all of our patterns and kits! (There isn't one for this bag, let me know if that would be better than this sketchy tutorial, ha!)
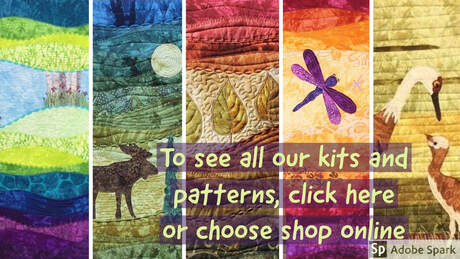
Picture
0 Comments

    Beret Nelson's On The Trail Creations Blog Page
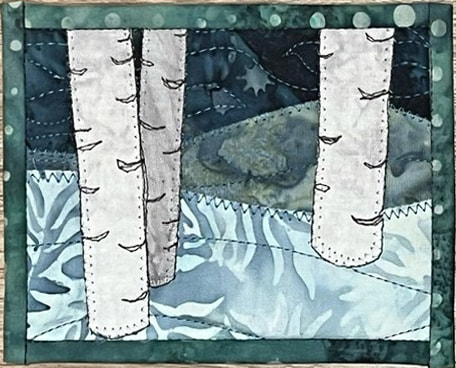
    Picture

    Beret Nelson

    I am a homeschooling mom of three fun kids, who are now old enough that I have a little time to pursue my passion for sewing! After several years of making quilted cards and art quilts, I'm now designing kits and patterns.  Some of my designs have been in Keepsake Quilting and Art Quilting Studios magazine! I  teach classes online, and am starting to do more traveling and teaching. I also have many tutorials, including some on YouTube. I am blessed to live in Alaska where I am surrounded by the inspiration provided by the beauty of God's creation!
    To see all of my patterns, click here.
    To follow my blog, sign up below to receive e-mails, and/or "like" my facebook page, button below!

    Free card pattern and also an e-book, and a quilt planning checklist!
    Picture
    * indicates required
    Picture

    "Like" my facebook page!

    I am also an independent distributor for Plexus supplements, since I credit them with enabling me to be healthy enough to do all these fun things! They target blood sugar and gut health, which are at the root of so many modern health issues. E-mail me for more info, or check out my website! I am as passionate about getting people healthy as I am about getting people creating :-)

    beret@onthetrailcreations.com
    or

    https://plexusworldwide.com/beretnelson
      

    Archives

    March 2023
    February 2023
    December 2022
    November 2022
    September 2022
    March 2022
    December 2021
    November 2021
    July 2021
    April 2021
    February 2021
    January 2021
    November 2020
    October 2020
    September 2020
    August 2020
    April 2020
    March 2020
    February 2020
    January 2020
    December 2019
    November 2019
    October 2019
    July 2019
    June 2019
    May 2019
    January 2019
    December 2018
    October 2018
    September 2018
    August 2018
    July 2018
    June 2018
    May 2018
    April 2018
    March 2018
    February 2018
    January 2018
    December 2017
    October 2017
    September 2017
    August 2017
    June 2017
    May 2017
    April 2017
    March 2017
    February 2017
    January 2017
    December 2016
    November 2016
    October 2016
    September 2016
    July 2016
    June 2016
    May 2016
    April 2016
    March 2016
    February 2016
    January 2016
    November 2015
    October 2015
    September 2015
    August 2015
    July 2015
    June 2015
    May 2015
    April 2015
    March 2015
    February 2015
    January 2015
    December 2014
    November 2014
    October 2014
    September 2014
    August 2014
    July 2014
    June 2014
    May 2014
    April 2014
    March 2014
    February 2014
    January 2014
    December 2013
    November 2013
    October 2013
    September 2013
    August 2013
    July 2013
    June 2013
    May 2013
    April 2013
    March 2013
    February 2013
    January 2013
    December 2012
    November 2012
    October 2012
    September 2012
    August 2012
    July 2012
    June 2012
    May 2012
    April 2012
    March 2012

    Instagram

    RSS Feed

Picture
  • Home
  • Shop Online
    • Art For Sale
    • Collage Art Quilt Kits
    • Store - Wall Hangings/Table Runners Kit & Patterns >
      • Sandhill Sunset Wall Hanging
      • Moonshadows Wall Hanging
      • Moonlight Moose Table Runner
      • Serenity Wall Hanging
      • Summer Dragonfly Wall Hanging
      • Summer Dragonfly Table Runner
      • Moonlight Moose Wall Hanging
      • Autumn Leaves Wall Hanging
      • Autumn Leaves Table Runner
      • Night Owl Wall Hanging Quilt
    • Store - Quilted Greeting Card Kits/Patterns >
      • Acrylic Card Template
      • Trish Stuart Collection
      • Out On a Limb Card Kit
      • Wonder Lake Card Kit
      • Moonshadows Card
      • Raven Moon Card
      • Chickadee With Berries Card
      • Whale Tale Card
      • Moose and Willows Card Kit
      • Raven Card Kit
      • Wild Iris Card
      • Northwoods Nisse Card
      • Boreal Botanicals Card
      • Winter Trees Card
      • For the Birds Card Pattern
      • Wild Flower I Card Pattern
      • Wild Flower II Card Pattern
      • Wild Flower III Card Pattern
      • Wonky Heart Card Pattern
      • Whimsical Heart Card Pattern
      • Black-Capped Chickadee Card
      • Three Leaves Card Pattern
      • Let it Snow Card Pattern
      • Happy Birthday Card Pattern
      • Tundra Swan Card Pattern
      • Milepost Card Pattern
    • Store - Coffee Kuspuks/Quilt Panels >
      • Season of Hope Velvet Panel
      • Screen Prints
      • Coffee Kuspuk
      • Moonlight Moose Potholder Kit
      • Chickadee Menu Planner
      • Spring Flowers Coaster Pattern
      • Teresa Ascone Panels
      • Scrappy Baby Bib
    • Molly Molecule Book
  • Online Classes
    • Simple Secrets for Art Quilting
    • Framed Collage Quilt Class
  • Beret's Blog
  • 40 Ways
  • About Us
  • Tutorials
    • Grace quilt tutorial
    • Sewing Machine Needle Organizer Pincushion
    • Organza silk screen tutorial
    • Polymer Clay button tutorial
    • Birch Tree card tutorial
    • Coffee Shop greeting card
    • Free Motion Stitching Tutorials >
      • Free Motion Tutorial
      • 10 minute project tutorial
      • Valentine Coasters
      • Grape hyacinth postcard
      • Advanced free motion projects >
        • Sparkly 3D dragonfly wings
        • Inktense Frog quilt
        • Dream Big flower panel
    • Journal Cover - Book Tutorials >
      • Quilted Book Cover Tutorial
      • 1000 Gifts Journal Cover Tutorial
      • Quiet Book Tutorial
    • Tutorials for Our Kits >
      • Moonshadows Video Tutorials
      • Summer Dragonfly Video Tutorials
      • Serenity Video Tutorials
    • Video Tutorials - Screenprinting, Inktense, Quilted Card Binding
    • Pocket Prayer Quilt
  • Art Quilt Gallery
  • Quilted Cards Gallery
  • Quilt Shops
  • Contact Us
  • Sked Verks
    • Sked Verks Gallery
    • Sked Verks Online Store
  • Return Policy - FAQs