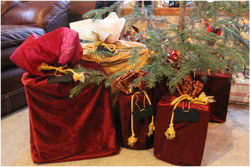
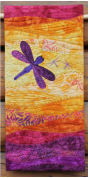
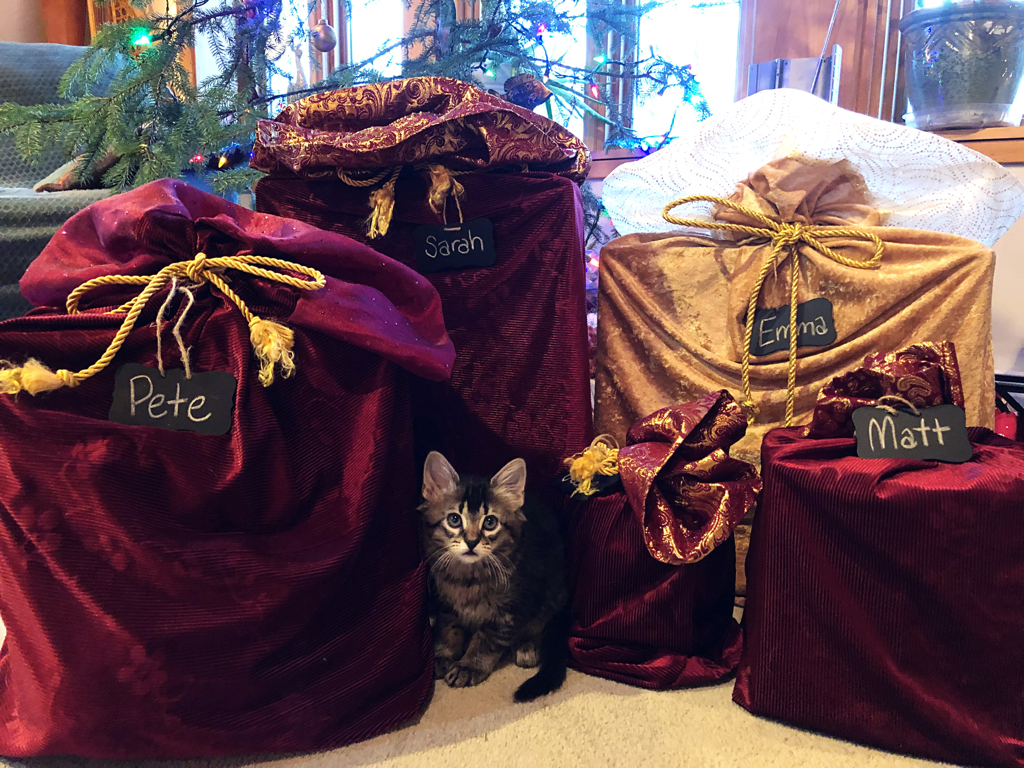
 Imagine yourself at 11:00 pm on Christmas Eve, you finally got the kids to sleep, the lights are twinkling on the tree…you would love to relax on the couch with a cup of tea, but now you are faced with a pile of gifts to wrap…Those gifts you have been meaning to wrap for days and never got to. And then you remember! You made a bunch of fabric bags just for this! It only takes a second to stuff gifts in and tie them shut! They work on odd shaped gifts like the duck decoy you got for Uncle Harold, and things that are still in their Amazon box. You get everything wrapped and get to sleep long before you normally do. Then, on Christmas morning, there is no mound of paper to get rid of, and you put some empty boxes back in their bags and back under the tree, so it still looks nice even after the gifts have been opened! You sit back with your tea and enjoy the morning. Or maybe you are one of those people who DO get things wrapped early, but you still love to save time. These are great for you too! They’ve been a life saver for me, so here is a quick tutorial. They are super easy to make. Choose the size you want your bag to be. Make lots of sizes! But then you just need to cut your fabric twice as large as you want them. You can add a bit for seam allowance if you want, but the sizes are pretty random anyway, so it doesn’t really matter. I start with some the whole width of the fabric, some half, and some a third. I usually fold the fabric in half and sew one side and the bottom. But you could fold it vertically (as long as it is not directional) and stitch both sides instead, to get some other sizes and still have no waste. I like to use velvety fabrics for the bags, and sparkly fabrics for the bands. Cut the band fabric the same width as your bag, and twice as tall as you want it, as you will fold it over before stitching on. You can add it before stitching the side seam, but I prefer to add it after, so the seam doesn’t show at the top. But, no rules! Just stitch the side and bottom of the bag, and the side of the band. Then fold the band in half so the seam is on the inside, put it inside the bag (which is still inside out) lining up all raw edges, and stitch around the top. If you have a serger, this is a great time to use it…even faster! All that is left is to add a cord, which I do by using a zig zag stitch in the middle of the cord, attached at the side seam where the bag and band meet. We also use chalkboard tags, which are quick and also re-usable. I hope you try this gift to yourself that keeps on giving! They are also great to give away.
There are lots more tutorials on our website, and of course, kits and patterns too! 
0 Comments
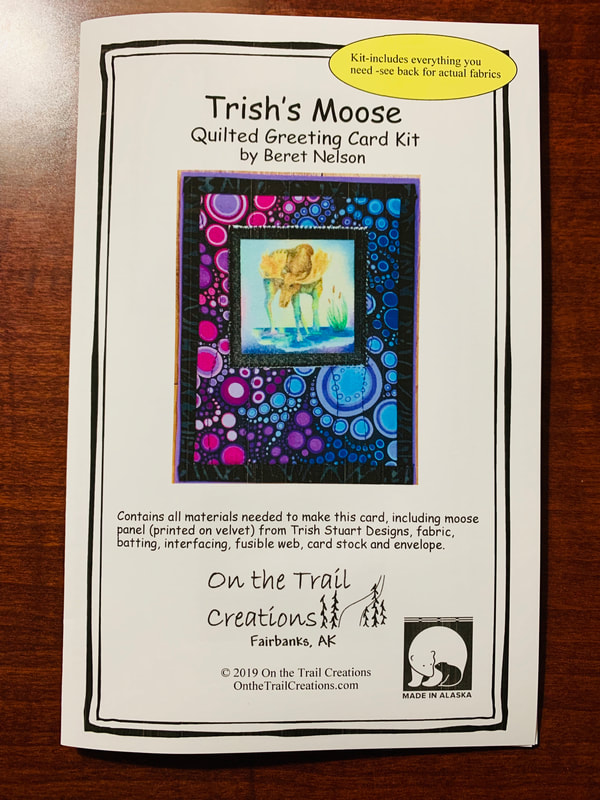
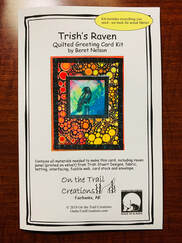
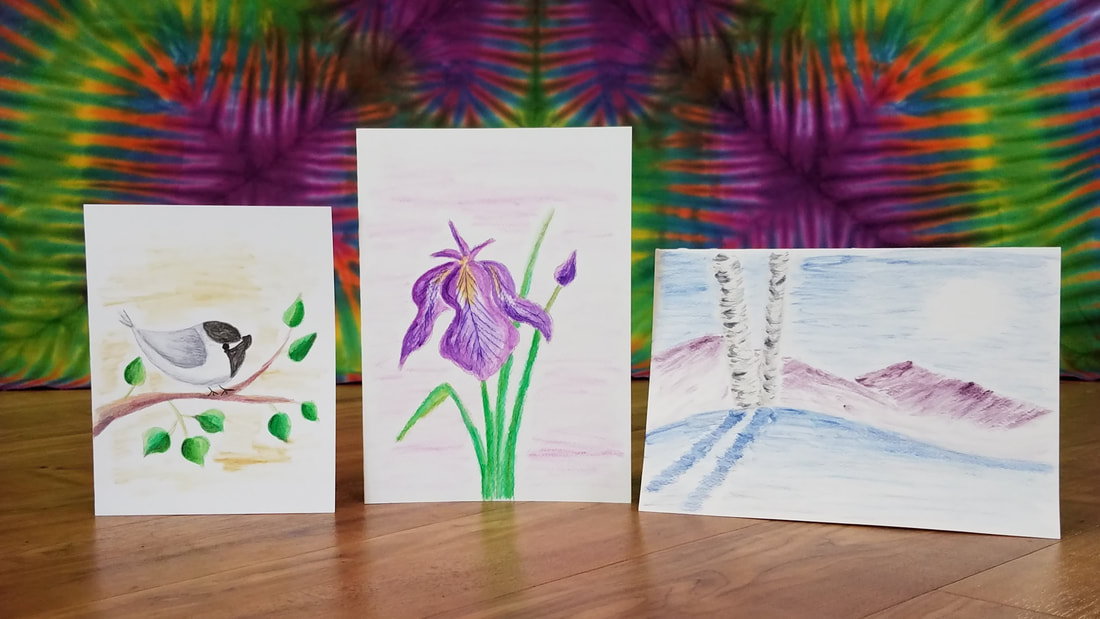
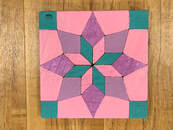 Once again, it's been awhile, but lots going on! At least four new things to tell you about, wow... Classes: We have several months worth up on the website now! We will add a kids' class for after Christmas eventually too. The newest class will be monthly, and I'm very excited about it! Friends of ours in Michigan, The Reclaimed Nation, have barn wood blocks with quilt designs on them for painting. Everything will be provided for you to make a large (10-12") and small (5") block. Additional blocks will be available to purchase if you wish. Several designs to pick from. But there are sewing classes up too! Click here to sign up for a class Eversewn machines: I'm so excited to now be able to offer Eversewn machines for sale! I have never found a brand of machines in this price range that I felt comfortable recommending until these. There are four levels of basic machines, ranging from $200 to $475, then a quilting machine and embroidery machine; those I'm not super familiar with yet though. I've been using the Sparrow 25's in my kid classes for almost a year, and I've been happy with them! I'm not totally organized yet with demos of each model, but if you are interested, I'd be happy to talk to you. I do have a couple of models in stock.  New kits: Thanks to the artwork of former Fairbanks resident Trish Stuart, we have two new card kits. These are both very quick projects, I think I actually managed to not have any free motion stitching on them! The fabrics are so nice you can't go wrong :-) The panels are printed on velvet! The background colors vary a bit, but the moose will be blue/purple, and the raven will be yellow/red. Click here to order :-)
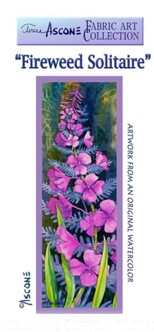
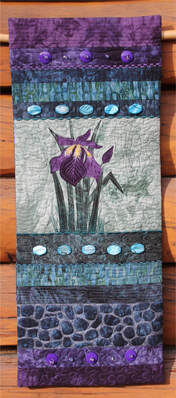
New Teresa Ascone panel: I love this new Fireweed Solitaire panel! I can't wait to play with it, but boy have I not had time yet... It is the same size and shape as the tall iris one, so I plan to make mine using similar borders to my iris one. Click here to order :-)
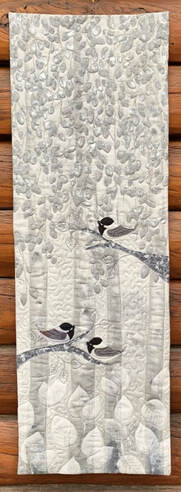
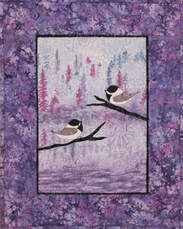
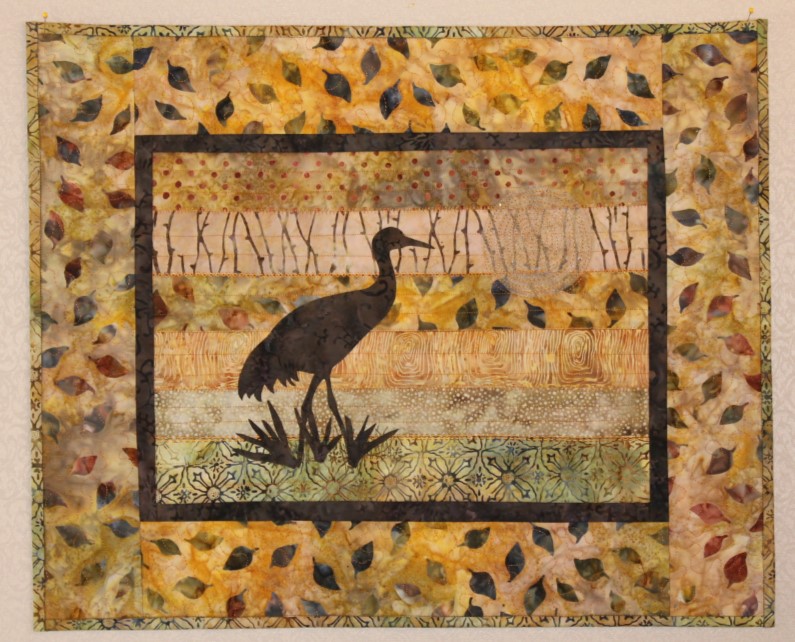
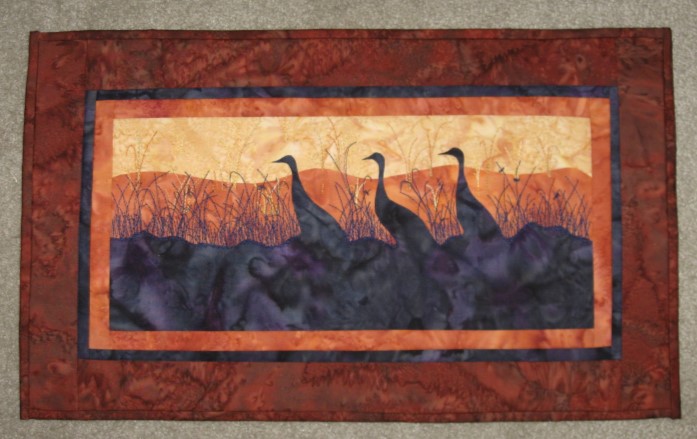
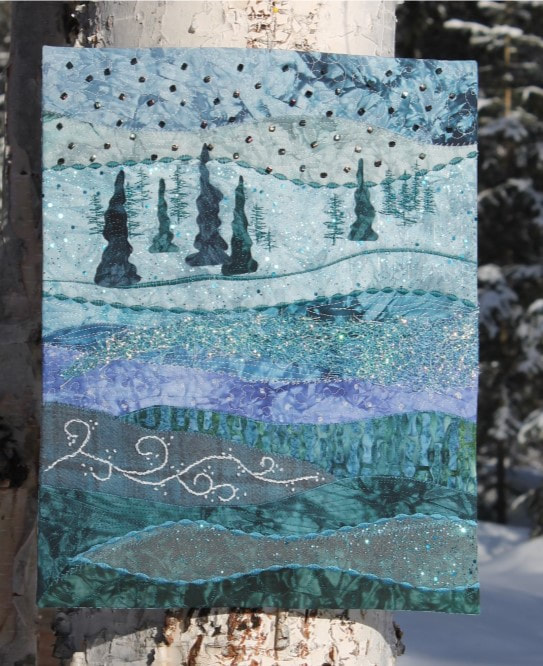
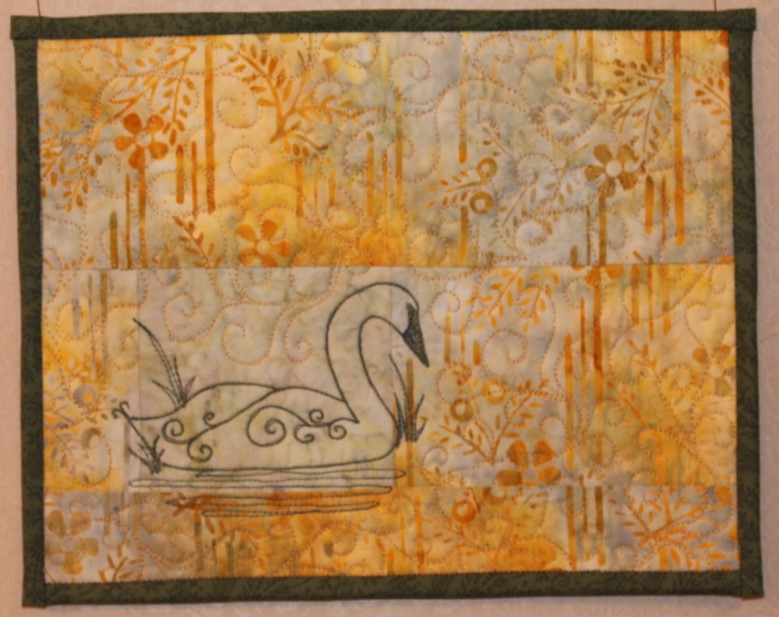
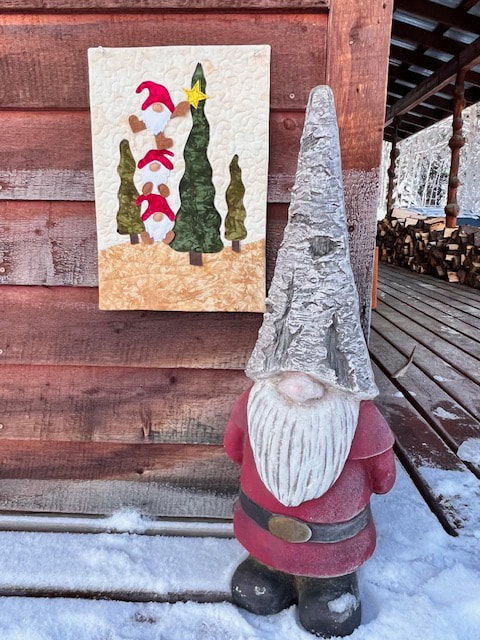
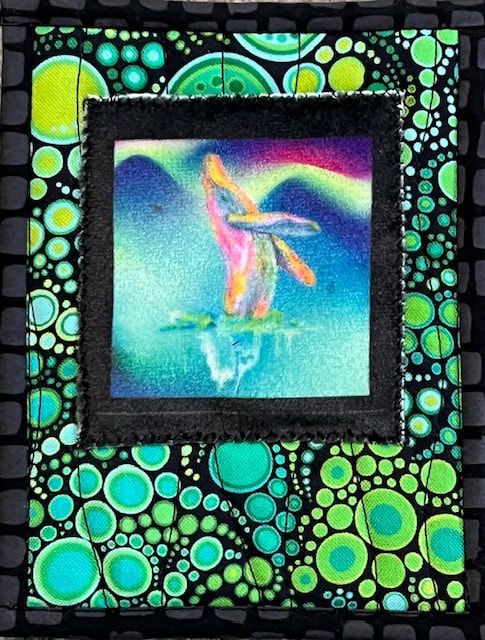
Whew, that's a lot of stuff! And more in the works :-) I'm also in the mad rush for bazaar season, my first one is the UAF Women's bazaar, Pioneer Park, Nov. 2-3 (both days this year!), 10-4. I hope you are all enjoying fall, it's pretty much done here. I took sooooo many pictures this year, lots of colors even here where we don't have a huge variety of trees... We might not have much for maples, but the tamaracks have been amazing this year. Thanks for making it to the end of this post! Happy Sewing, Beret 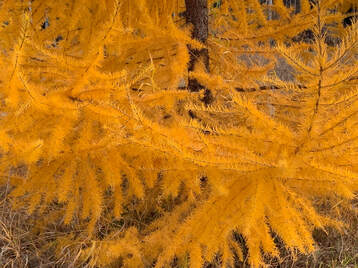 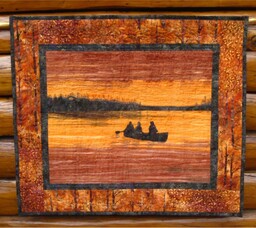 Seagull Sunset Seagull Sunset Have you ever wanted to try art quilting but don’t know where to start? I have a few easy ways to help get you over the hurdle of getting going! I have lots of tricks for making projects that look great but are really pretty simple when you break them down. These are all landscape style quilts. Let’s start with the background. There are several ways to give yourself a head start. Use a watercolorish fabric, which looks like a landscape all by itself. (Seagull Sunset quilt) Or, use a panel that doesn’t have too much going on in the foreground, they are out there! (see two chickadee quilts) If you are a bit braver, you can make a simple striped background. (two single crane quilts) I like to have a bit of gradation in mine, but that’s not always necessary. If you are even braver, do a curvy stripe background. Just three carefully chosen fabrics cut with curved edges begins to look like a world! Basically, the top one needs to look skyish! (quilt with three crane silhouettes) From there, it’s not too hard to add mountains….then trees… It’s kind of addicting once you get started :-)
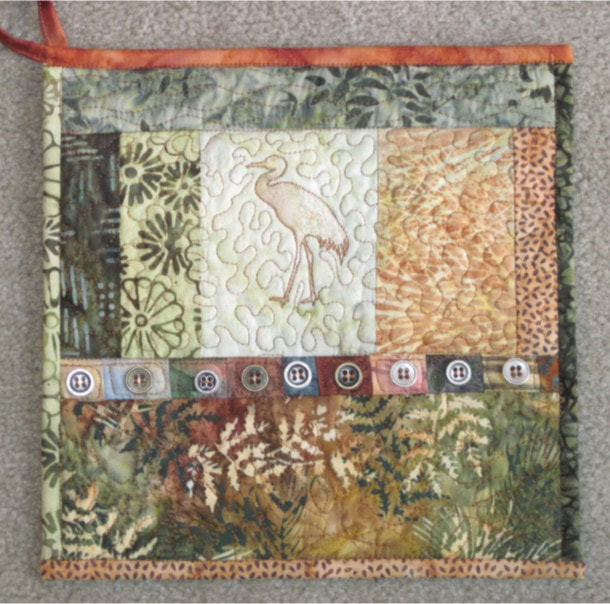
Once you have a background, there are some simple ways to add a foreground. The simplest of all is to do a silhouette. Several of these quilts were done that way. (more below) The Seagull Sunset quilt is done with only two fabrics other than borders! I also added a bit of thread sketching for some details, but only two fabrics. For the background, I cut it in half and flipped one half vertically so the sky and water are mirror images. So not only two fabrics, but only two pieces of each one! A step up from silhouette appliques is more detailed appliques. Those can be as detailed as you’d like. As you get more confident, you can add thread painting or other embellishments. Another little trick is to use lots of borders. The teal tree quilt has only a small area that has the actual scene on it, the rest of the stripes are basically borders. The crane potholder is another example of that, and the iris and the swan. And I often do not make my borders the same all the way around, that is another way to make quilts artsy. I add details to borders with bead, buttons, quilting, decorative stitching or other art quilty techniques. Once you break quilts into parts, you can see that you can do a lot of fun projects without doing anything super complicated. I hope you will give them a try, and send me a picture! Either like my On the Trail Creations Facebook page and send a message, or join my On the Trail Creations VIP facebook group. And of course, our kits and patterns are another way to give you a head start on your art quilting journey!
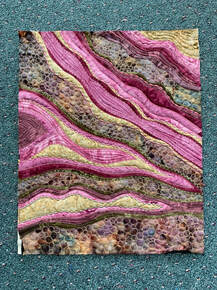
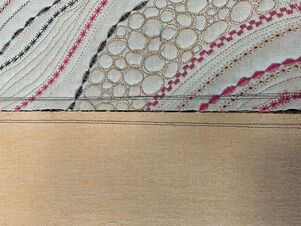
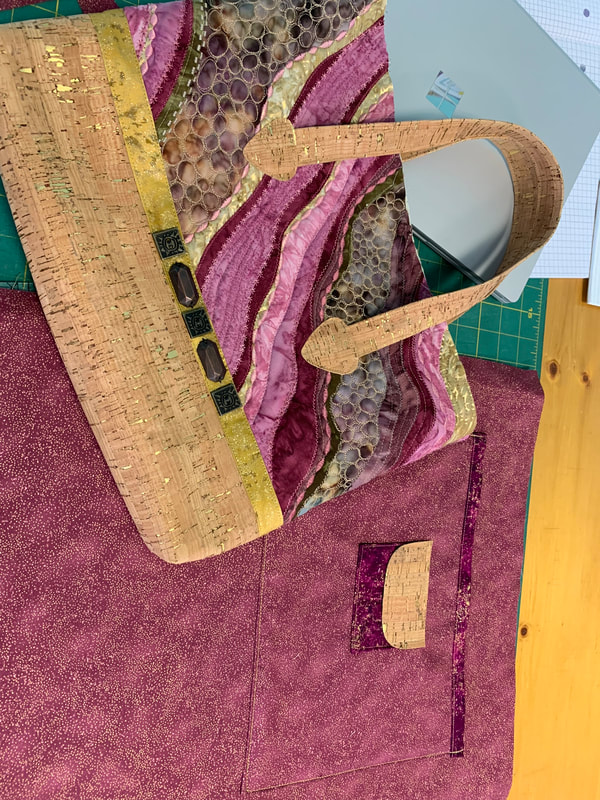
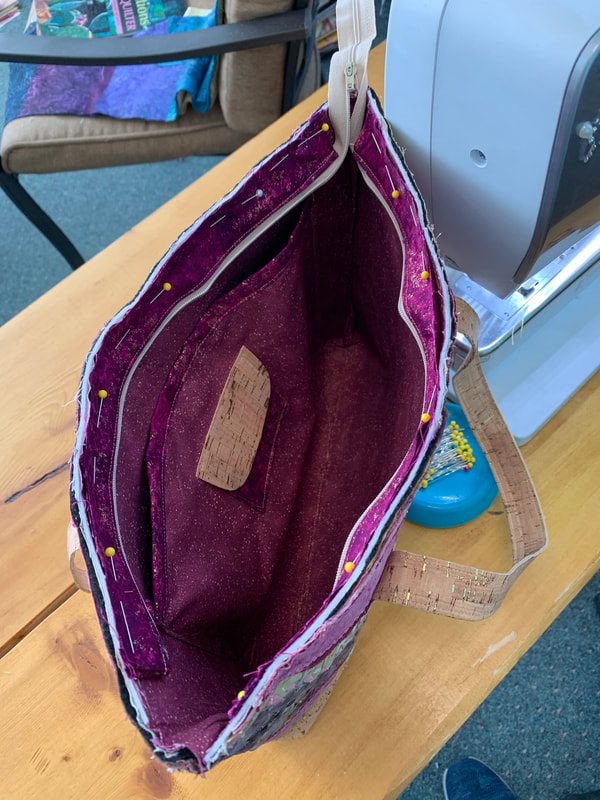
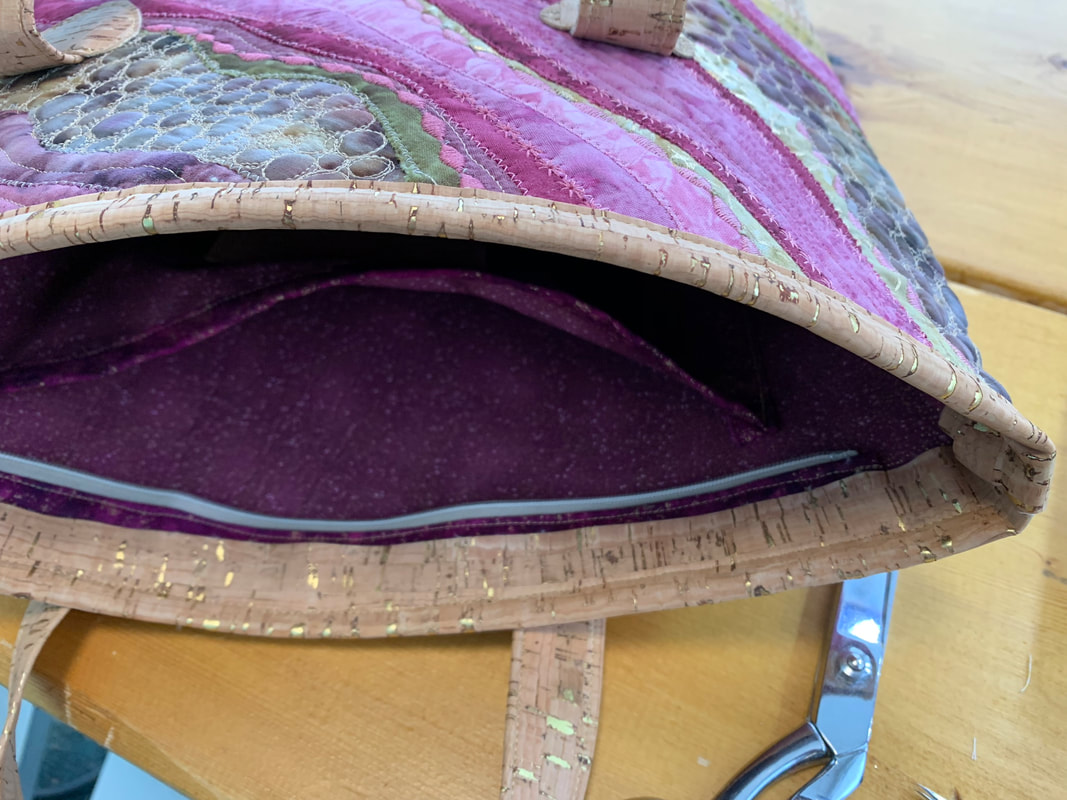
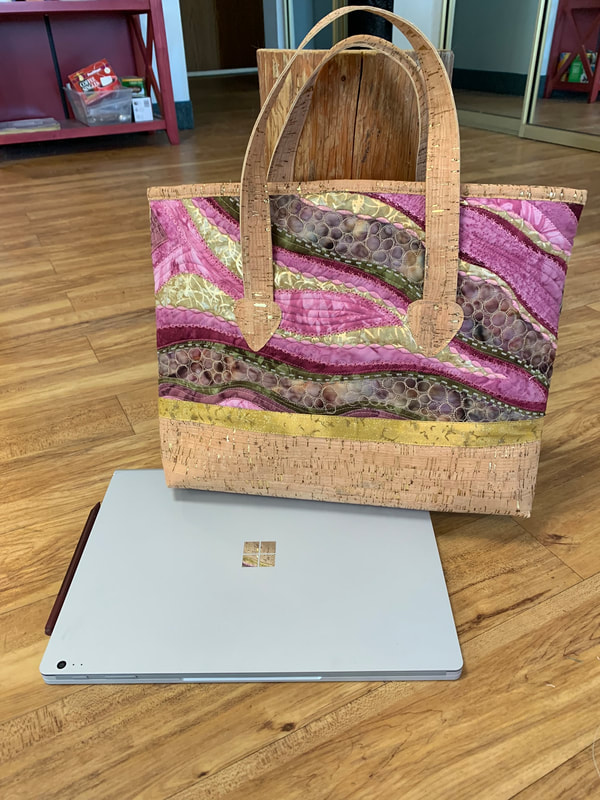
 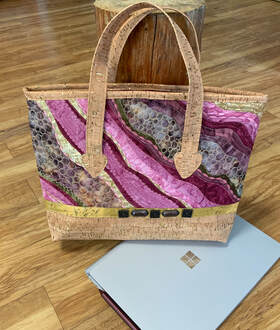 I'm really trying to put more of my tutorials here instead of other forms of social media... I think they will be more accessible! I recently made a really fun bag for my Microsoft Surface Book, but it would be a great bag for many uses, and easily customized. I also was able to incorporate both cork fabric and a UFO art quilt that had been sitting around for awhile! I may do it as a class, or even two classes since the quilted part is optional. Let me know if that sounds interesting, local people! This won't be a complete tutorial, but I will include a few things that can be applied to many different bag projects, like my favorite tote bag zipper method! First of all, the gold strip under the buttons wasn't strictly decorative. The quilted part and the cork fabric are both fairly substantial, so to avoid a bulky seam there, I added the strip between them. If the strip is cut 4 times the seam allowance, the two thick layers will butt up together on the inside, which was my goal. Mine was 3/8" seam allowance, 1 1/2" strip, final size 3/4". Here is a photo (second photo below) of the inside at that spot. No overlap of the thick layers, but also no gap.
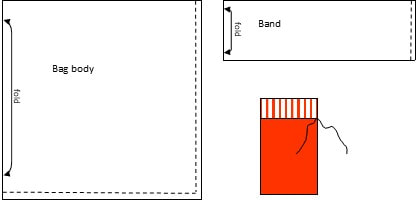
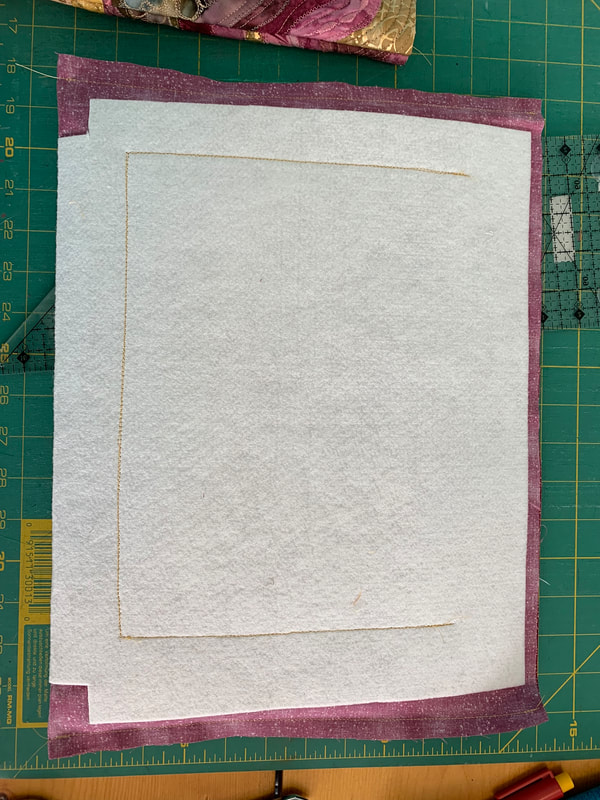
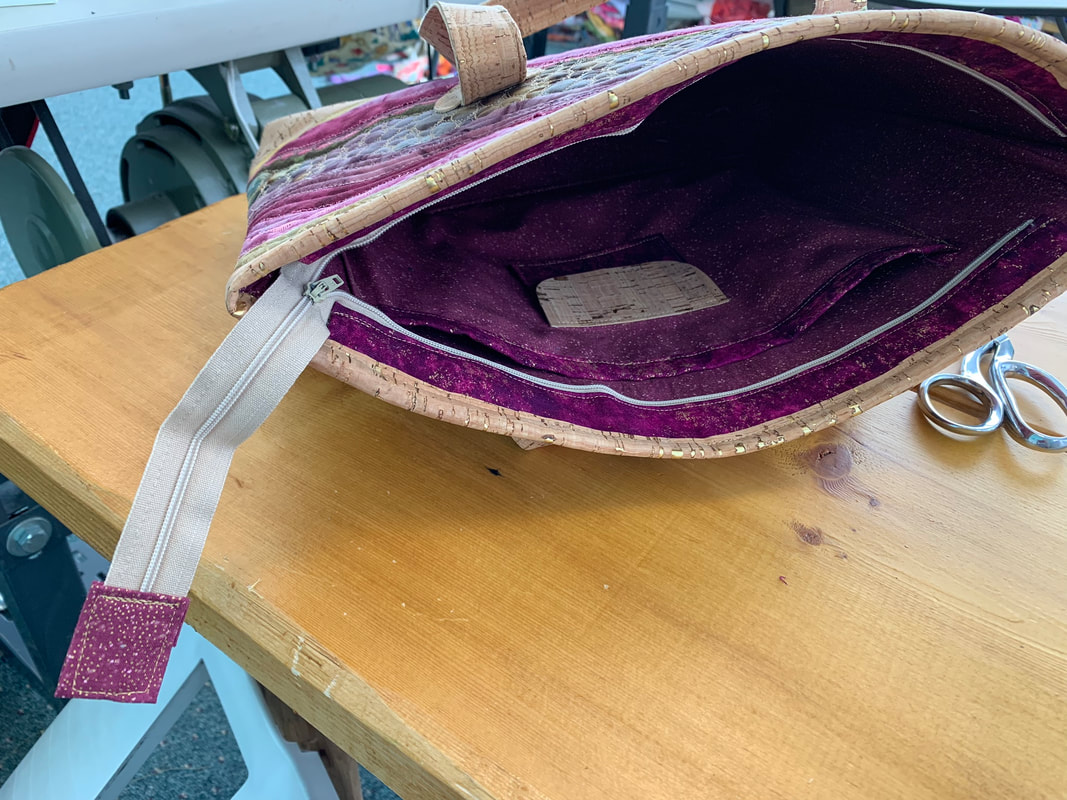
I made the outside with a section of quilt, then cork, then quilt, attached with the gold strips for both seams. I didn't photograph that, but here is a diagram. Mine was 16" wide and 24" long, but that can be varied to any size you want. I also made 3/4" box corners, which makes the "bottom" 1 1/2" wide. I also added the handles at this point, which I made by folding a strip of cork in half and topstitching both edges. I attached them, then covered the ends with a rounded triangle cut out of cork. Then this gets folded in half right sides together, and sides and box corners stitched. (see lining for at least partial photos of those steps.) Also any decorations such as buttons get added now.  I made the lining the same size, then I cut out a piece of Peltex stiff interfacing the same size, minus the seam allowances and the corners, and fused that to the wrong side of the lining. Then I added a larger pocket for the cord and mouse, and a smaller one on that pocket for thumb drives. Then stitched the side seams and box corners. It would have been easier to do the seams and corners first, but then adding the Peltex would have been harder, so I went with this option! Since I used binding to attach the inside and outside, the lining just tucks right in, no wrestling it through a hole, or turning it right side out, it stays just like this.
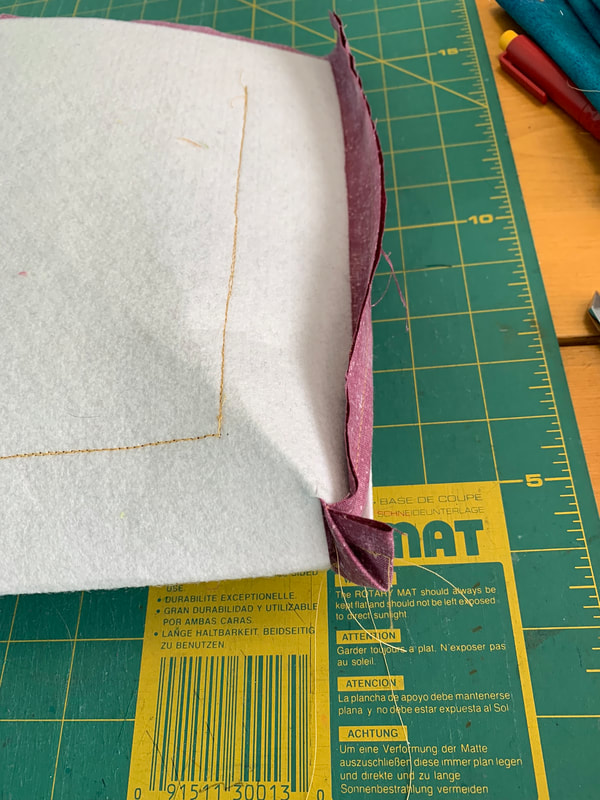
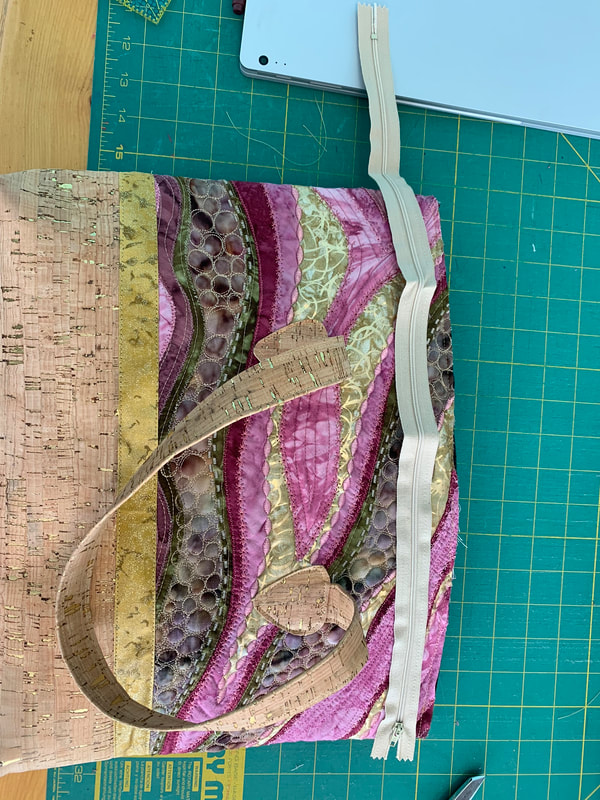
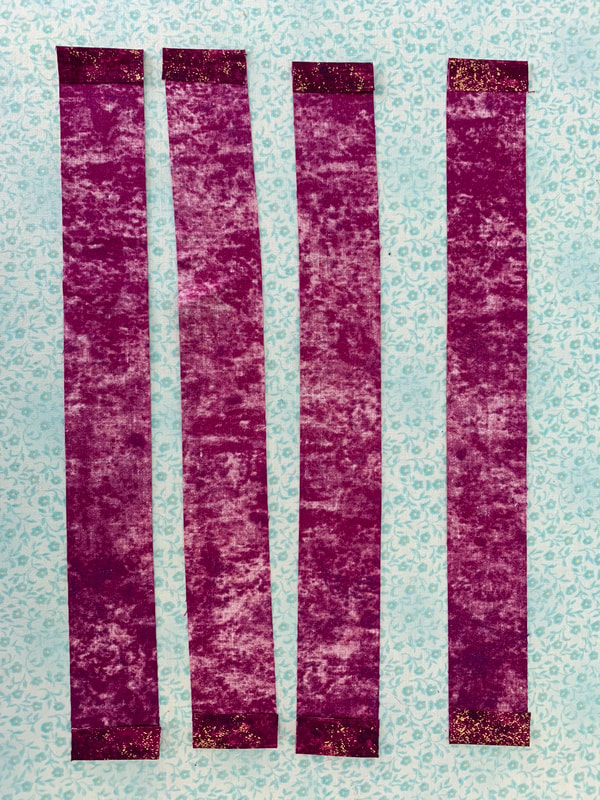
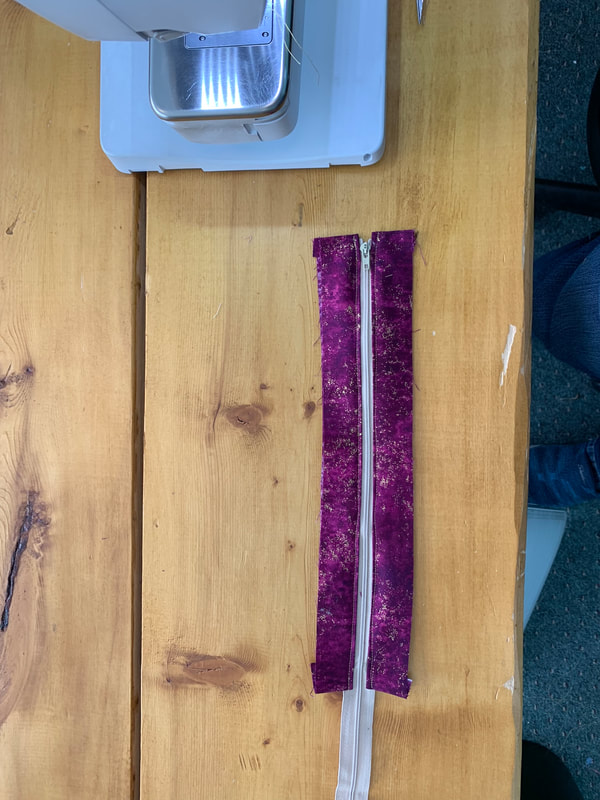
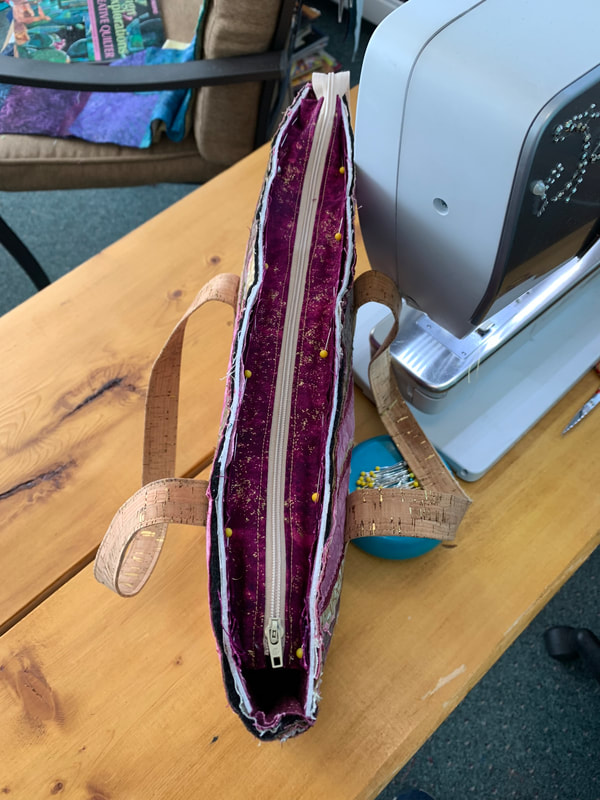
After I tucked the lining into the bag, the thickness of it caused the lining to stick up a bit, so I just trimmed it off :-) 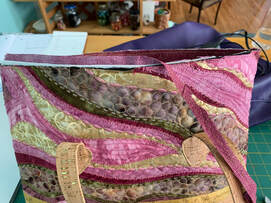 And now for the dreaded zipper! But with this method, it really isn't bad at all. The secret is adding the zipper to strips of fabric, and then attaching those with the binding. You never have to deal with the zipper and the bag at the same time! Use a zipper that is longer than you need also, so you can open it up all the way when attaching the strips to the bag. First, cut four strips that are one inch narrower than your bag, and about 1 1/2 inches wide, bigger if the bag is wider. Then press under 1/2" at both ends of each strip as shown. Now you are going to sandwich your zipper between these strips, two on each side, but it's easier to do one at a time. In the last photo below, the zipper is face down on the right side of the fabric. The open end is at the end of the strip, with the excess zipper tape folded over. Stitch it down fairly close to the teeth using a zipper foot. The zipper will be extra long at the other end, that's what you want.
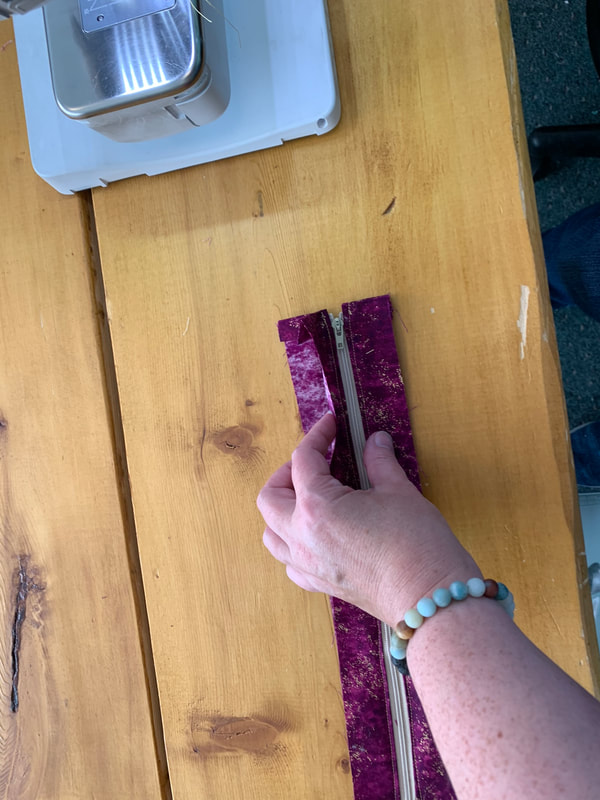
Now add another strip directly on top of the one you just did, right sides together, with the zipper in between. Do the same to the other side of the zipper. Then, topstitch on either side of the zipper to flatten it out...hard to press with a zipper! There, that wasn't too bad, right? Much easier than putting a zipper in a bag! At this point, it's easy to add to the bag, I promise!
Center the zipper on the inside edge of the bag. Both ends should be an inch away from the corners, which keeps them from getting in the way of the binding. See how it helps to unzip the zipper past the opening? Tuck the extra zipper in the bag through the hole in the corner, mine is sticking out so you can see it... Stitch the strips to the bag, through the outside and the lining, using a narrow seam allowance that will be covered by the binding. You could even use a zig zag to reduce bulk, but I didn't think of that until now, ha! It's a good idea to zip before stitching to make sure the sides are lined up. Then unzip all the way before binding, and you won't even know it's there!
You can use your favorite binding method to finish at this point, but I thought it would be cool to try cork fabric. I knew the normal method would be too bulky, but then I thought it would be hard to catch the back side if I just used a strip folded over the edge. I ended up cutting it extra wide, and trimming it after it was stitched. I put the extra on the inside, and stitched from the outside. I cut it about 1 1/2" wide. There's a bit of waste, but I think well worth it! I had to use two pieces as my cork fabric was too narrow to use just one. I overlapped the ends just a bit. The first photo shows after stitching but before trimming the extra on the inside. I just trimmed close to the stitching, maybe 1/8". The second photo shows how you can shorten the zipper if it is WAY too long. There you have it, send me a photo if you try it, or any part of it! Send to beret@onthetrailcreations.com or post in our On the Trail Creations VIP facebook group. Happy Sewing! I'll put one more of the final bag at the end also. Ok, two... front and back. I've been using this bag and I love it!
Click here to see all of our patterns and kits! (There isn't one for this bag, let me know if that would be better than this sketchy tutorial, ha!)  It's been a crazy few months in my life, so I have been pretty absent here. I was in Minnesota for two months taking care of my mom. Nine days after we lost her, we gained our first grandbaby, Juliet Pearl. It's been a whirlwind... I'm glad to be home and getting back into my studio. As usual, I have lots of plans for more designs and tutorials, but life keeps getting in the way! I do have a lot of irons in the fire, so we have been doing a little regrouping and prioritizing. I managed to get one new pattern out while I was away, partly with the help of some faithful followers to do the sewing I couldn't do! Photos below of the pattern and my new grandbaby 😊 Here is a list of some of the things I am trying to incorporate into my business: Who we are! Kits and patterns: always first priority! We sell those here on this website and also wholesale to quilt shops. Always looking for ways to increase our website visibility, we've been working with Google. We recently discovered that an old business we had, which wasn't really even a business, was sabotaging this website since they had duplicate phone numbers; in the process of getting that sorted out, whew!! Classes: kids class is going well, aside from the 7 week break... More to come! Next week I will be in Wasilla for a class with the Valley Quilters Guild. Teaching is definitely a passion of mine, I want to see creative pursuits continue with current and future generations! Tutorials: I tend to put those on Facebook or Instagram, but I am planning to start putting them in blog posts instead, and/or pages here on the website. Also working on more YouTube videos, be sure to subscribe to our channel! Finished products: I am still making quilted cards and wall hangings for bazaars. We did six bazaars last year! In the summer, The Quilt Tree (Anchorage) and That Old Sew and Sew (Fairbanks) are pretty much the only places I have the cards, I can't keep up with more than that right now. Colorplay: I still have a great place to create, plus lots of cool stuff to share, so I want to get that going again! Monthly nights where people can come to learn a technique and have a fun night out. Along that same line, I would love to host private parties, whether birthday or other, older kids or adults. I have a variety of types of projects we could do, sewing, painting, and more. Eversewn machines: I am hoping to become the local dealer for these machines. I'm just starting that process, so I hesitate to put it here, but working toward that hopefully! I would love to have machines in a reasonable price range that I can confidently recommend to people, something I have always struggled with. Panels: In addition to kits and patterns, we have fabric panels for sale here on the website. So far they are mostly from Alaskan artist Teresa Ascone, but I'm planning to add some from Trish Stuart soon, and maybe even some of my own! They are a really fun way to have a quick project with someone else doing the actual artwork! That's a lot of stuff, and there are even a few more smaller categories I will leave out for now! This is what comes from a brain that never stops spinning with ideas 😂 I hope you are all having a great spring, and are making some time to create! Beret
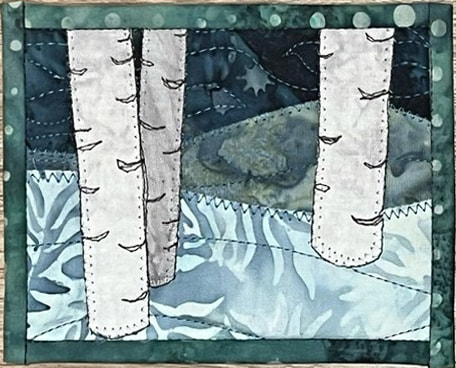
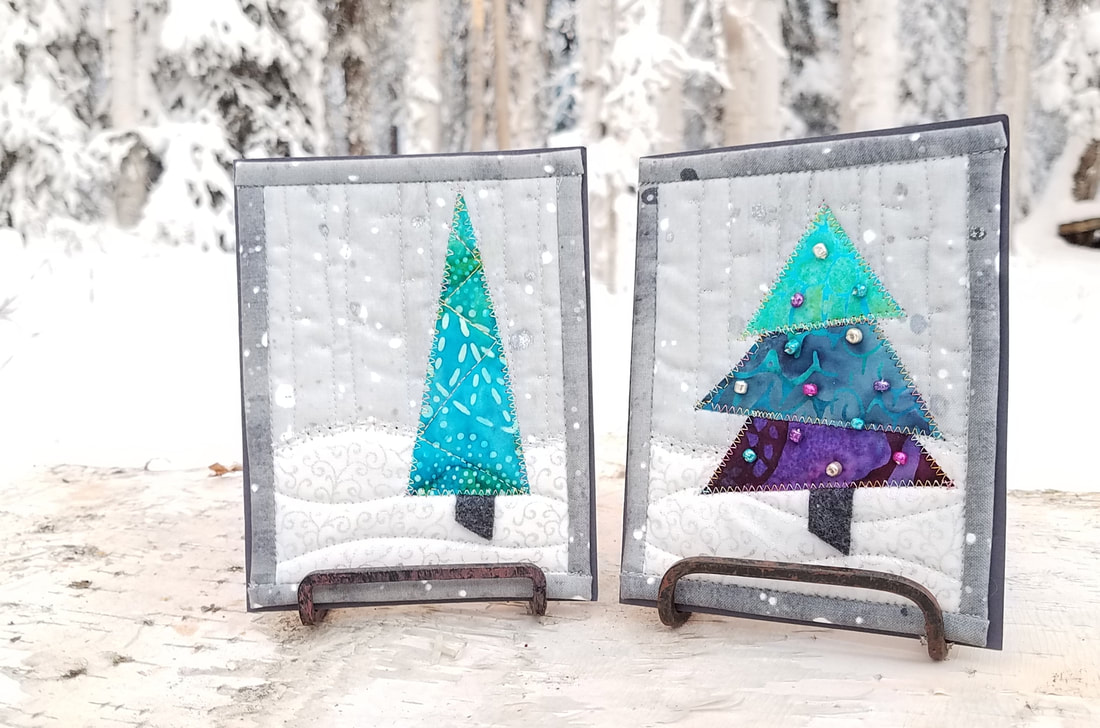
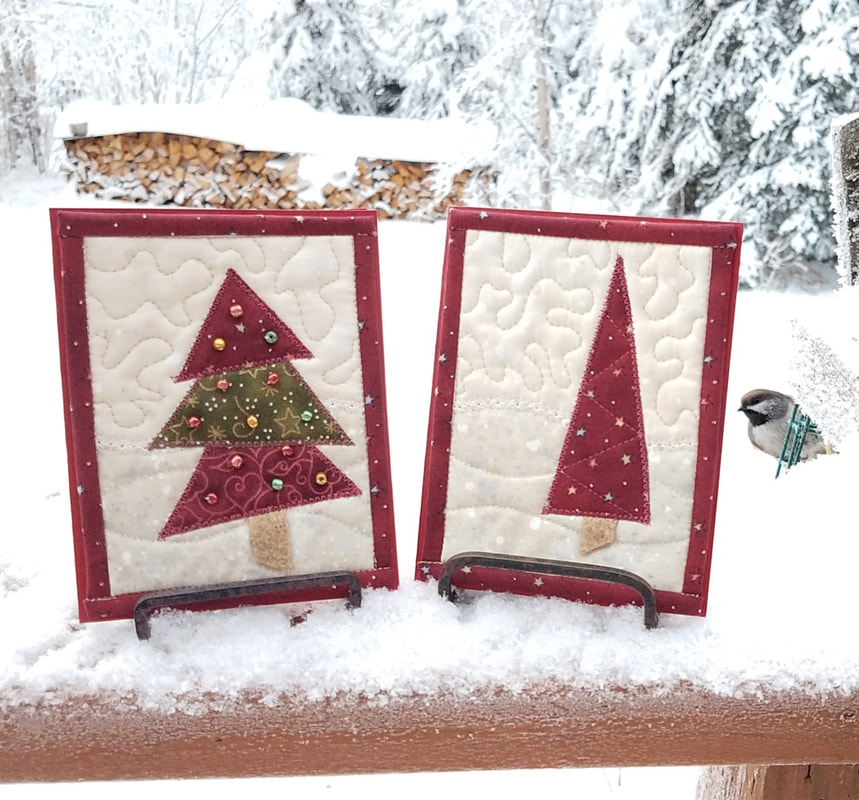
Whew!! After the busiest bazaar season, and really year, that I've had in a long time, I'm happy to announce that we finally have the parts together for a semester long beginning sewing class for home school students! The sewing room is coming together, I just need to get a few more supplies and paint the chairs I found lots of fun colors. For more information or to register, please see our Classes page or click on the photo. They start in about three weeks! 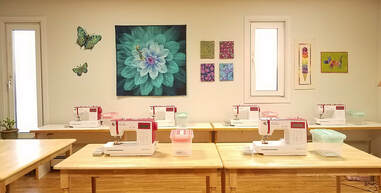 New classroom with 6 Eversewn Sparrow 25 sewing machines We've had a bit of excitement in Alaska this weekend with a big earthquake in Anchorage! Many people felt it here, I slept through it.... We're praying for everyone who was affected, and thankful that so far there have been no reports of major injuries! I've also been busy for weeks with bazaar season, and still have three to go: Naughty and Ice at West Valley Dec 8, 10-4 Tanana Valley Farmer's Market at the Carlson Center, Dec 9, 10-4? not sure... Goldstream Valley at the Ken Kunkle Center, Dec 15, 10-4 So, I've been sewing like crazy, but I still managed to finally get this pattern done for two of my most popular designs! It's a fairly easy one too, with lots of ways to add your own touch. It's called Winter Trees, group one, because I'm working on another set as well :-) I'm hoping to be able to start a page of photos if people send them in! Email them to me at beret@onthetrailcreations.com or post in the On the Trail Creations VIP Facebook group. Of course, we have to have a sale for this month too, so here it is: Every purchase of $24 or more will get a free printed copy of the new pattern! It's a $10 value, which is already a deal since our one card patterns are $8, and this is two for $10. Click either photo to order. I was pretty excited about the little boreal chickadee photobomb :-) No code or anything, it will just be included in your order. I hope everyone is having a joyful and not stressful Christmas season! Beret
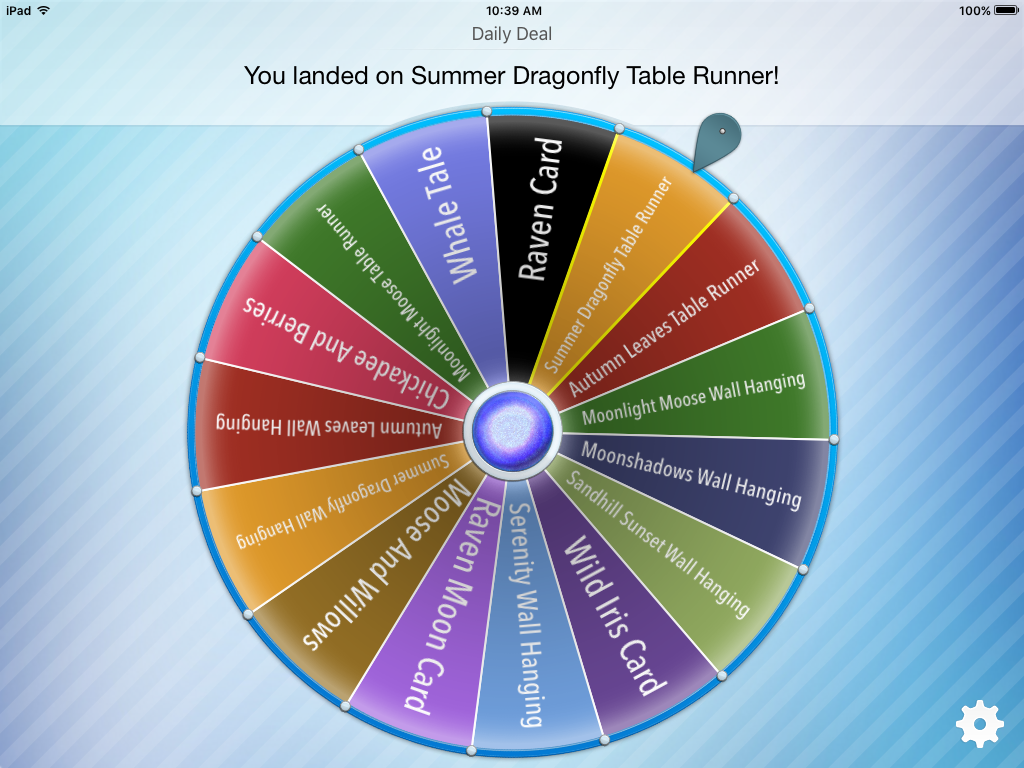
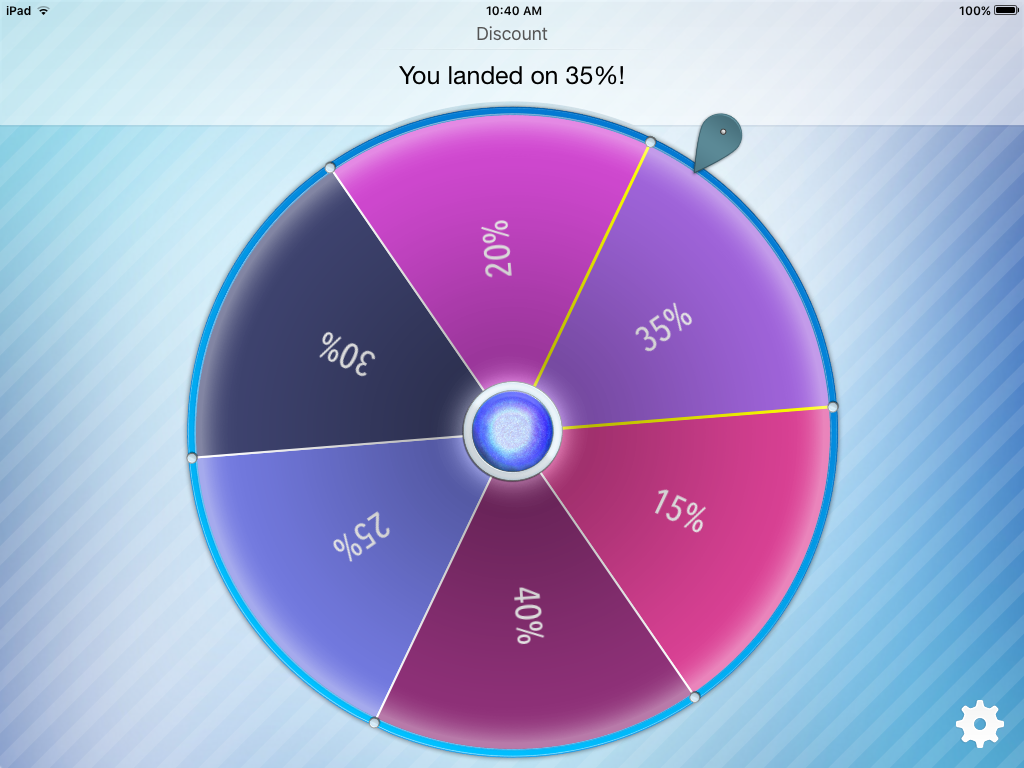
Yep, the snow has started (barely though...) and bazaar season starts Saturday, for me at least! (see list below, Saturday only for me this year at the first one) I've had lots of visitors and other delays in getting started on card making this year, which was all really fun, but making for a busy few weeks! It looks like I'm going to hit my goal of 250 cards still though! (For this bazaar, then I hope to make another 150 by the end of bazaar season. I will also have kits and patterns, and quite a few finished wall hangings, mostly from panels. That way I get to use other people's artwork, like Teresa Ascone and other Alaskan artists! :-) I will have some of her panels for sale also, including NEXT year's exclusive design! For local AND non local people, we are still doing a daily deal on the website, a different product and discount each day. Those are announced in the On the Trail Creations VIP group, and on Instagram, so follow us on one of those if you want to get in on the deals! The facebook group is still where I tend to post the most about what is going on. www.facebook.com/groups/614962188849895/ And I'm not the only one getting ready for bazaars at my house... My husband has caught the bug and is cranking out wooden spoons. Here is a sneak peek photo. He won't be at the one Saturday, but probably the rest after that. Here is my schedule: November 3, UAF Women's, Pioneer Park, 10-4 Nov 17, Quota Club, Pioneer Park, 10-4 Dec 8, Naughty and Ice, West Valley, 10-4? Dec 9, Farmer's Market, still waiting to see Dec 15, Goldstream Valley, Ken Kunkle Community Center, 10-4 I hope to see you there! And sorry, both photos are purposefully sneak peeks only :-) This is the cards with their binding strips waiting to go on! 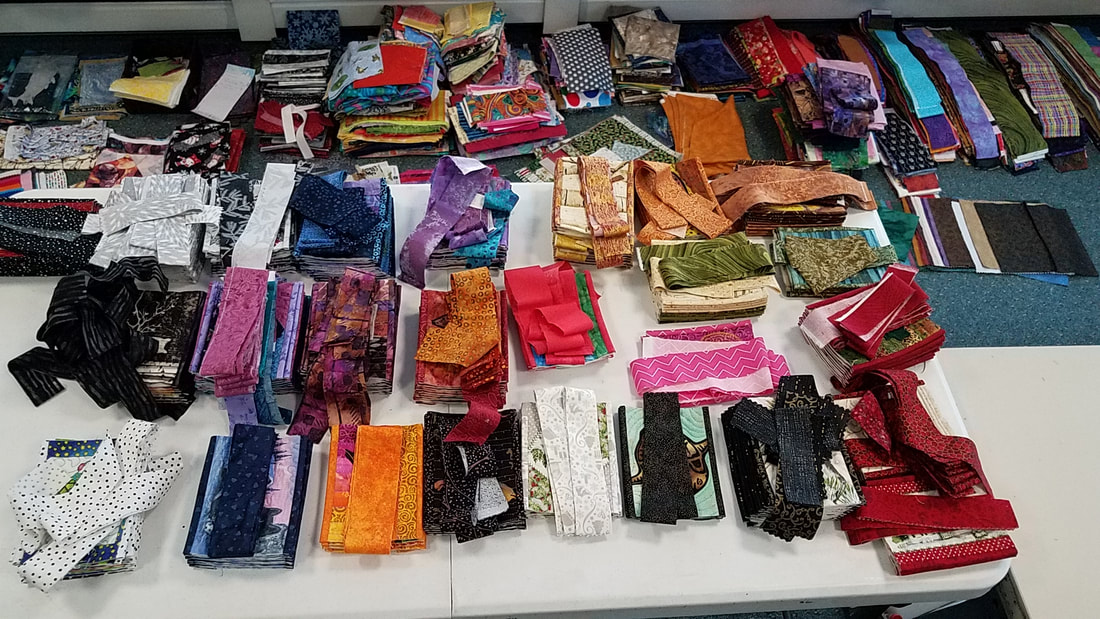 Quilted greeting cards in the making for bazaars  Hand carved wooden spoons and scoops ready for bazaars To see all of our kits and patterns, click the photo! 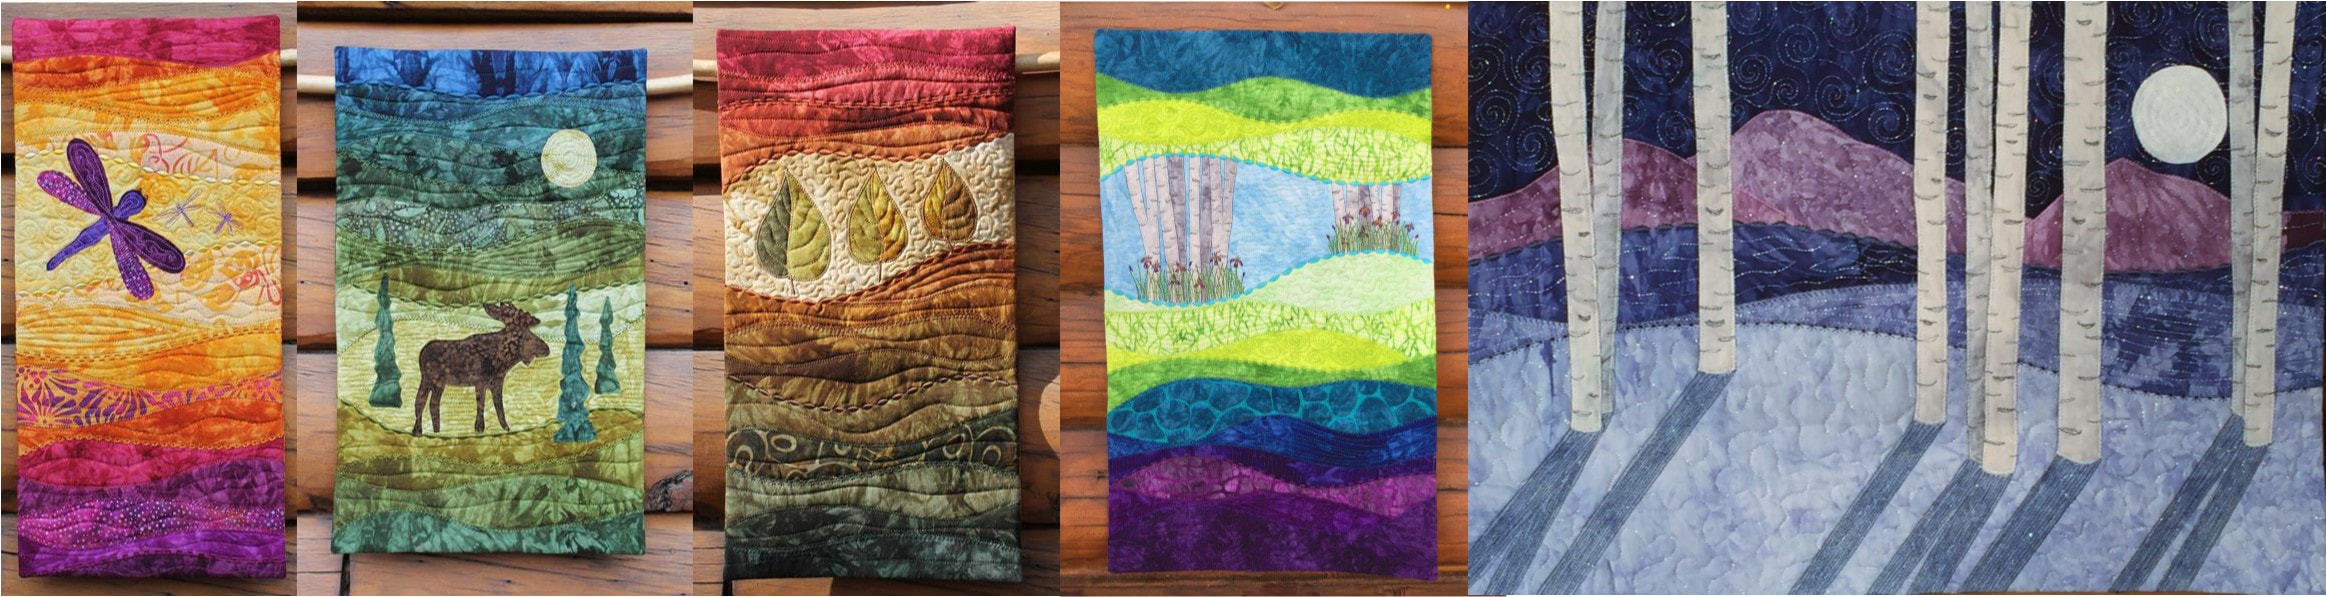 Quilted wall hanging available in kits and patterns If you are in our VIP group or follow me on Instagram, (which I recommend so you get our daily deals!), you will have seen that I skipped sewing yesterday to go hiking in the mountains while my family hunted caribou. I knew it would cost me a day of sewing, but it was so worth it! I neglected to factor in, however, how sore I would be today 😭😭😂😂. Ten days until the first bazaar and I have 9 cards all the way done, still aiming for an ambitious 200-250! I do have quite a few in progress, but that's still going to take some doing! Stay tuned... 😂😂 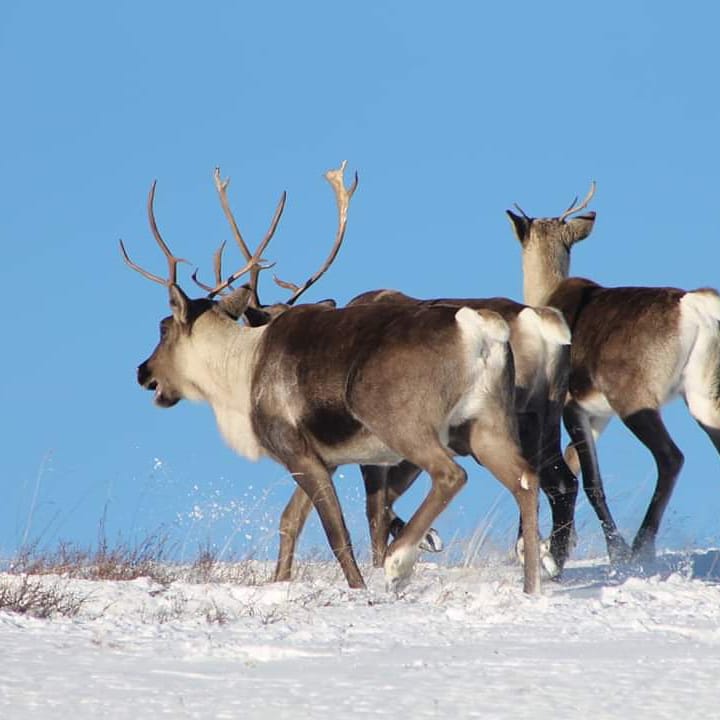 Beautiful October day and caribou in Alaska 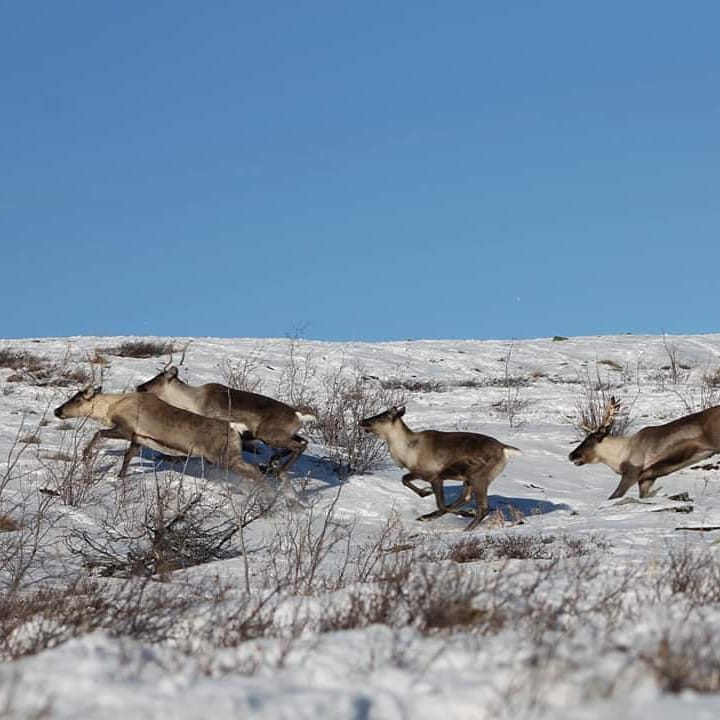 Small herd of caribou came right by me 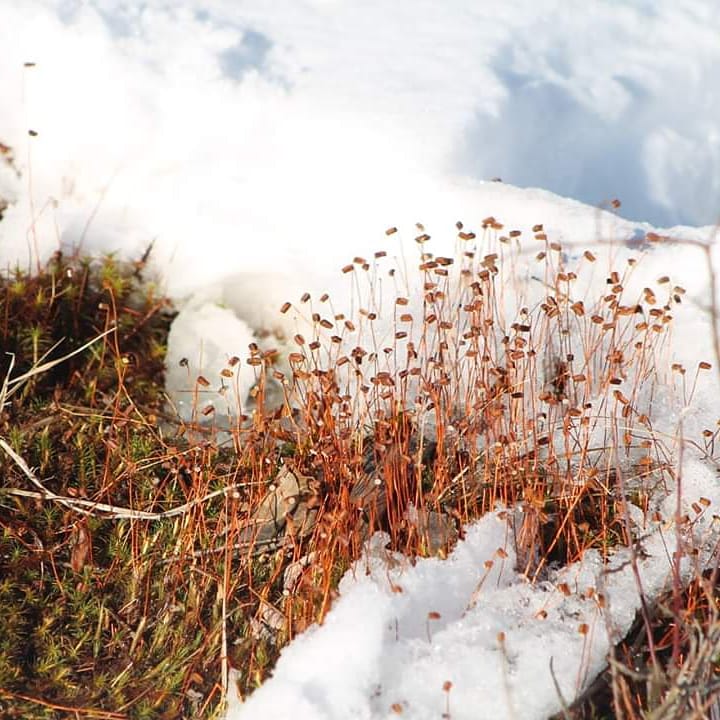 Tundra vegetation and snow 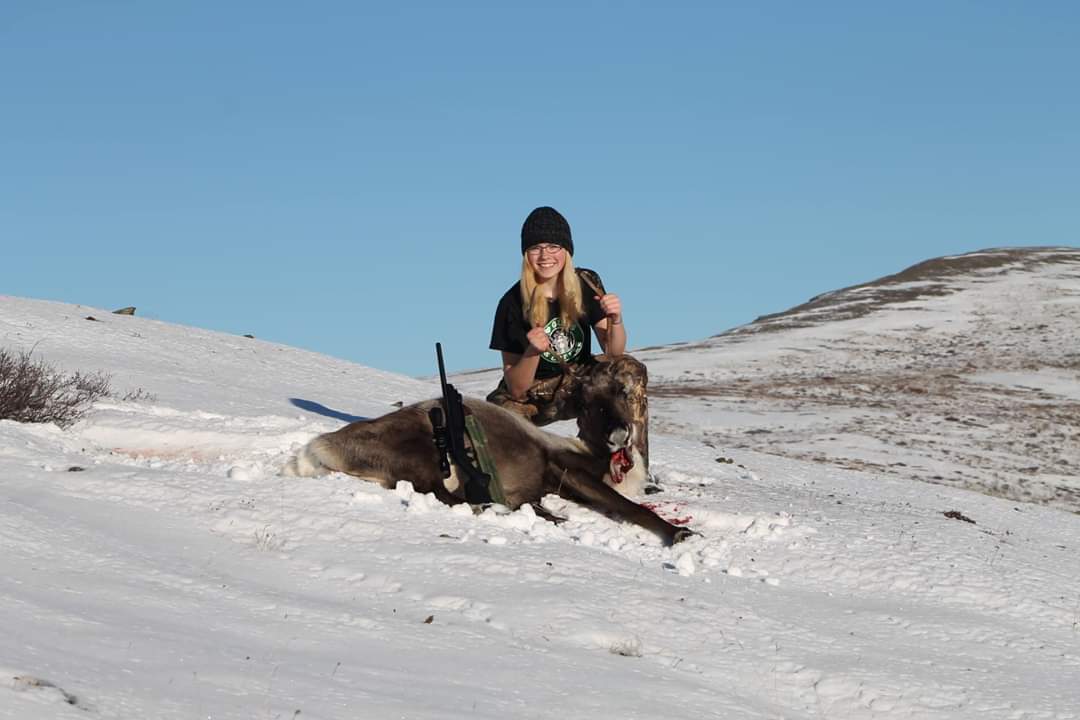 My daughter got her first caribou 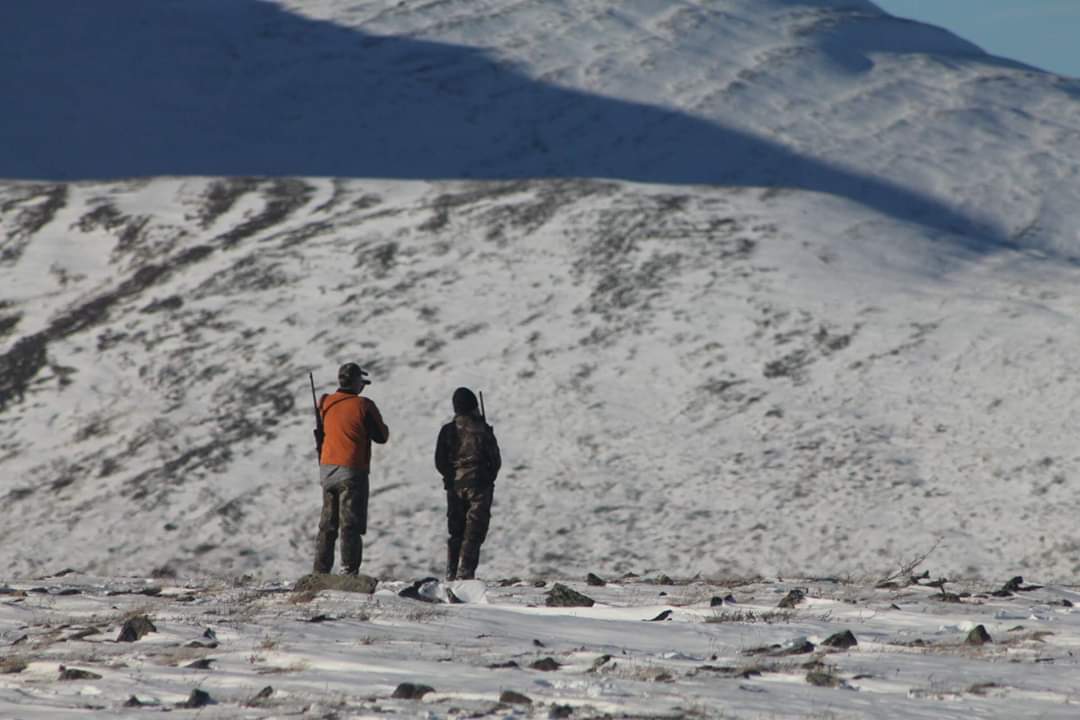 Looking for caribou Three things! One for everyone, one for Anchorage area, one for Fairbanks. One, we have decided to start doing a "Daily Deal" sale on the website! We have an app with a wheel to spin for the item and the discount amount. We will probably do it around 10 pm Alaska time, so for most of you it will start first thing in the morning. (The time zone messes us up a lot!) I will only post it in the On the Trail Creations VIP group (https://www.facebook.com/groups/614962188849895/) and on Instagram (also On the Trail Creations) for now, so make sure you are in one of those! Scroll down to see today's, which is open to everyone, not just those two groups! Since it's getting a late start, we will leave this one up through Sunday. Two, I have been invited by the Chugach Mountain Quilter's Guild to come to Eagle River next weekend for two days of classes and a trunk show! I'm very excited to be able to share with this group of quilters! The trunk show is open to the public, and is Friday, Oct. 5, 7:00 pm, at the Skyline Family Fellowship. And three, our first official Colorplay night is this Tuesday, Oct. 2, 6:30-8:30 pm at my shop. (748 Gaffney, Suite 206) We will be working with Inktense pencils and now I have the blocks too! I will show you how to do the iris design, but you can do whatever you want, and however many cards you have time for. Cost is $10, ages 12-adult, everything is provided! And you will get a punch card for a free one after four. I hope to see you there! Wow, busy week coming up! Happy sewing! Beret
|
Beret Nelson's On The Trail Creations Blog Page
Beret NelsonI am a homeschooling mom of three fun kids, who are now old enough that I have a little time to pursue my passion for sewing! After several years of making quilted cards and art quilts, I'm now designing kits and patterns. Some of my designs have been in Keepsake Quilting and Art Quilting Studios magazine! I teach classes online, and am starting to do more traveling and teaching. I also have many tutorials, including some on YouTube. I am blessed to live in Alaska where I am surrounded by the inspiration provided by the beauty of God's creation! Free mini art quilt workshop for new subscribers!
"Like" my facebook page!I am also an independent distributor for Plexus supplements, since I credit them with enabling me to be healthy enough to do all these fun things! They target blood sugar and gut health, which are at the root of so many modern health issues. E-mail me for more info, or check out my website! I am as passionate about getting people healthy as I am about getting people creating :-)
beret@onthetrailcreations.com or https://plexusworldwide.com/beretnelson  Archives
April 2024
|


 RSS Feed
