|
I've been pretty quiet on here again, but not for lack of activity! 😅 I have mostly been making masks, for donations and a few for sale for individuals. Now I'm doing a big order for an organization, paid this time which is nice! I've still been learning, so I made a video with some time saving tricks. If you are making them, I hope it helps! We also sent out a huge kit order to Keepsake Quilting, look for us in the next catalog! And in the middle of all that, I was invited to submit something to a favorite magazine. It was a mad rush to squeeze it in, but it would be really fun to be accepted! Last week I got an order of my favorite Starr fabrics. She's been experimenting with dyeing wool, so she sent a few samples. I'm in big trouble if she adds wool to her collection 🤣🤣 The samples made me laugh, because it reminded me of the small package of samples of her fabrics that I got from Keepsake Quilting almost 10 years ago that ended up being a huge factor in both my card making and my wall hanging kits! I used every sliver of that little package. You never know what little thing will change your life. As C.S. Lewis once said, "A stone can change the course of a river." I hope you are all staying healthy and hopeful in the chaos! Beret
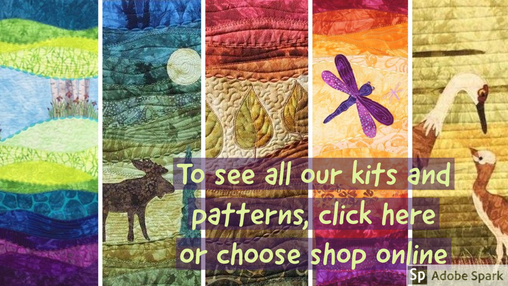
 Click photo to see our kits and patterns
0 Comments
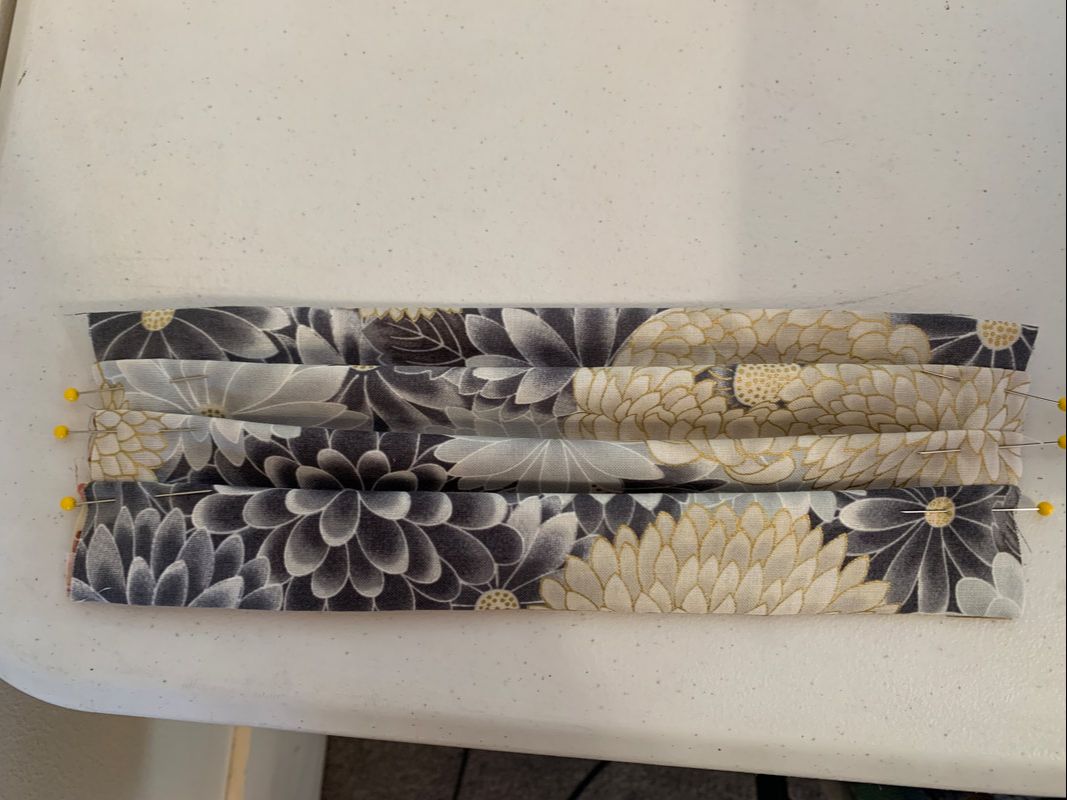
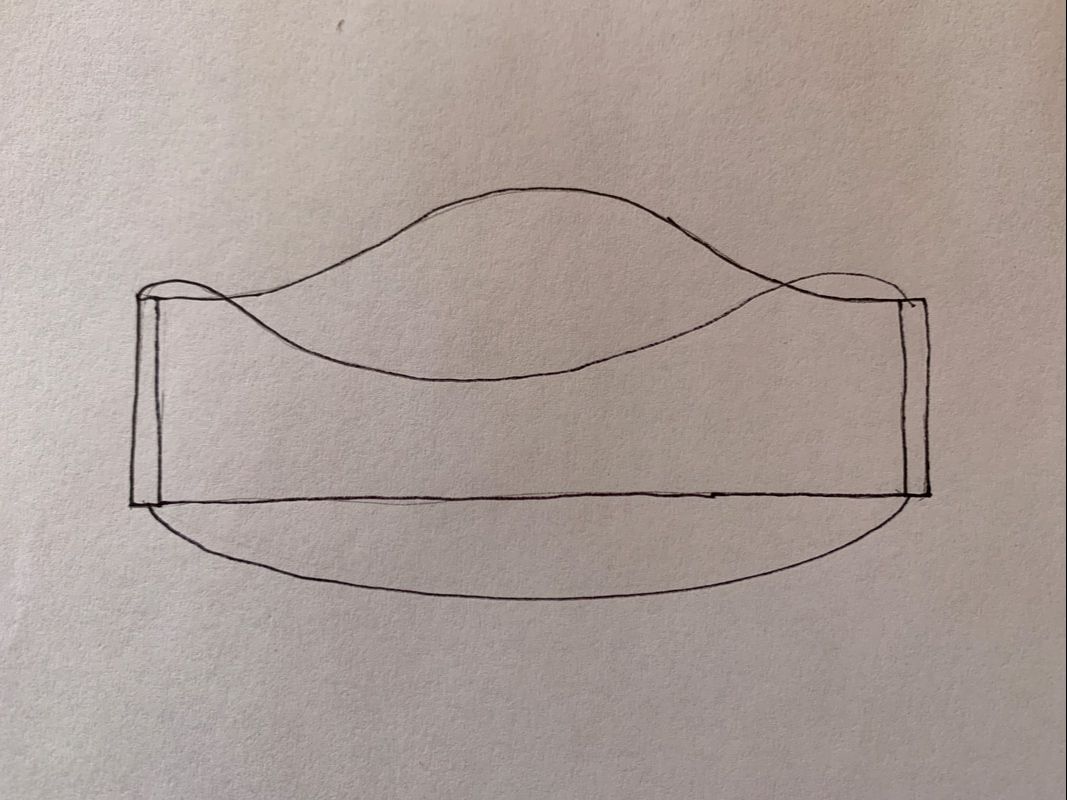
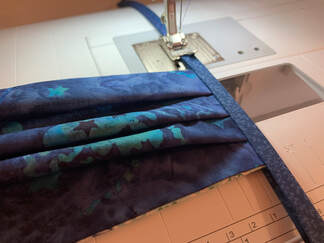
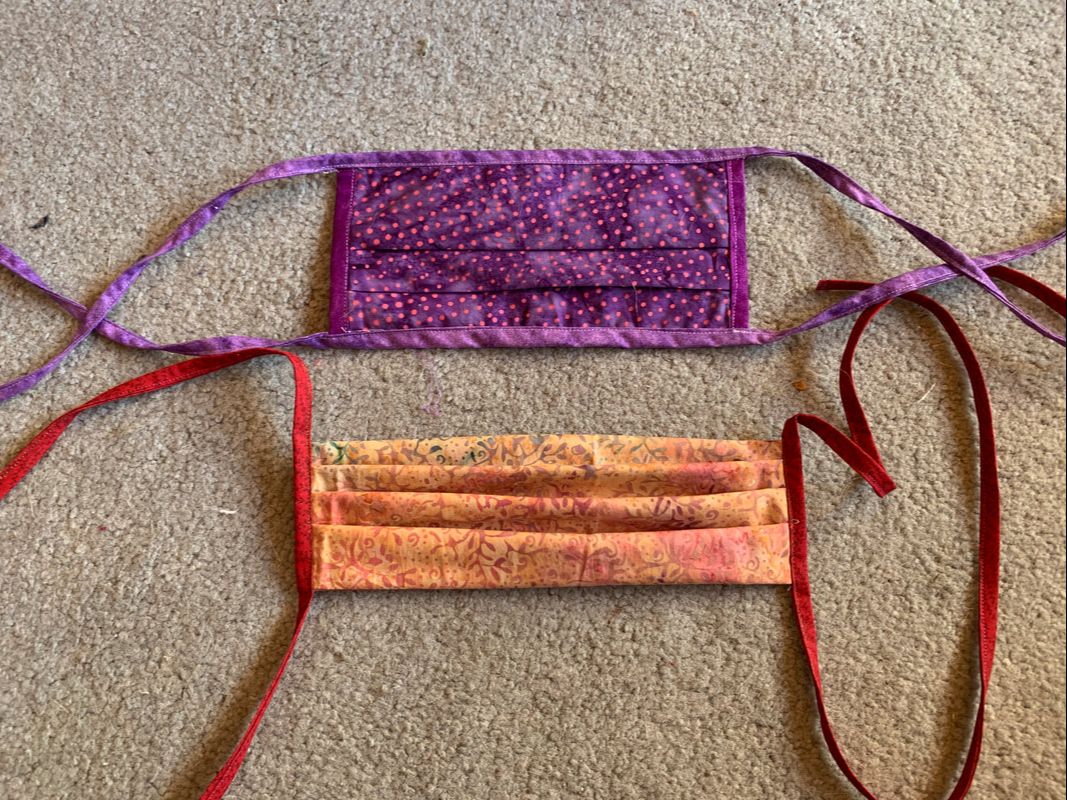
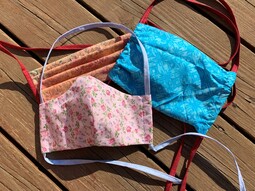 Mask pattern collection Mask pattern collection I don't know about you, but I've been feeling kind of overwhelmed by the number of mask designs out there for this Coronavirus pandemic! I want to help, but at first I had no idea where to start. The best thing is to know who you are making them for, and see what requirements they have. Fairbanks has a fb group to coordinate requests, which has been really helpful! This post will by no means cover all the options, but hopefully it will help. I was going to do several design tutorials, but then I realized that the parts are kind of 'mix and match'able, so I will just show the parts separately and you can choose each one according to your needs. (That's how I try new recipes too, look at several and take what I like from each 🤣) All of the masks have a main body, lining, ties or elastic to hold it on, different ways of attaching the ties, and some have a pocket for adding another filter layer. I will cover each part separately, because for the most part they can be used in any combination. There's lots of "if this, then this" in here, so I will sum them up at the end! Mask body First let's talk about the main body of the mask. Most of them are either the pleated version, or the shaped one. But I also like the one that has neither (blue in the photo above) and the sides get gathered up with the cord to give it some shape. I also saw one that has the shaped front, but with darts instead of two pieces, AND pleats at the sides. Pleats (coral one in above photo): For the pleated front, start with two rectangles. I've seen anywhere from 6-8" tall, and 8-10" wide. Mine is 7 x 10 cut size. Put right sides together and stitch the top and bottom edges with approximately a 1/4" seam. Turn right side out and press. Fold three little pleats in the sides, about 1/2" each, making sure they are at least 1/2" from the top and bottom. This doesn't have to be exact, just make sure it ends up about 3 to 3 1/2" tall, and that the two sides are at least close to the same! You could mark them, or make a paper folding guide, but I just fold and pin. We'll cover the rest in the tie section!
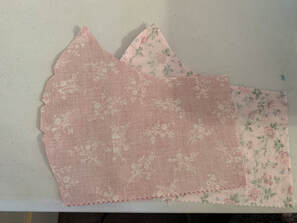
Shaped version (pink in above photo): The pattern for this came from a website called Craft Passion, https://www.craftpassion.com/ so please go there to get it, it's a free download with four sizes. (I modified mine, which I will explain below) Cut out four pieces, two each for the lining and the outside. (Fold your fabric in half before cutting so they are mirror images of each other) I tried a lightweight interfacing on this one, but I've heard mixed reviews on that. Stitch the center front seams, right sides together, and make a few notches so it presses better. Press the seams open. (A pressing ham is great for that, but a rolled up towel might work?) Decide on ties before proceeding, you may need to add them now. (Only if you are using elastic or ties stitched into the corners.) If not, put the lining and the front right sides together and stitch the top and bottom. Clip the curves a bit and turn right side out. Press. On mine I did the casing method (see below) for attaching the tie. So I had extended the sides of the pattern by 1 1/2" so I could do about a 5/8" rolled hem. (Technically only needs 1 1/4", but I didn't want the stitching to go too far into the mask.)
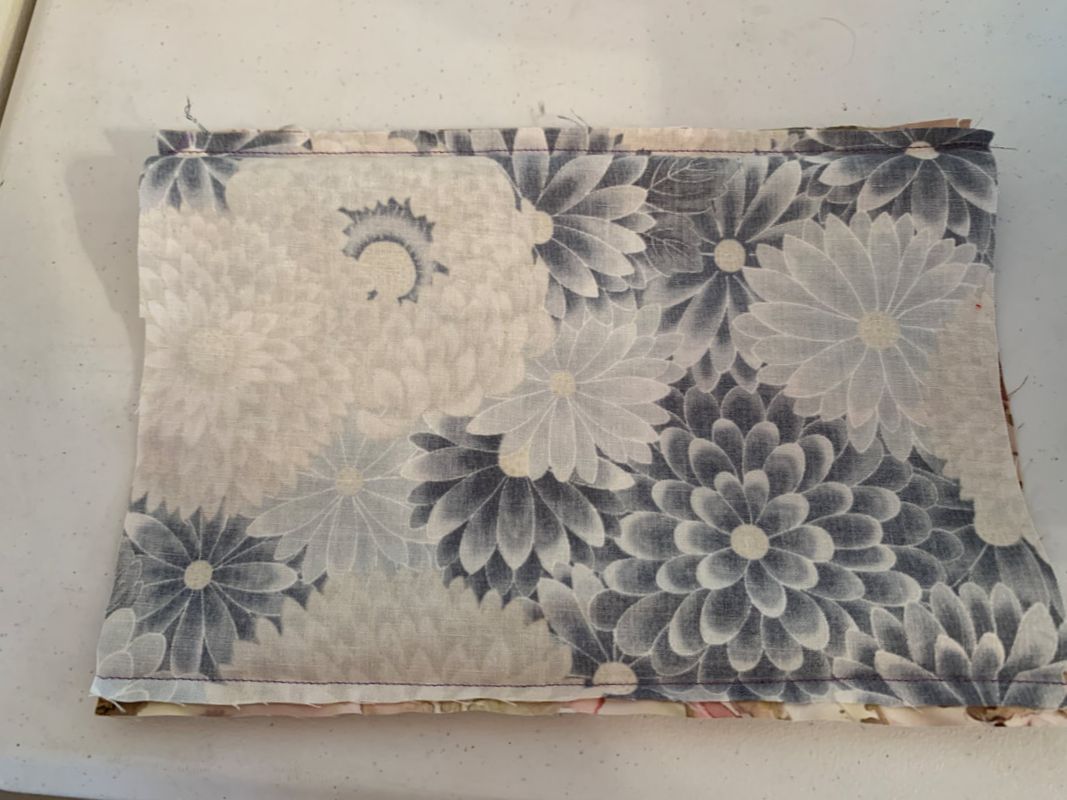
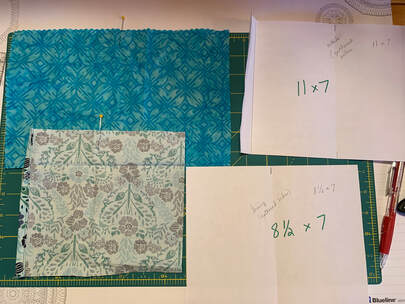
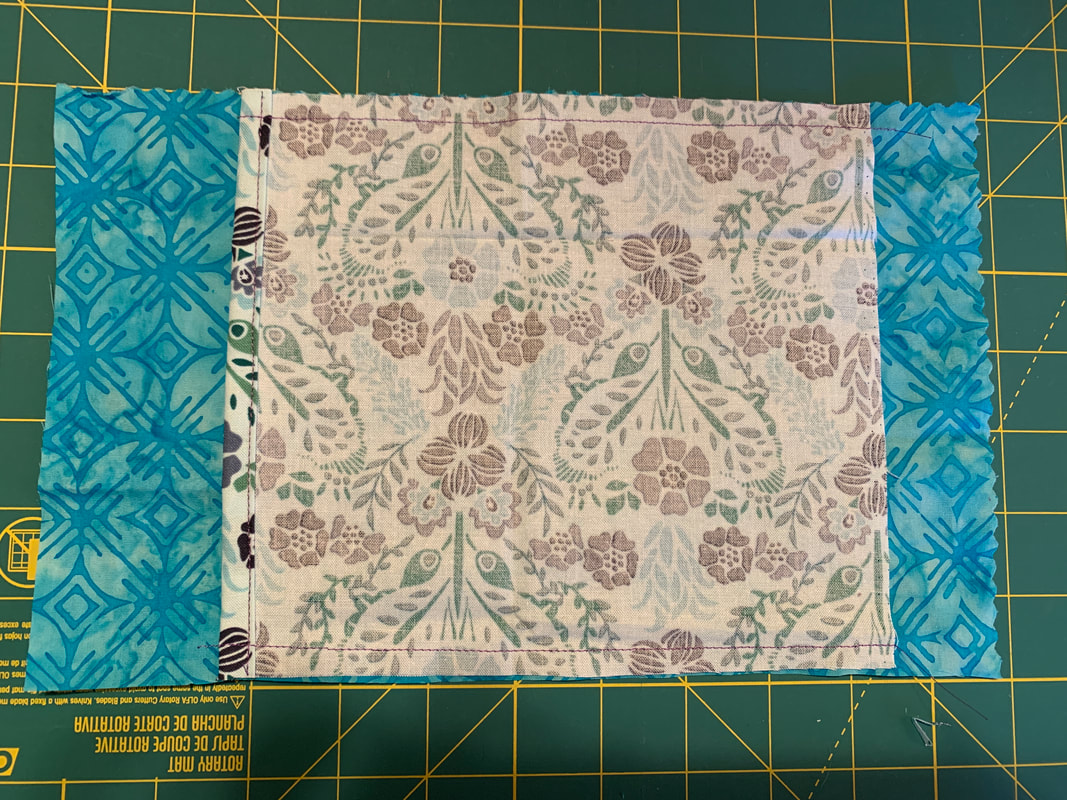
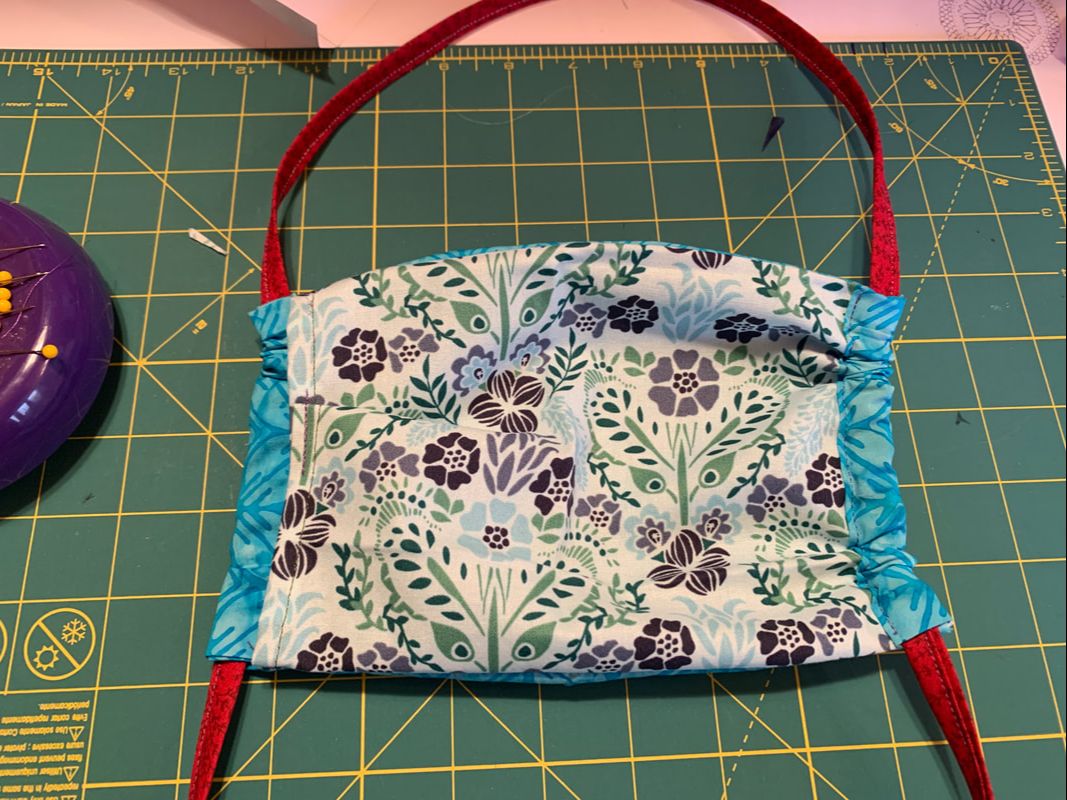
Flat version (no pleats or seams, blue above): For this version, cut two rectangles, mine were 11 x 7 (outside) and 8 1/2 x 7 (lining). I made a pocket on this one, so I will explain that. First mark the center of the top of each piece (by folding in half). Then do a narrow rolled hem on one side of the lining. If you don't want a pocket, simply skip this step. Put right sides together, matching the pins you used to mark the center, otherwise you can't tell where to put the lining piece... Stitch across the top and the bottom edges with a 1/4" seam.
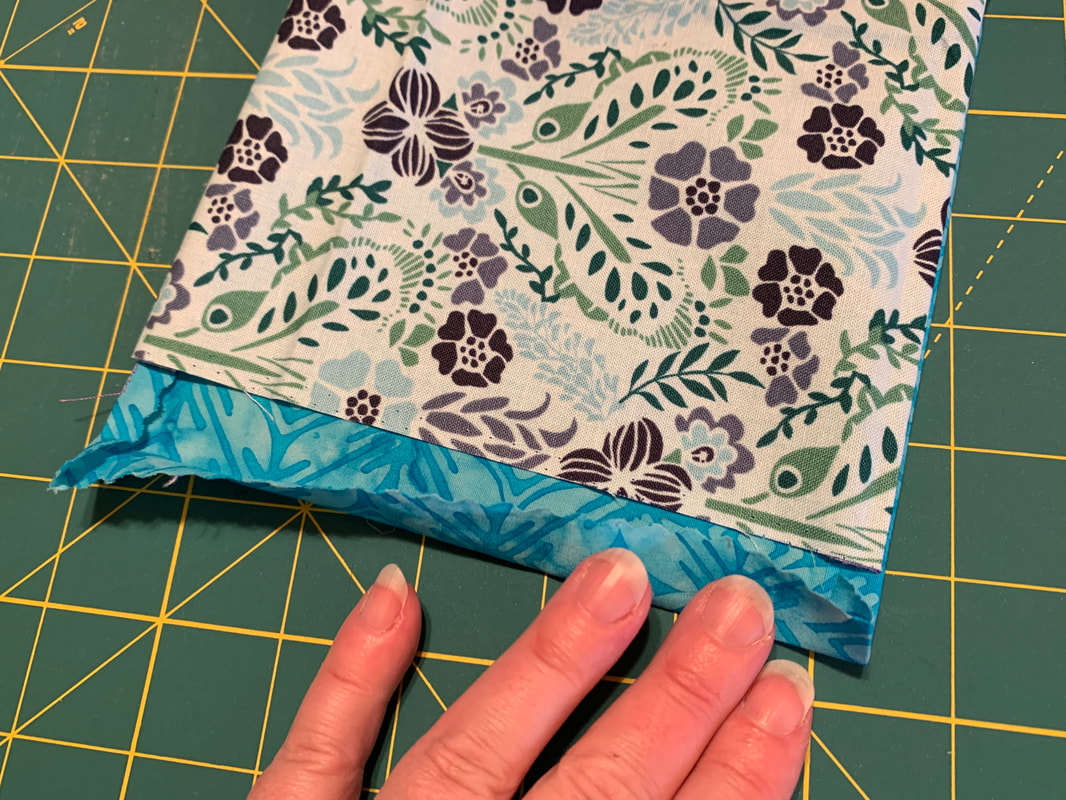
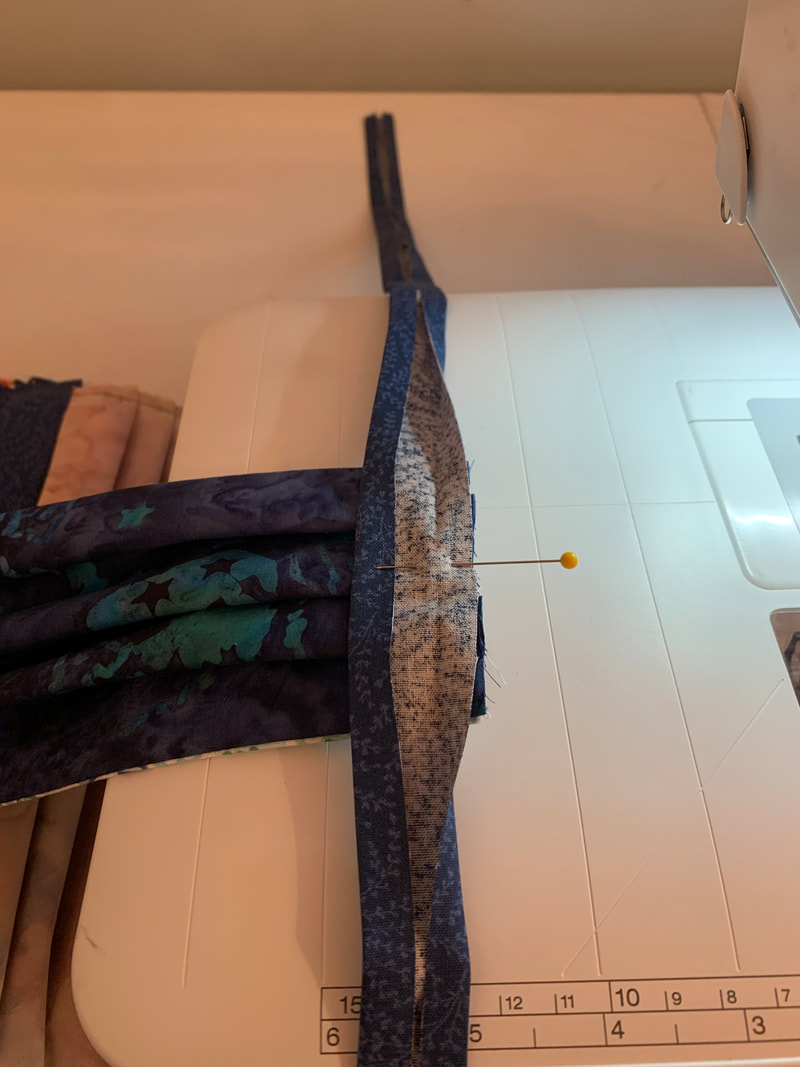
Turn right side out and press (I took the pic before pressing😅) Starting with the side that does NOT have the hemmed lining, fold the outside 5/8" toward the lining, it should just meet, then fold again over the lining and stitch close to the edge. This is your casing for the tie. (This is the only tie method that works for this design since it is what creates the gathers at the sides)
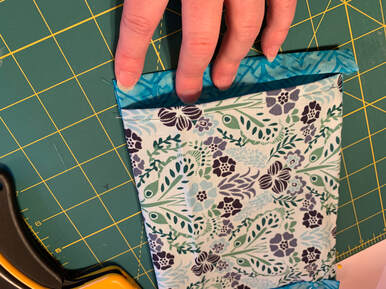
For the other side, do the same 5/8" rolled hem, but this time it should just meet the lining after BOTH folds, and not overlap it at all. (first pic below) Stitch close to the edge. This is so you can access the pocket. I found the pocket got kind of gappy when the sides were gathered up with the tie, so I made a pleat in the middle of it to minimize that.
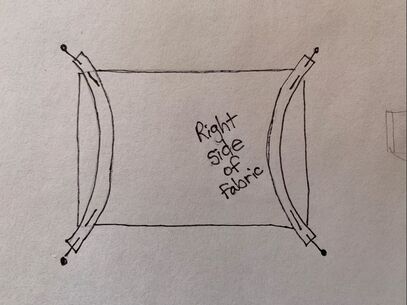
Ties and attaching them Most masks I have seen have either elastic or bias binding for ties. Elastic can be uncomfortable, less durable, and hard to find at the moment, so I'm doing binding on mine. If you do use elastic, usually it gets stitched in between the lining and the outside, approximately 5" pieces. If you do the pleated version, you will have to pleat at the end. I have also seen some like the second photo below, with a continuous piece of elastic going through a casing.
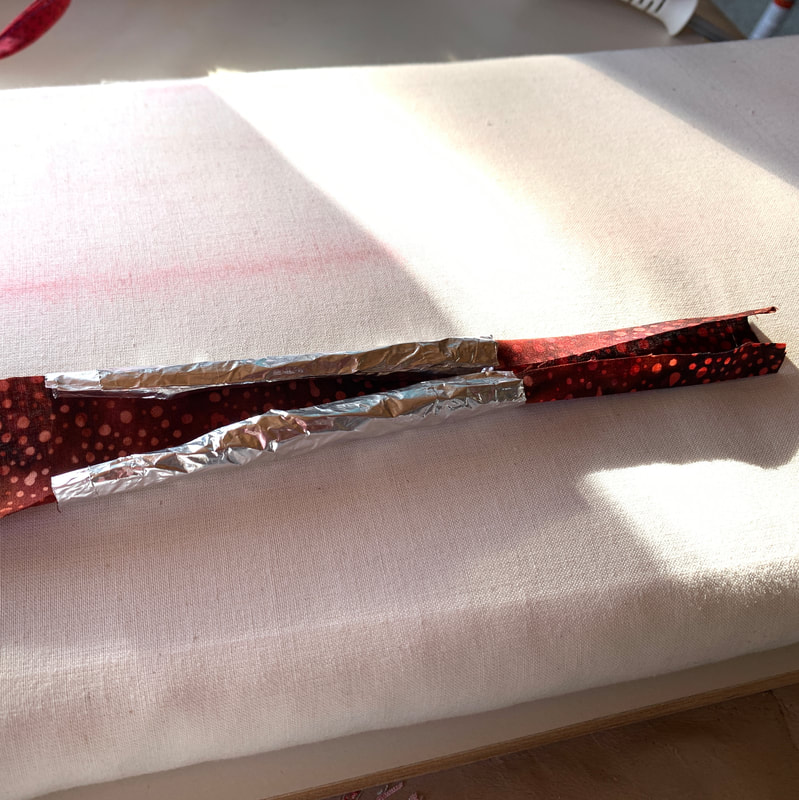
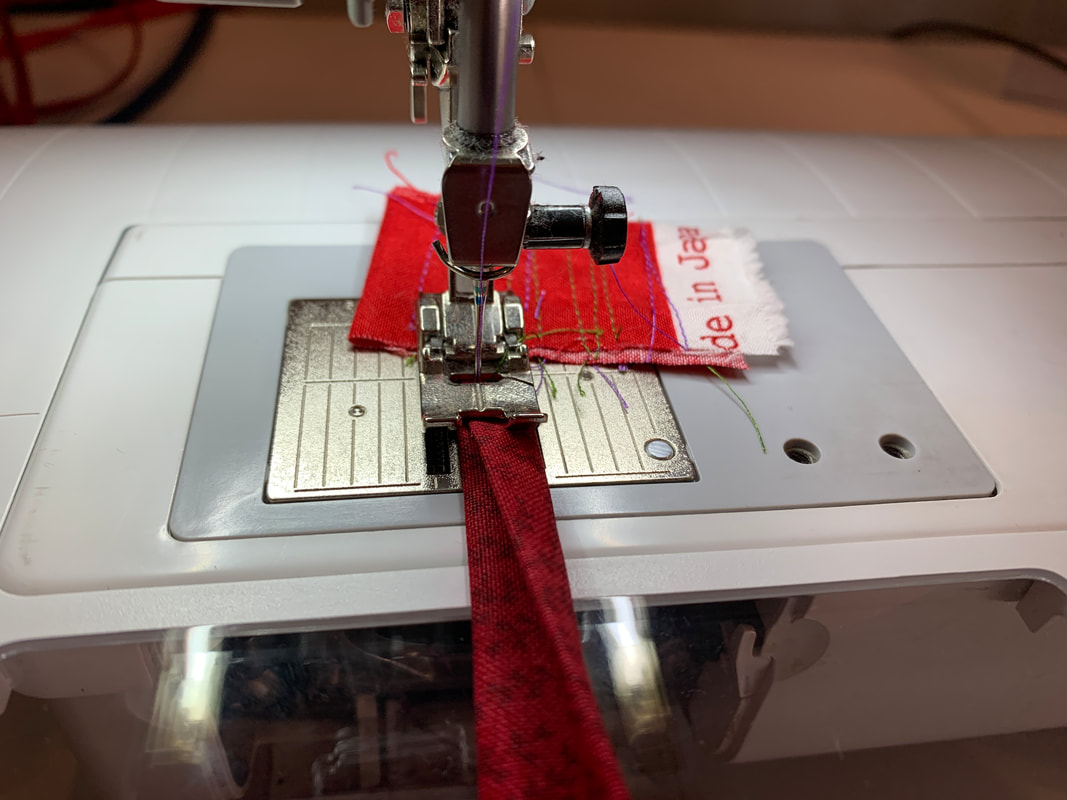
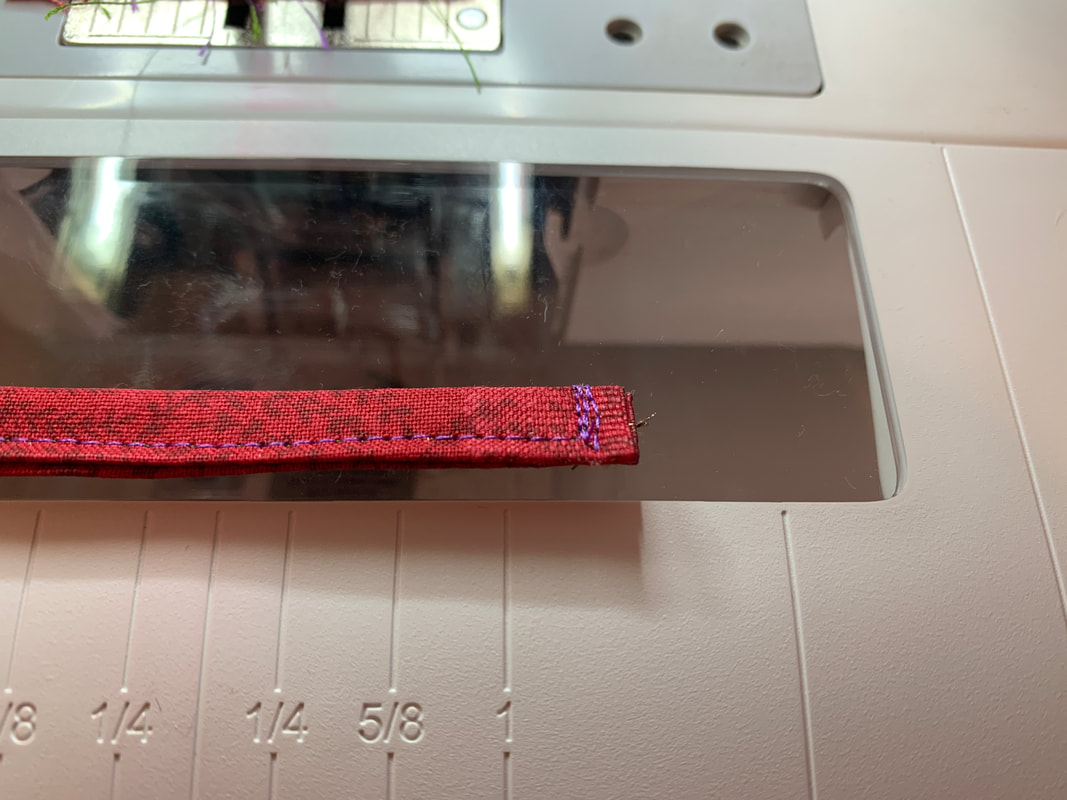
I think most people are going with binding now. Since premade binding is hard to come by now too, you will probably have to make your own. It doesn't have to be cut on the bias, straight across the fabric is fine. I like about 1 1/2" strips to start with, but I've seen anywhere from 1 1/4" to 2". Length needs to be a minimum of 36-40", I just do the WOF (width of fabric, or 42-44") If you have a bias tape maker, that helps a lot. There are some paper ones out there too, I'll add that if I can. I rigged one up out of foil! You can do it without any of those things, they just help. Fold the sides to the center, and then press in half. If you don't have a tool, pressing in half first helps you see where to fold the sides. If you are using the binding to also finish seams on the mask, you will finish sewing the long side of the binding and attach it at the same time. Find the center of the binding, pin it to the center of the side of the mask (unfolded). I find it is worth stitching across the mask section first, (if you start a bit before and go a bit past the mask body you don't have to backstitch and it will still hold together until the next row of stitching) then go to one end of the binding and stitch the whole side.
The ends of the binding can be tricky, so here are a few tips. Guess what, my favorite beginners and enders tip works here too! If you stitch across a folded scrap before starting at the end of your binding, you have more to hold on to. At first I was folding the ends under, then I switched to satin stitching the ends, now I just do a straight stitch back and forth. It helps to do a few stitches along the side you will be sewing first, then back up to the end, then pivot and go across the end. Then pivot again and go along the whole side, making sure you catch the other half by the mask edge. Another option is to start at the mask section, stitch to one end, then go back to the middle and do the other side. (Some masks have the binding on the top and bottom instead of the sides, those had the sides sewn first instead. Either way works, you just need a bit more if it goes the long way. In the purple one below, I used binding for all of the sides)
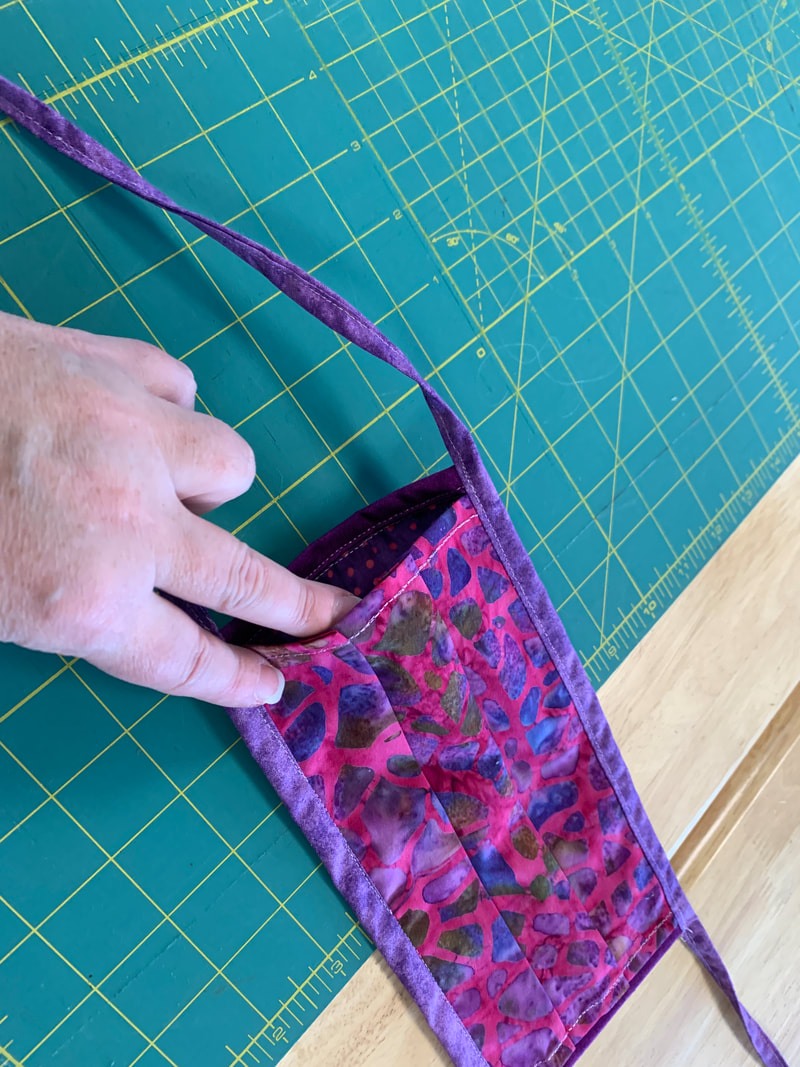
If you are using the casing method, as shown earlier, you need to make a casing to put it through. I like a 5/8" rolled hem, so if your pattern doesn't allow for that, you will need to add it. It's not ideal for the pleated version, it would be more work than the previous way. But for the other two styles it's great. For that you need more like 45-48" of binding, (so will probably have to be pieced) but only one, so overall it's less binding and only needs to be tied once to put on. 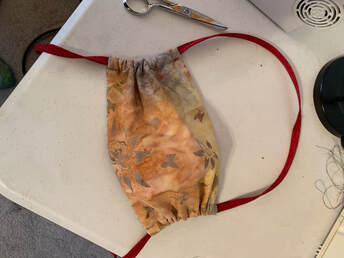 Pockets I think any of these designs can be modified to add a pocket for people to add another filter layer if they want. Basically, you just need to finish one side of the lining before putting it together, and make sure it doesn't get caught in whatever way you finish the edge of the outside on that side. Usually a small rolled hem will do both at once, since it makes it shorter also. I did that on the pleated one below, but you could also use a small piece of binding to finish that edge. If so, you may need to trim a bit off so it doesn't get caught when you finish the edge of the outside. (With that one I finished both side pieces first, then joined them with binding on the top edge. I think that was my first experiment 😅)
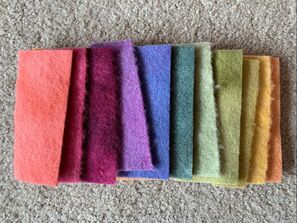
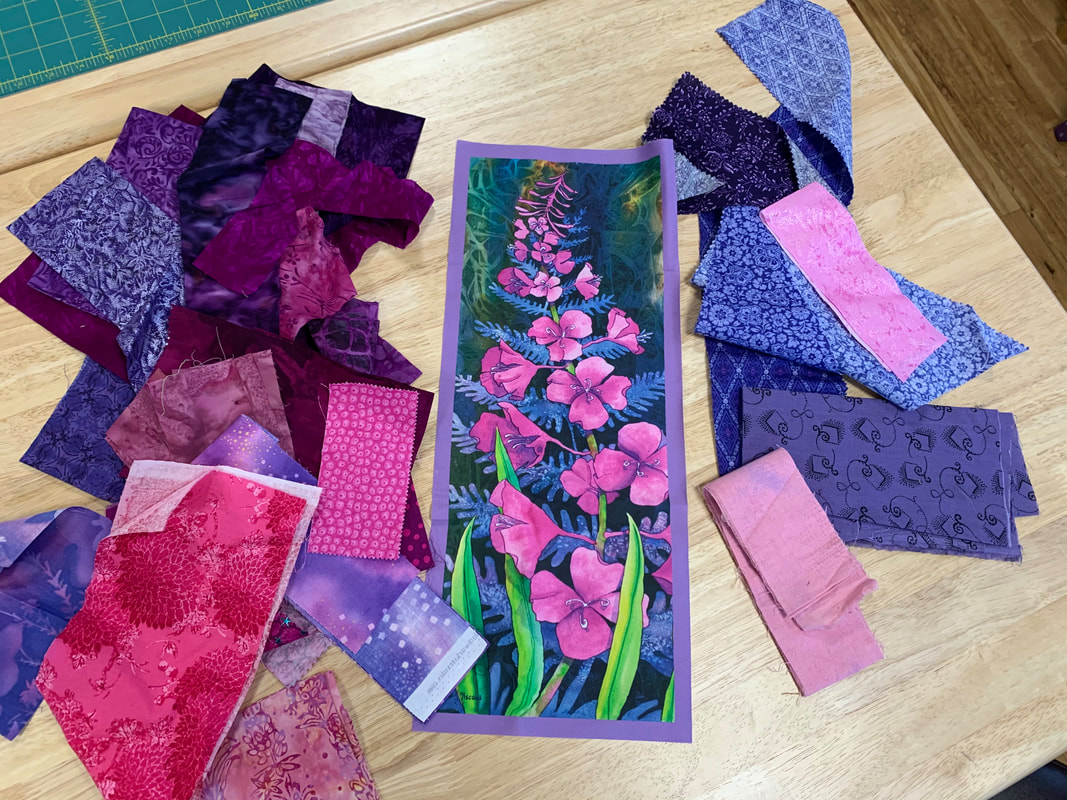
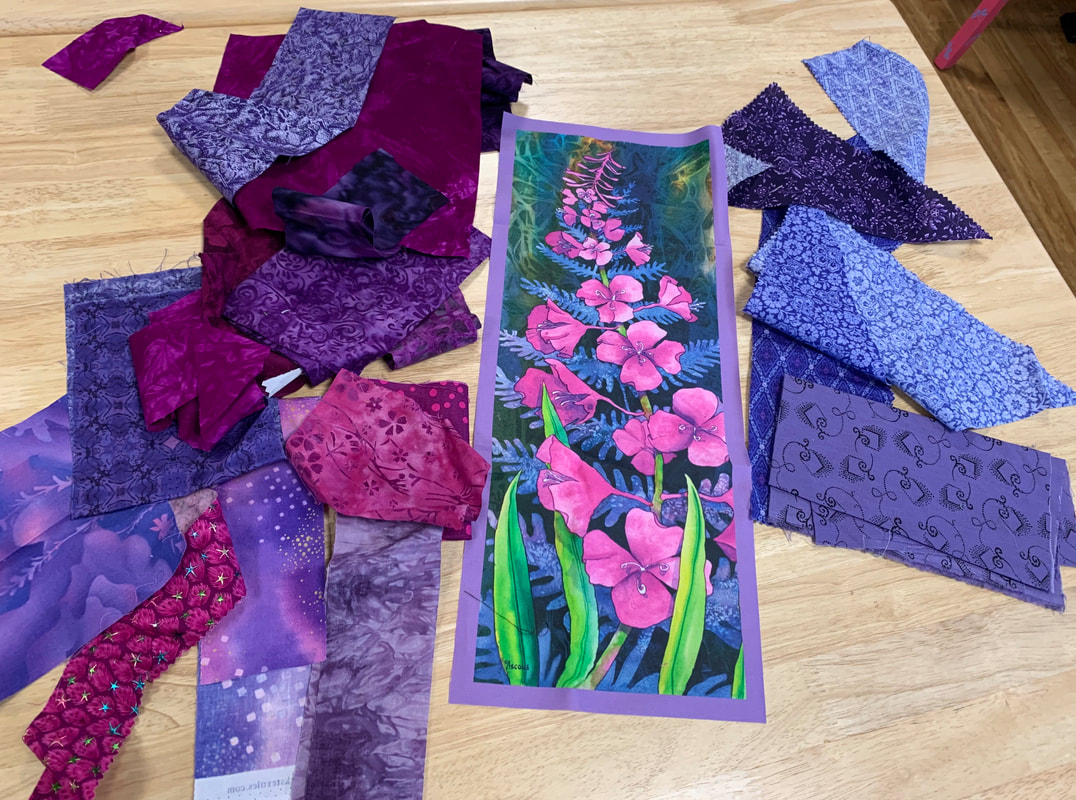
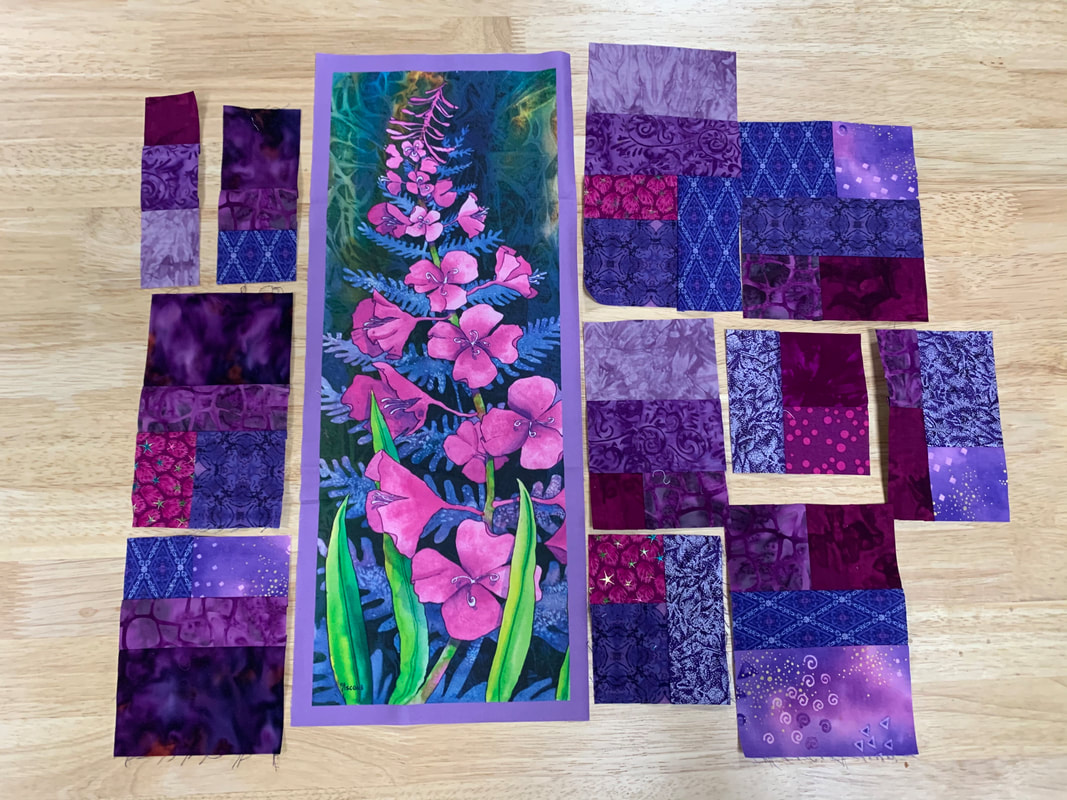
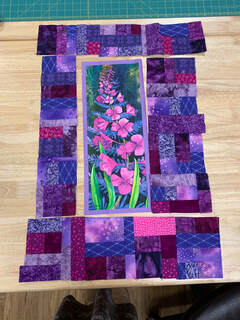
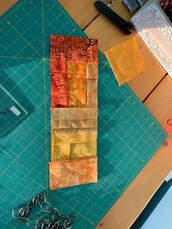
Summary Hopefully that wasn't too confusing... Basically, these all have main body that has an outside and a lining. They get shape either from a curved seam, or pleats or gathers at the sides. The four edges all have to be finished in some way, either by a 'right sides together' seam, binding, or a rolled hem. Then they all need a way to keep them on, elastic or ties. Still no way I could cover all of the possibilities, I see new ones almost every day! Some of the "ifs": If you do all four sides with seams instead of binding, you need to leave a hole for turning it right side out, and you usually need to catch the elastic or ties in the corners. If you want a pocket, finish one side of the lining, and make sure it doesn't get caught when you finish the edge of the outside. If you use binding stitched to the sides, you need 36-40" each side, probably a few more inches if you go across the top and bottom. If you do a continuous strip and a casing, you need one piece that is 45-48" long. If you want a casing for binding, you need to make sure the pattern has an extra 1 1/2" on the sides for that. As I'm sure you know, these are not meant to be as effective as the 'real' ones, but they have to be better than nothing. And it helps us feel like we can help when so many things are outside of our control these days. I hope you are all well and healthy during these crazy times! And I pray that you know Jesus, the One who IS in control, no matter how crazy it looks to us. "Trust in the Lord with all your heart, and lean not on your own understanding." Proverbs 3:5 Happy Sewing, Beret Feel free to add your tips and ideas in the comments! Click the photo to see all of our kits and patterns 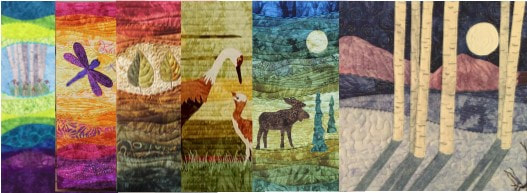 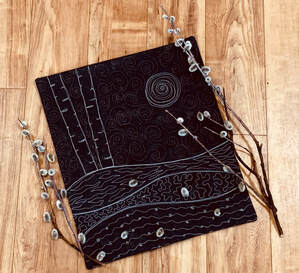 Free motion class: So many people ask me about classes, but I am terrible about posting reminders, trying to get better! My next free motion quilting class is Saturday, Feb. 29, from 1-4 pm. To make it reeeeally easy for you to come, you don't have to bring anything at all! You can bring your machine if you'd like, but you are also welcome to use one of mine. I will provide materials. We will cover the basics of free motion quilting, and have lots of time to practice different stitch patterns. Usually in this class I only do a bunch of practice stitches, but this time I thought I'd add a quick wall hanging project for anyone who is interested, it will be optional. I do my best to take the fear out of free motion stitching for you! Sign up here: free motion class 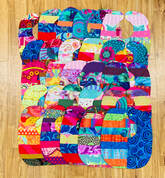 Free pattern! The other big thing happening here lately is a group bib making project for some care packages our church is making for a local pregnancy center. They were really fun, I hope this becomes an annual project! We used mostly Kaffe Fasset fabrics (from my quilt angel!) so they are pretty colorful! They are also really easy, and I got the pattern put up for anyone who wants to try it: free scrappy baby bib pattern. And now, it's 25 degrees outside for possibly the first time in maaany weeks, so I'm going skiing! Happy sewing, Beret  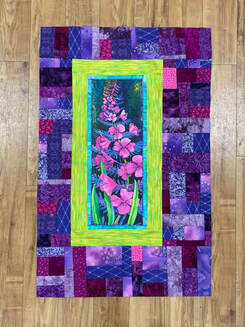 I thought I would follow up my last post with a little more of a tutorial just on improv piecing. This is a very low risk way to try it! The secret is fabrics that are similar in both value and color, but not toooo much alike. (I may do yet another post on using a wider range of fabrics, but I have to learn more about that first 🤣😅) I have been wanting to play with the borders on this fireweed panel from Teresa Ascone since I got it, but haven't had a chance! I made a couple of quicker versions for bazaars, but I really wanted to make one similar to the tall iris one, they go well together. The first step is to grab a pile of fabrics that I think might work. Then I put them by the panel, and quickly saw a few that I wanted to remove. Too 'grayish' or too red, or too light. That's partly just my preference, it's quicker and easier with less variation. What is left is fairly homogeneous, but there is still some variety. All medium ish purples. I did end up putting one of the pinks back in, you will see how that ended up!
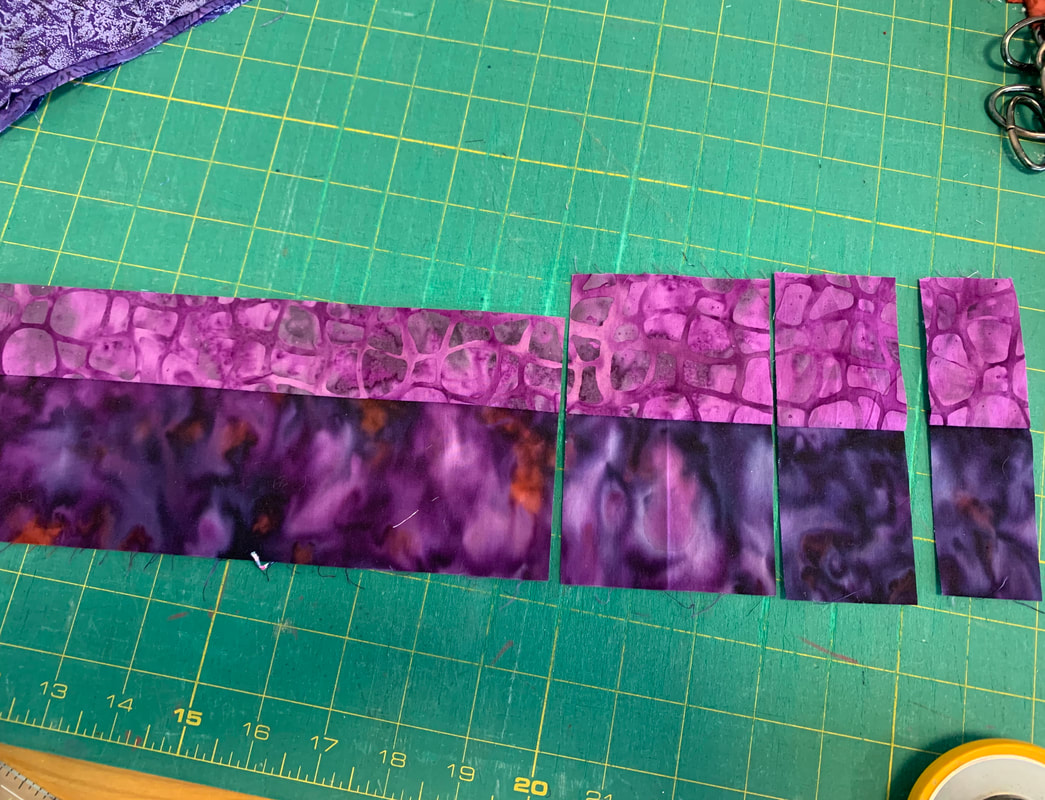
If none of your scraps are in strips, you may want to cut a few to start. I had several already in my pile, so I started with sewing some of those together. The width doesn't matter too much, but keep in mind the scale of the project you are doing. Then I cut those into random sized chunks. In the second pic below, you can see that I cut a few chunks off, then trimmed a whole strip so I could add another to that set and have it not be too wide.
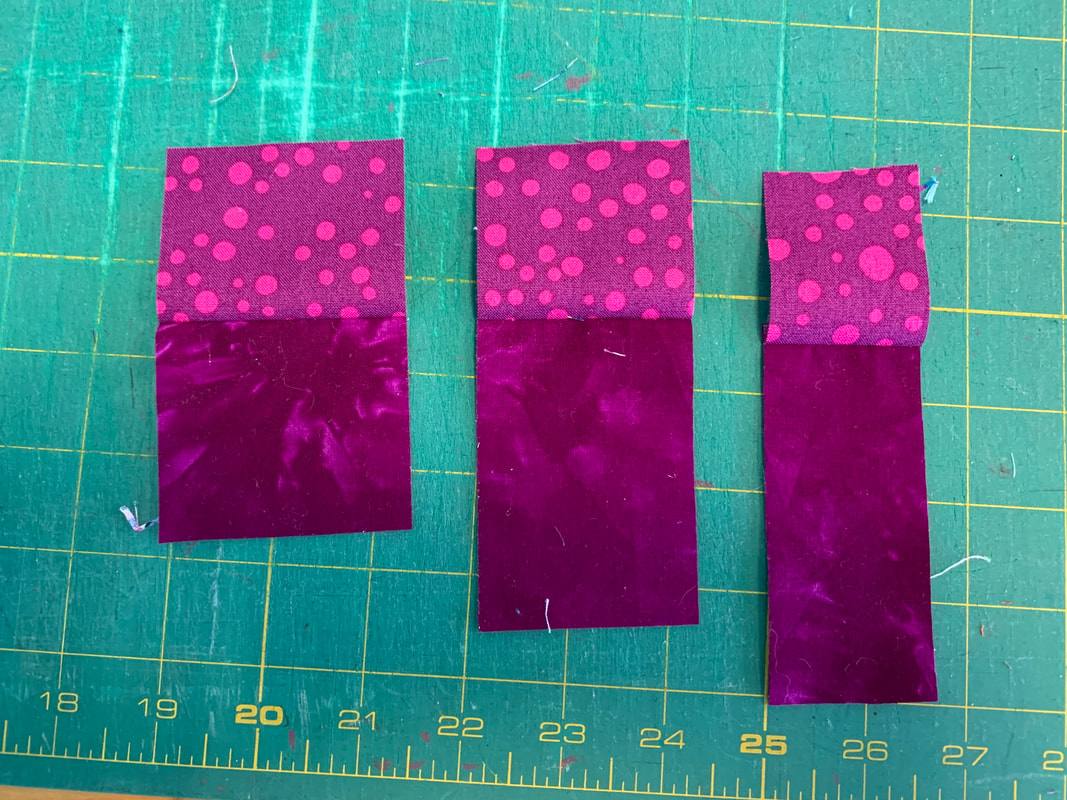
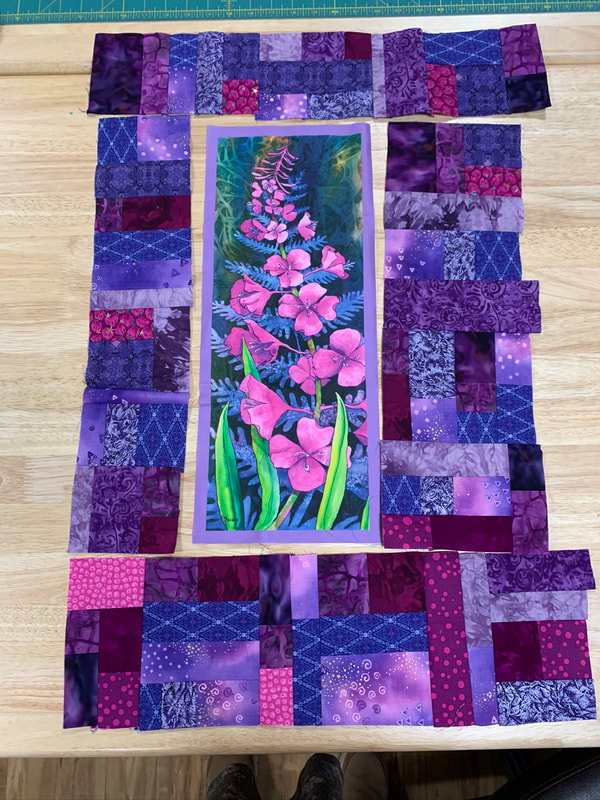
Then I start stitching those pieces to each other, or to another strip. You will be amazed at how quickly it comes together! I just keep making each little chunk bigger, then when I have a good pile, I can put them by the panel to see how it's coming. At this point, I will decide approximately how wide I want my borders to be. I decided to have them 4 inches on two sides, and 6 inches on the other two. (cut size, but it's improv, so it doesn't really matter!) So then if a chunk was already four or a little over, I knew to only add to the ends, not the sides. I squared things up after each batch of stitching a new piece on, but that's optional too, it can be wonky if you want!
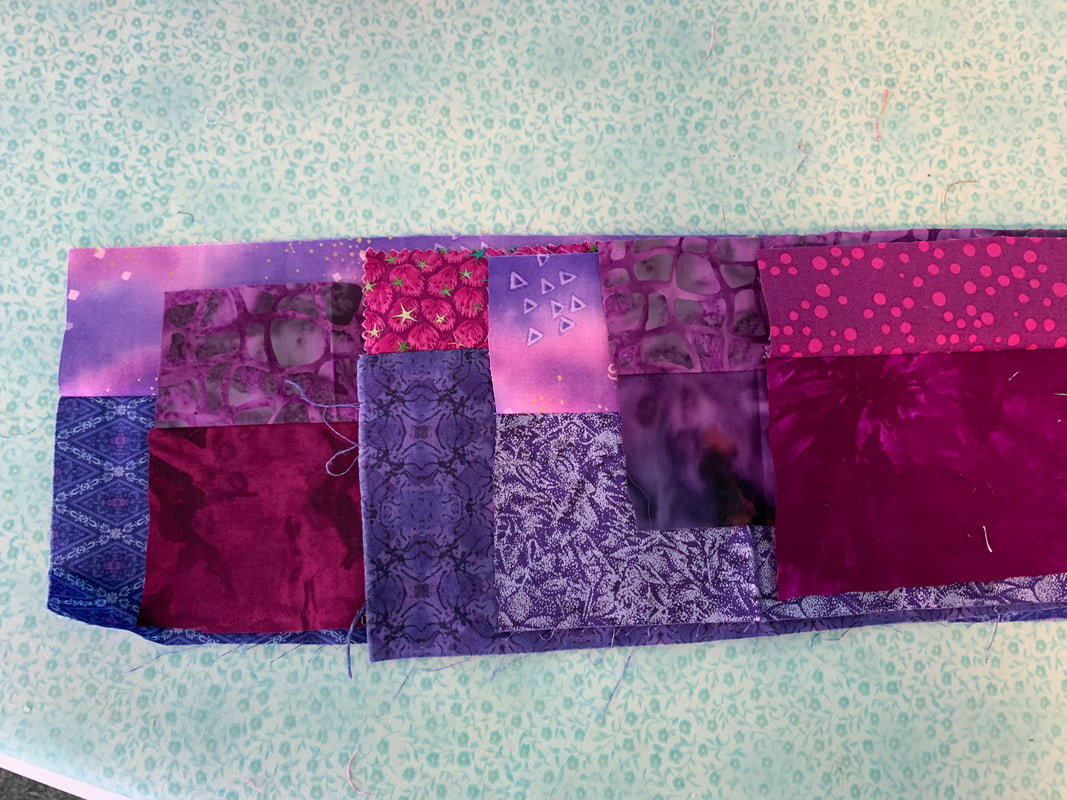
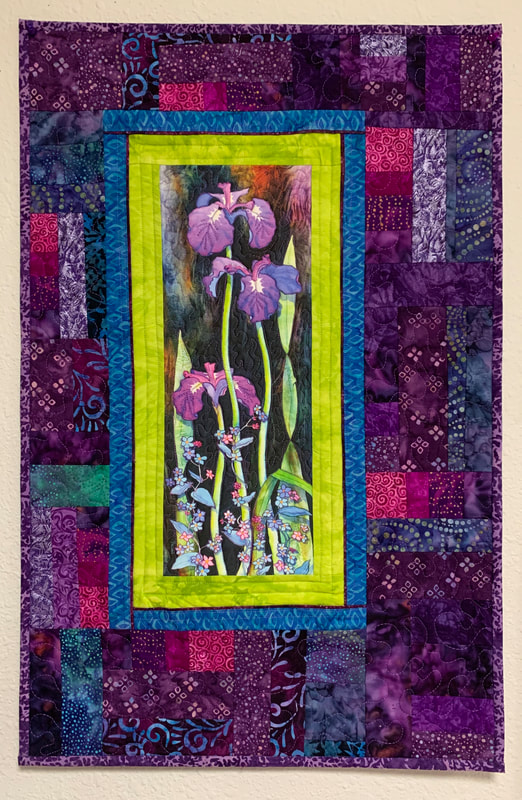
I thought I had enough at this point, (below) and I even remembered to allow extra at the top and bottom to make room for inner borders. But for some reason it didn't connect that the sides would need that too. 🤦♀️ (Lyme brain😭) But that was ok, because I was also not really happy with that one bright pink fabric... I tried flipping the whole border over so it would be on the inside, and I still didn't like it, so I chopped the whole thing in half and sewed it back on another way. After adding some more to the length, the pink ended up in completely different spots, but I like it better. The trouble with a wider variety of fabrics is that totally random doesn't always end up looking great. But that just means it requires at least a little more planning.
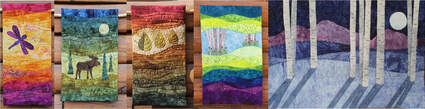
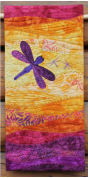
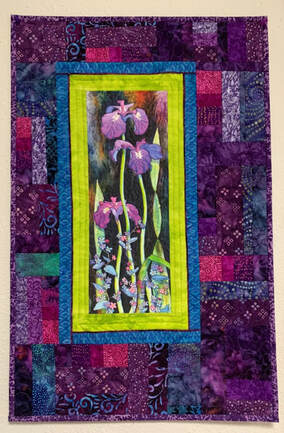
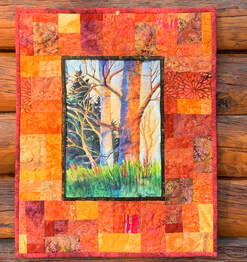
It still needs quilting, but that has to wait a bit! I'll put the iris one in here again too. As long as there isn't a huge range of colors and values, these can be pretty random and still look great! I'm still not 100% sure of those little pink squares.... maybe I'll paint them 🤣 And, as I said in my last post, this project can also be done as a 'beginners and enders' project. I hope you will try it! Now I need another beginners and enders project myself, hmm.... Oh, and I almost forgot! These plus more panels, kits, and patterns available here, just click 'shop online' above. Happy sewing! Beret
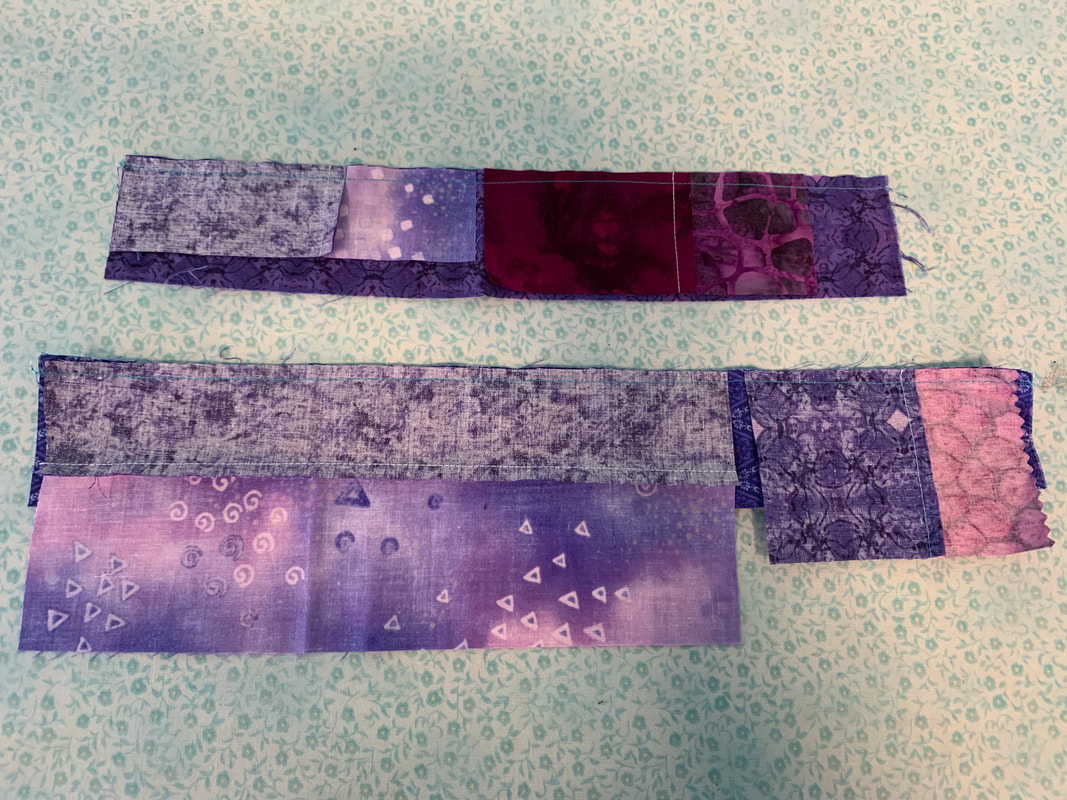
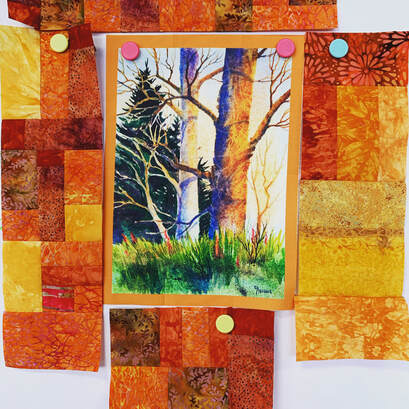
Upcoming classes: Barn wood quilt block painting, Mon, Feb. 17, Free Motion quilting Saturday, Feb. 22. Click 'classes' above for more info or to register! Click the photo below to see all of our kits and patterns! 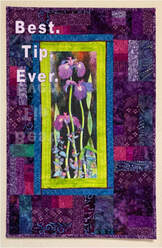 It seems like I would have posted about this before, but if I did I'm doing a better job this time 🤣 Most quilters will be familiar with the first couple of parts of this tip, but of course I add my own twist! Here we go: most quilters know about chain piecing, where after each seam, you immediately butt the next piece up to that one and stitch. This saves tons of time and thread, and maybe more importantly, bobbin winding! 😅 It also eliminates the need to hold down your threads at the beginning of every seam to prevent the needle from coming unthreaded... 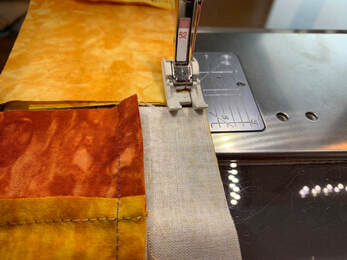 You may even be familiar with well known quilter Bonnie Hunter's 'leaders and enders' technique. It's the same as chain piecing, except when you get to the end of your batch, stitch onto a random folded piece of fabric, and leave it under the presser foot so it's ready to go for next time. Again, no thread tails to cut off, saves the 3-5 inches of thread that would have been wasted (and since I often do 5 inch seams, that's 50% of my thread that would otherwise be cut off!), bobbin lasts longer, and you don't have to hold the thread ends to start a seam. It saves so much aggravation! She then takes it a step further, and says why not keep a pile of squares or pieces from another quilt project by your machine, and stitch two of those together instead of just onto a piece of fabric. Brilliant! I made an entire quilt top this way, which was in progress for years, because I kept forgetting about it, but it's done! Except for cutting the squares before hand, the 4 hand applique blocks, and adding the borders at the end, I never spent any dedicated time on this quilt, the whole thing was done as 'leaders and enders' during maaany other projects. Definitely the way to do the tedious tiny squares border! (The center of this quilt came from a magazine years ago, but I have no idea who to credit😢 )  But here's where I add my twist to this idea. While my above lap quilt used up some dark batik scraps, the majority of this is the background fabric. I have waaaaaaaaay too many scraps to use them that slowly 🤣😅 So, I decided to pull out a bunch of coordinating scraps, usually one color family even, and use this concept to do some improv piecing. This has a couple of extra benefits. One, it uses lots more scraps! And two, and probably more importantly for me, is that there is far less prep work to be done. I just dig through a tub for colors I like, then maaaybe iron them, but that's it. And these can be used for lots of things! They make really great borders for panel quilts, or any quilt, and in that case, you just choose a width you are aiming for, and just keep it a little bigger than that, like 4-5 inches wide, and trim it to size later. But they also make great potholders, journal covers, or even a whole quilt background. To improv piece, just start stitching fabrics together! They don't even have to be cut straight, as long as you sew straight. You can trim after. No accuracy in seam allowance required. Just don't sew two pieces of the same fabric together. After stitching a few, you can recut, like a chunk off of a strip set, and stitch that to another piece. 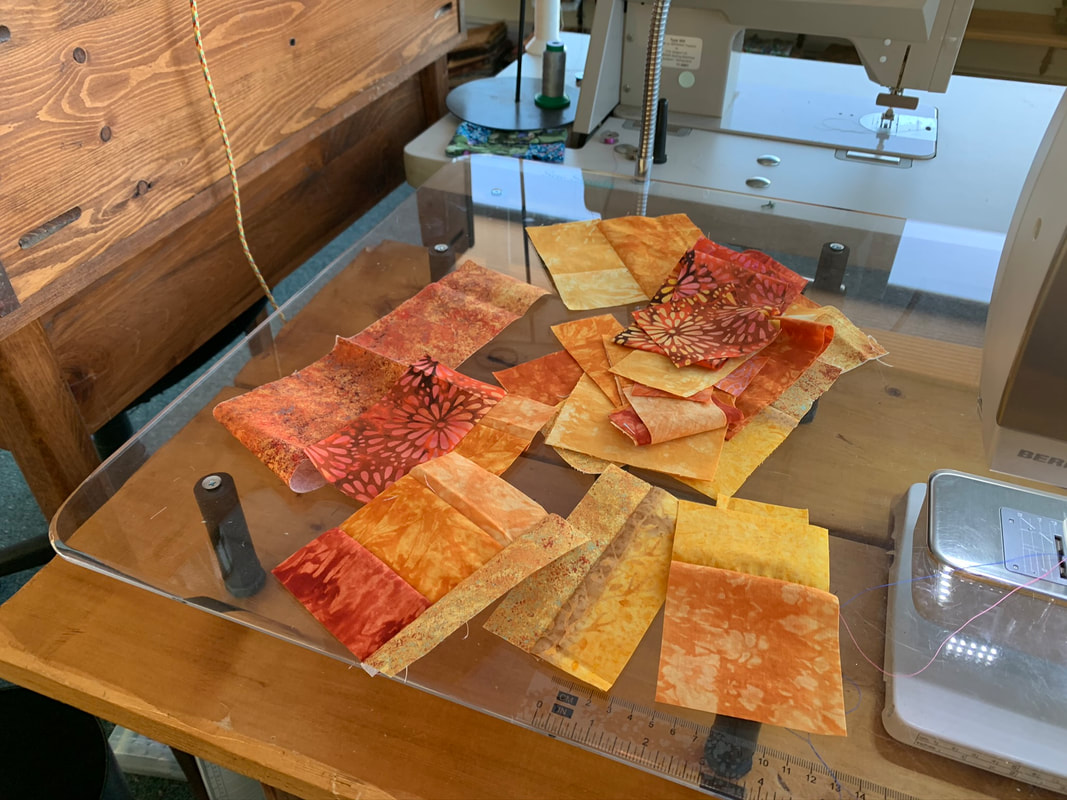 I started this batch to use on my 2020 exclusive Teresa Ascone panel, Shadow Patterns. I decided I was not happy with the chunk on the right, pieces were too big, and too similar, so I cut it up and I will stitch it back together a different way.
Here are a couple of other improv pieced quilts I have made. On the iris one, I decided the hot pink fabric was contrasting enough that I did choose more carefully where it landed, but otherwise it's pretty random! On the fireweed blossom quilt, even the dark green border and binding are pieced if you look closely! I hope you will try the beginners and enders trick, you will be hooked! In addition to saving so much thread, time, aggravation, and bobbin winding, you could end up with a project done in barely noticeable nooks and crannies of time! Maybe I'll do another post with more details on improv piecing, of course I have tricks for that too. Happy sewing! Beret And remember, these panels and soooo much more are available here on our website 😊 And also remember, every comment, share, pin, and like helps us a ton!
Click here to see all of our kits, patterns, and panels 😊   Greetings from a freezing cold Fairbanks! We had three days off from our cold snap, but it's back... The Moonshadows card kit was mostly ready last spring, but I decided to wait until winter since it wasn't very 'springy'. And then almost forgot! It's a good one to try if you like the wall hanging but aren't sure about doing it! Or include it if you made the wall hanging as a gift. 😊 Here is the link: https://www.onthetrailcreations.com/moonshadows-card.html For local people, I also have several classes scheduled. I will put them here with a link to the classes page. The barn wood painting one is really fun, you can invite your non quilting friends too! And any of these can be done with a private group if you'd like, I can do groups of 3-6 for sewing, up to 10 for painting! Just call or email me to set up a time. 907-687-7603 beret@onthetrailcreations.com These are all one session classes, if it has more than one date, that is a separate class. If you are interested in these, sign up now, or print this off for a reminder! I will send reminders also. (only the next upcoming session will be live for registration... future ones will go up after the previous one is full or happened.) https://www.onthetrailcreations.com/classes.html Quilt Block painting Monday, Jan 20, 6-8pm $36 Monday, Feb. 17, 6-8 pm Thurs., March 12, 6-8 pm Monday, April 6, 6-8 pm Tuesday, May 12, 6-8 pm Quilted Greeting card class Saturday, Jan 25, 1-4 pm, $25 plus kit of your choice Saturday, April 18, 1-4 Wall hanging class Saturday, March 21, 10-4, $35 plus wall hanging kit of your choice Free motion quilting basics Saturday, Feb. 22, 1-4 pm, $25 Saturday, May 16 I love to pass on my enthusiasm for what I do, I hope to see you in one or more of these! Beret To see all of our kits and patterns, click the photo below:  Like many people, I often spend some time during the week between Christmas and New Year’s Day looking toward the next year and thinking about possible goals or changes in different areas. This year especially, since last year kind of ran me into the ground, and I’d prefer to not repeat that. But this year, I had a bit of a revelation... I figured out long ago (although I rarely do it) that I’m better off making daily ‘what I did’ lists than ‘to do’ lists. It works better for me to see a growing list of accomplishments than a list of things hanging over me, especially if I don’t get to lots of them. This is great if you tend to have interruptions or changes of plans frequently, because you still get to write something down:-). It also encourages writing down more relational things like reading to your kid, or a phone call with a friend, that might not normally even make it on to your ‘to do’ list, at least if you are a ‘measurable results’ oriented person like I am... It’s still good to keep a list of things you’d like to do, or things you have to do, but more general and ongoing rather than daily. But I’ve never done that on a yearly basis, or really even written down what I DID do. I tend to just see all of the things I HAVEN’T done. And of course you can do both, you don’t have to choose. I was extremely busy last year, but much of it was not what I planned. (Obviously no one plans ‘seven weeks of hospice care for Mom’ into their schedule :-( ) But I think writing down what I actually do at least in addition to what I plan to do will make me more mentally accepting of doing what God sends me and letting go of MY plans, and also more willing to spend time on relational things (or routine things like housework or exercise that don’t end with a finished product and have to be done again... and again...) rather than just projects. I’m probably on the extreme end of ‘results oriented’, hopefully YOU are better at going with the flow already. But 2020 seems like a good year to start practicing ‘hindsight’ along with my planning. :-) Beret To see all of our kits and patterns, click the photo!
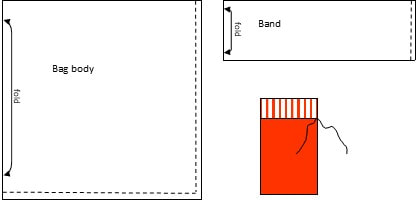
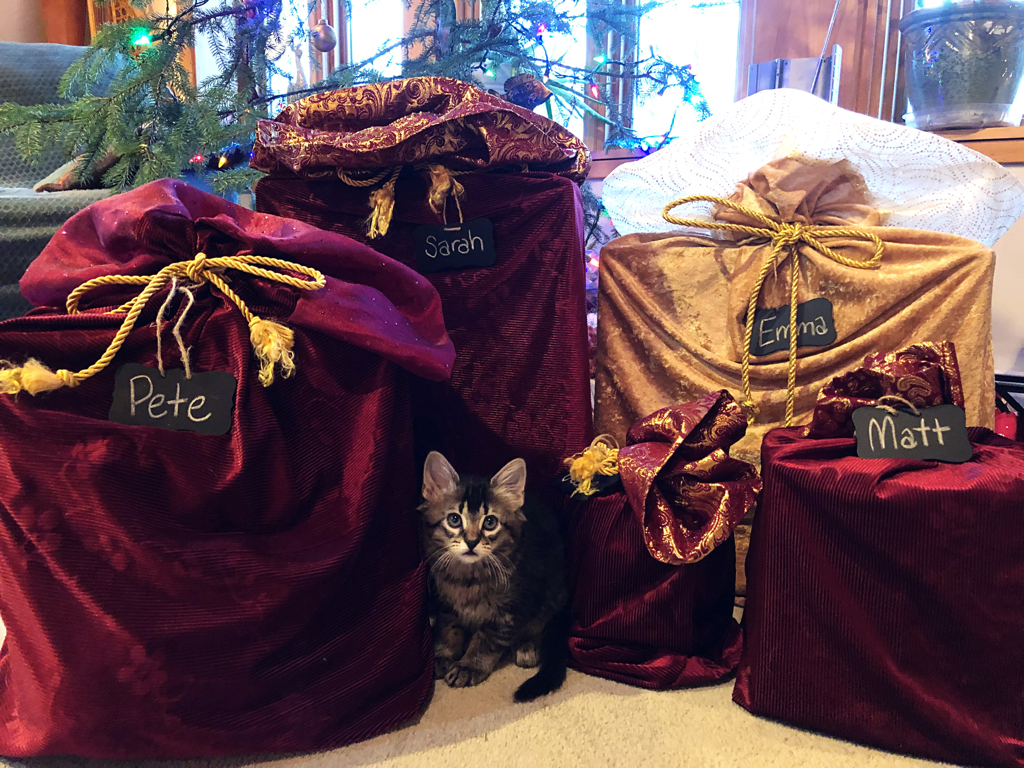
It's been ages since we did a sale! So, to cover Black Friday, Small Business Saturday, and Cyber Monday, this will go through Monday, Dec 2nd. Here it is: All wall hanging and table runner kits, 30% off, code SNOW since we have plenty of it here! I hope you all had a good Thanksgiving! Beret  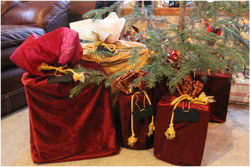 Imagine yourself at 11:00 pm on Christmas Eve, you finally got the kids to sleep, the lights are twinkling on the tree…you would love to relax on the couch with a cup of tea, but now you are faced with a pile of gifts to wrap…Those gifts you have been meaning to wrap for days and never got to. And then you remember! You made a bunch of fabric bags just for this! It only takes a second to stuff gifts in and tie them shut! They work on odd shaped gifts like the duck decoy you got for Uncle Harold, and things that are still in their Amazon box. You get everything wrapped and get to sleep long before you normally do. Then, on Christmas morning, there is no mound of paper to get rid of, and you put some empty boxes back in their bags and back under the tree, so it still looks nice even after the gifts have been opened! You sit back with your tea and enjoy the morning. Or maybe you are one of those people who DO get things wrapped early, but you still love to save time. These are great for you too! They’ve been a life saver for me, so here is a quick tutorial. They are super easy to make. Choose the size you want your bag to be. Make lots of sizes! But then you just need to cut your fabric twice as large as you want them. You can add a bit for seam allowance if you want, but the sizes are pretty random anyway, so it doesn’t really matter. I start with some the whole width of the fabric, some half, and some a third. I usually fold the fabric in half and sew one side and the bottom. But you could fold it vertically (as long as it is not directional) and stitch both sides instead, to get some other sizes and still have no waste. I like to use velvety fabrics for the bags, and sparkly fabrics for the bands. Cut the band fabric the same width as your bag, and twice as tall as you want it, as you will fold it over before stitching on. You can add it before stitching the side seam, but I prefer to add it after, so the seam doesn’t show at the top. But, no rules! Just stitch the side and bottom of the bag, and the side of the band. Then fold the band in half so the seam is on the inside, put it inside the bag (which is still inside out) lining up all raw edges, and stitch around the top. If you have a serger, this is a great time to use it…even faster! All that is left is to add a cord, which I do by using a zig zag stitch in the middle of the cord, attached at the side seam where the bag and band meet. We also use chalkboard tags, which are quick and also re-usable. I hope you try this gift to yourself that keeps on giving! They are also great to give away.
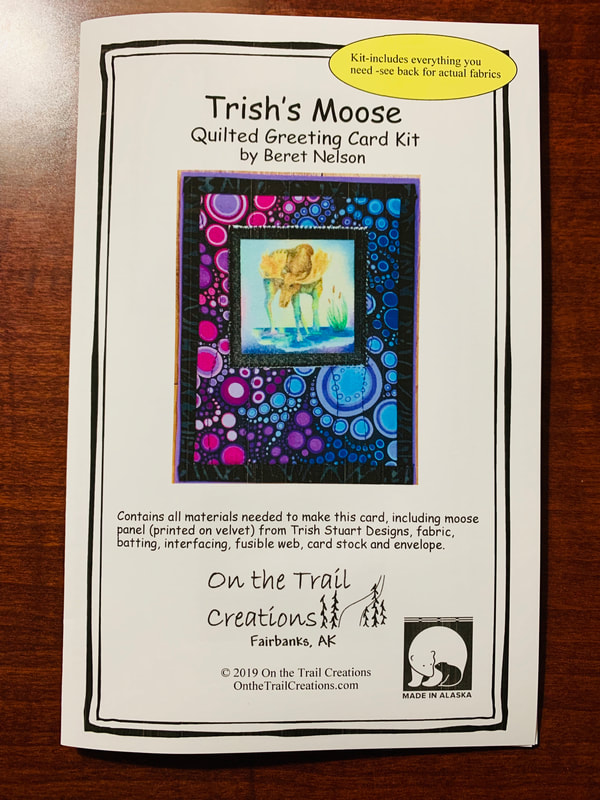
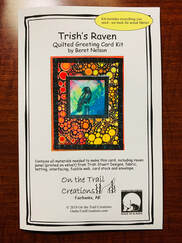
There are lots more tutorials on our website, and of course, kits and patterns too! 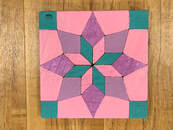 Once again, it's been awhile, but lots going on! At least four new things to tell you about, wow... Classes: We have several months worth up on the website now! We will add a kids' class for after Christmas eventually too. The newest class will be monthly, and I'm very excited about it! Friends of ours in Michigan, The Reclaimed Nation, have barn wood blocks with quilt designs on them for painting. Everything will be provided for you to make a large (10-12") and small (5") block. Additional blocks will be available to purchase if you wish. Several designs to pick from. But there are sewing classes up too! Click here to sign up for a class Eversewn machines: I'm so excited to now be able to offer Eversewn machines for sale! I have never found a brand of machines in this price range that I felt comfortable recommending until these. There are four levels of basic machines, ranging from $200 to $475, then a quilting machine and embroidery machine; those I'm not super familiar with yet though. I've been using the Sparrow 25's in my kid classes for almost a year, and I've been happy with them! I'm not totally organized yet with demos of each model, but if you are interested, I'd be happy to talk to you. I do have a couple of models in stock.  New kits: Thanks to the artwork of former Fairbanks resident Trish Stuart, we have two new card kits. These are both very quick projects, I think I actually managed to not have any free motion stitching on them! The fabrics are so nice you can't go wrong :-) The panels are printed on velvet! The background colors vary a bit, but the moose will be blue/purple, and the raven will be yellow/red. Click here to order :-)
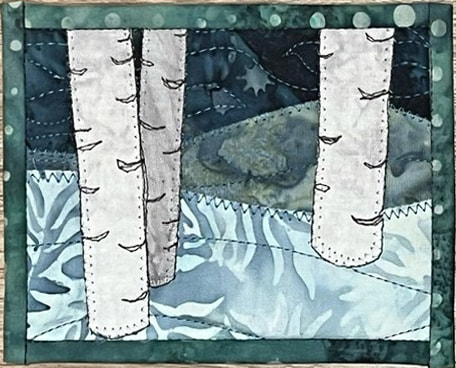
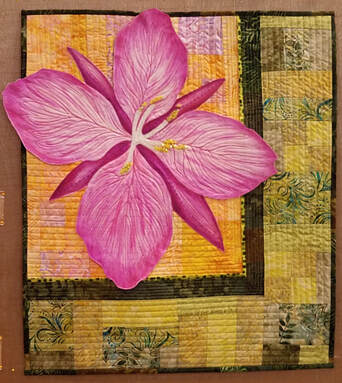
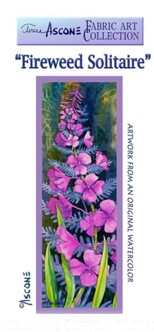
New Teresa Ascone panel: I love this new Fireweed Solitaire panel! I can't wait to play with it, but boy have I not had time yet... It is the same size and shape as the tall iris one, so I plan to make mine using similar borders to my iris one. Click here to order :-)
Whew, that's a lot of stuff! And more in the works :-) I'm also in the mad rush for bazaar season, my first one is the UAF Women's bazaar, Pioneer Park, Nov. 2-3 (both days this year!), 10-4. I hope you are all enjoying fall, it's pretty much done here. I took sooooo many pictures this year, lots of colors even here where we don't have a huge variety of trees... We might not have much for maples, but the tamaracks have been amazing this year. Thanks for making it to the end of this post! Happy Sewing, Beret  |
Beret Nelson's On The Trail Creations Blog Page
Beret NelsonI am a homeschooling mom of three fun kids, who are now old enough that I have a little time to pursue my passion for sewing! After several years of making quilted cards and art quilts, I'm now designing kits and patterns. Some of my designs have been in Keepsake Quilting and Art Quilting Studios magazine! I teach classes online, and am starting to do more traveling and teaching. I also have many tutorials, including some on YouTube. I am blessed to live in Alaska where I am surrounded by the inspiration provided by the beauty of God's creation! Free mini art quilt workshop for new subscribers!
"Like" my facebook page!I am also an independent distributor for Plexus supplements, since I credit them with enabling me to be healthy enough to do all these fun things! They target blood sugar and gut health, which are at the root of so many modern health issues. E-mail me for more info, or check out my website! I am as passionate about getting people healthy as I am about getting people creating :-)
beret@onthetrailcreations.com or https://plexusworldwide.com/beretnelson  Archives
March 2024
|


 RSS Feed